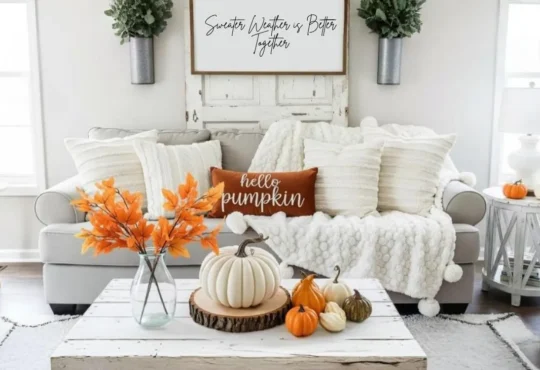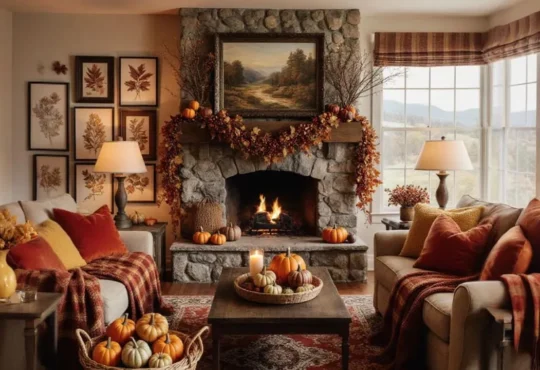
As the leaves change their hues and the air turns crisp, there’s no better time to infuse your home with the warm and cozy spirit of fall. While the vibrant colors of autumn foliage are a sight to behold outdoors, you can bring that same natural beauty indoors through simple and charming fall home decor ideas.
In this article, we will explore various ways to embrace the season and create a cozy, inviting atmosphere in your home with natural fall decor.
Natural Fall Simple Home Decor Ideas Bringing the Beauty Indoors
1.Autumn-inspired Wreaths
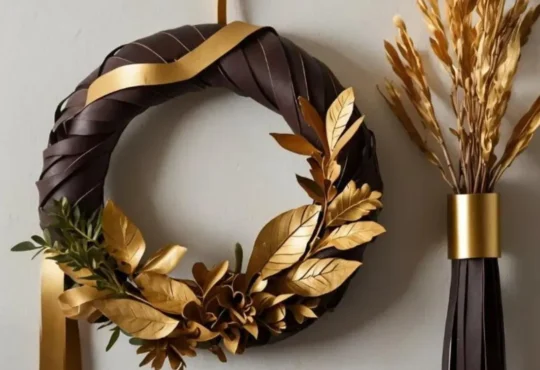
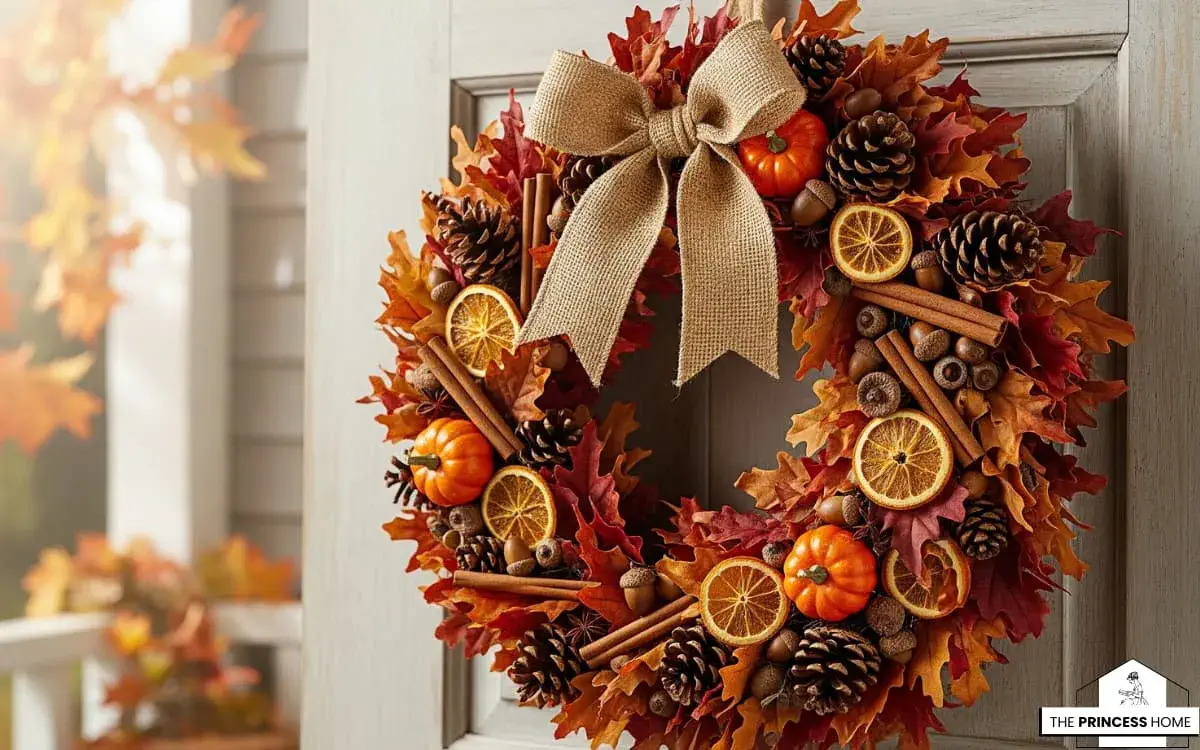
Let’s start with the front door, where a fall-inspired wreath can set the tone for your entire home. Consider using materials like dried leaves, pinecones, acorns, and miniature pumpkins to create a stunning wreath that welcomes guests with a touch of fall magic. You can also add some cinnamon sticks or dried orange slices for a delightful scent. Autumn-inspired wreaths are a fantastic way to bring the beauty of fall indoors, starting right at your front door.
Here’s a more detailed look at creating a stunning fall wreath:
1.*Base and Structure:
Wreath Form: Begin with a grapevine or wire wreath form. Grapevine wreaths offer a natural, rustic look and provide a sturdy base for adding decorations.
Foliage: Use a combination of faux or dried leaves in rich autumn hues—think deep reds, oranges, and yellows. You can also mix in some green leaves for added contrast and depth.
2.*Decorative Elements:
Pinecones: Attach pinecones around the wreath for a touch of texture and natural beauty. You can spray-paint them in metallic shades like gold or copper for a bit of sparkle.
Acorns: Add acorns, either natural or painted, to introduce a playful, woodland element. Hot glue them in clusters for a more dynamic effect.
Miniature Pumpkins: Small faux pumpkins or gourds can serve as eye-catching focal points. Place them strategically around the wreath for balance and interest.
3.*Fragrance:
Cinnamon Sticks: Tie a few cinnamon sticks together with twine and attach them to the wreath. Their warm, spicy scent will enhance the fall ambiance.
Dried Orange Slices: For a citrusy twist, include dried orange slices. They add both color and a subtle fragrance.
4*.Additional Touches:
Ribbon: Incorporate a bow made from burlap, satin, or plaid ribbon. Choose a ribbon that complements the color scheme of your wreath and ties everything together.
Seasonal Accents: Consider adding small fabric or felt leaves, berries, or even small fabric bows for added detail and texture.
5.*Finishing Details:
Arrangement: Arrange all elements in a balanced manner, ensuring that no single area is too crowded or too sparse. Step back frequently to check the overall look.
Attachment: Use floral wire or hot glue to secure decorations firmly in place.
Once complete, hang your wreath on the front door or inside the home to welcome guests with the charm and warmth of fall. This simple yet impactful decor piece sets a welcoming tone and brings the essence of the season indoors.
toni_marianna
2.Rustic Centerpieces
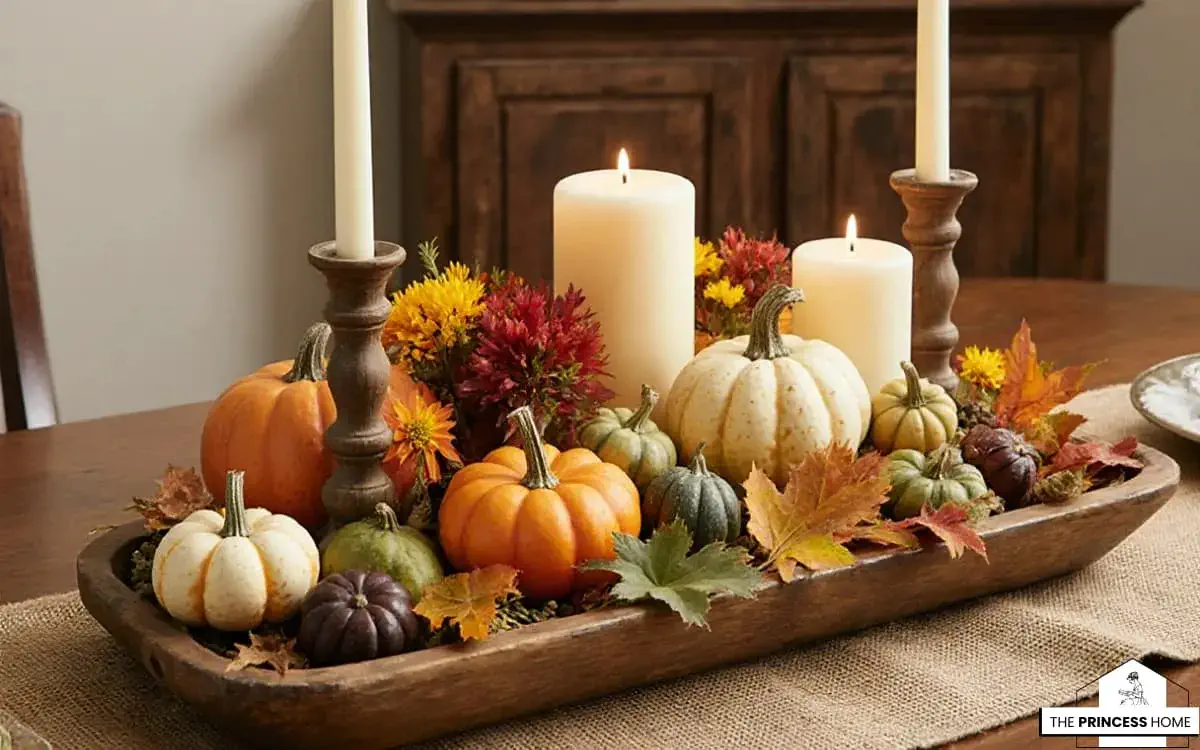
Transform your dining table into a rustic autumn sanctuary by crafting a charming centerpiece. A wooden tray or a burlap table runner can serve as the base. Arrange an assortment of gourds, pumpkins, and candles in various sizes for a rustic and inviting look. You can also include autumn leaves or fresh flowers for a pop of color. Creating a rustic autumn centerpiece is a wonderful way to enhance your dining table with the cozy charm of fall.
Here’s a detailed guide to crafting a centerpiece that combines rustic elegance with seasonal beauty:
1.*Wooden Tray or Burlap Runner:
Wooden Tray: Start with a wooden tray or a distressed wooden box as the foundation. This adds a natural, rustic feel and provides a stable base for your arrangement. Opt for a tray with a weathered finish for extra character.
Burlap Table Runner: If you prefer a more laid-back approach, use a burlap table runner. Its textured, earthy tone complements the rustic theme and acts as a backdrop for the centerpiece.
2.*Gourds and Pumpkins:
Variety: Select a mix of gourds and pumpkins in different shapes, sizes, and colors. Look for ones in traditional autumn shades like orange, green, and white, as well as unique varieties with bumpy textures or stripes.
Placement: Arrange these items in clusters or scattered across the tray. Larger pumpkins can serve as focal points, while smaller gourds fill in the gaps and add interest.
Candles:
Types: Incorporate candles in varied heights. You can use pillar candles, tea lights, or even taper candles placed in rustic holders.
Scented Options: Consider using scented candles with autumn fragrances like cinnamon, apple, or pumpkin spice to enhance the seasonal atmosphere.
Arrangement: Place candles among the gourds and pumpkins, ensuring they’re spaced out to avoid overcrowding. Use candle holders that match the rustic theme, such as those made from wrought iron or wooden bases.
3.*Autumn Leaves:
Types: Use faux or dried autumn leaves in vibrant colors like red, orange, and yellow. You can also scatter them around the base or tuck them between the pumpkins and candles for a natural look.
Arrangement: For a more structured look, create a small pile of leaves on the tray, placing pumpkins and candles on top.
Fresh Flowers:
Varieties: Incorporate fall flowers such as chrysanthemums, sunflowers, or marigolds. Choose blooms in rich, warm colors that complement the overall palette.
Vases: Place flowers in rustic containers like small mason jars, vintage bottles, or galvanized metal vases. Arrange the vases around the centerpiece, ensuring they don’t obstruct the view across the table.
4.*Finishing Touches
Burlap or Jute: Add a touch of burlap or jute twine around the base of candles or vases for a cohesive look. You can also use it to create small bows or accents.
Wooden Elements: Consider adding small wooden accents, like slices of wood or miniature wooden crates, to enhance the rustic feel.
Layering:
Height Variation: Use varying heights for your elements to create visual interest. Taller candles and smaller pumpkins, combined with floral arrangements, add depth and dimension.
Balance: Ensure the arrangement feels balanced. Distribute visual weight evenly, and avoid clustering too many items in one area.
5.*Final Arrangement
Balance and Symmetry: Step back and view the centerpiece from different angles to ensure it looks balanced and visually appealing. Adjust elements as needed to achieve a harmonious arrangement.
Practical Considerations: Ensure that the centerpiece doesn’t obstruct diners’ view or interfere with place settings. It should enhance the dining experience without causing inconvenience.
By following these steps, you can create a rustic autumn centerpiece that not only beautifies your dining table but also brings the warmth and charm of fall into your home.
3.Natural Textures
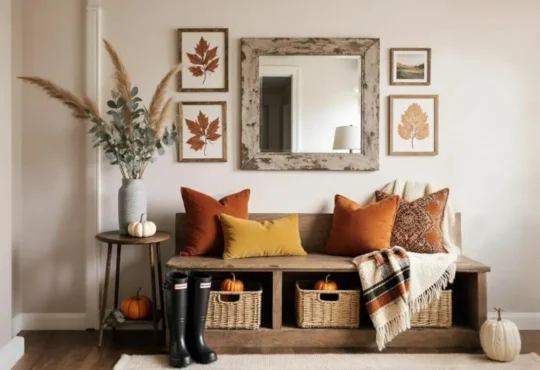
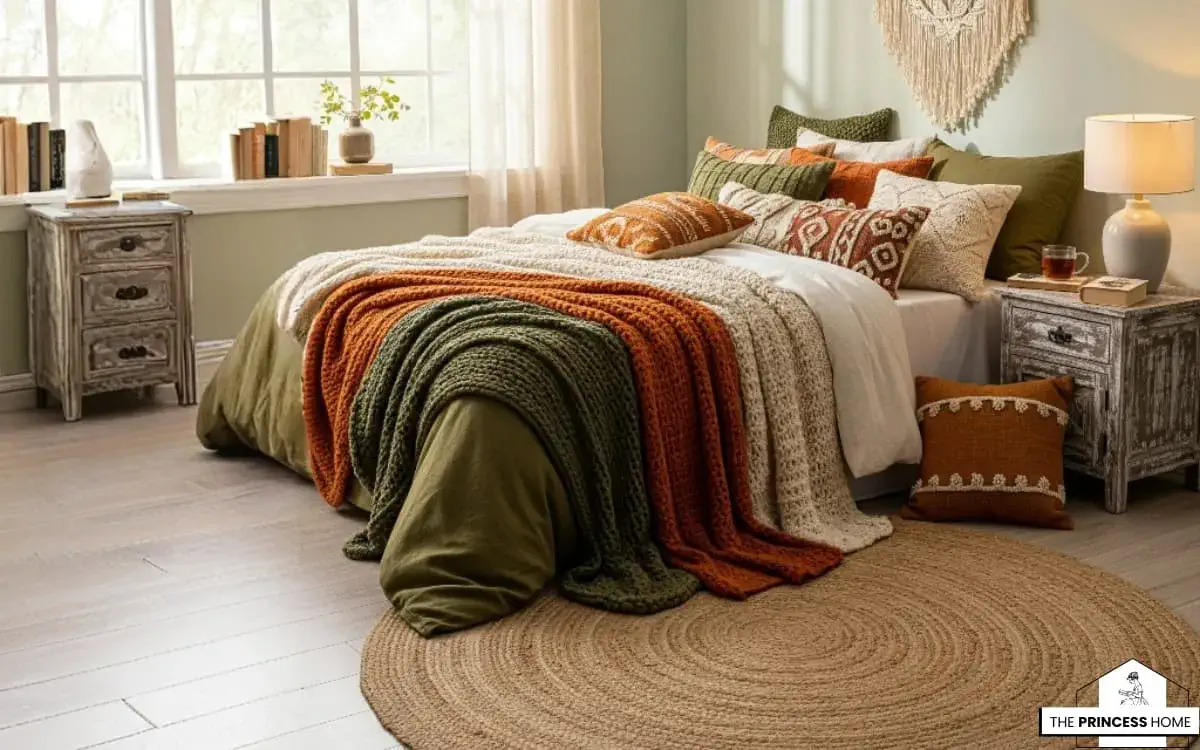
Incorporating natural textures into your fall decor is an excellent way to create a cozy atmosphere. Swap out your lightweight summer linens for cozy, textured blankets and pillows in earthy tones. Consider adding a jute rug or a sisal runner to embrace the warm, rustic feel of the season. Incorporating natural textures into your fall decor can transform your space into a warm and inviting haven.
Here’s a detailed approach to embracing these textures:
1.*Blankets and Throws:
Materials: Opt for blankets and throws made from materials like chunky knit, faux fur, or wool. These fabrics add a layer of coziness and warmth.
Colors: Choose earthy tones such as deep browns, burnt oranges, mustard yellows, and rich greens. These colors resonate with the fall season and complement the natural textures.
Pillows:
Textures: Incorporate pillows with a variety of textures, such as burlap, velvet, or woven fabric. Mix and match different textures for a layered look.
Patterns: Look for patterns like plaid, houndstooth, or subtle autumn motifs. These patterns enhance the seasonal feel and add visual interest.
2.*Flooring
Rugs:
Jute Rugs: A jute rug adds a natural, rustic texture to the floor. Its neutral color and woven texture work well in creating a warm, grounded feel.
Sisal Runners: Sisal runners offer a similar natural texture and can be used in hallways or as a base for fall decor. They’re durable and add a touch of rustic charm.
Layering:
Overlapping Rugs: For added depth, layer a smaller, patterned rug on top of a larger jute or sisal rug. This combination brings both texture and style to the room.
3.*Decorative Accents
Woven Baskets:
Materials: Use baskets made from natural fibers like rattan, seagrass, or willow. These can be used to store throw blankets or as decorative pieces.
Placement: Position baskets near seating areas or entryways to enhance the cozy, rustic vibe.
Wooden Elements:
Accents: Incorporate wooden decor items like carved figurines, wooden trays, or small wooden stools. These add an organic, natural feel and complement the textiles.
Finishes: Choose wooden pieces with a distressed or weathered finish for a more authentic rustic look.
Candles and Holders:
Materials: Opt for candles in natural materials such as beeswax or soy, and use holders made from stone, wood, or metal with a patina finish.
Arrangements: Group candles of varying heights and textures together to create a warm, inviting glow.
4.*Wall and Table Decor
Natural Wall Hangings:
Materials: Use wall hangings made from materials like woven fibers, macramé, or dried botanicals. These can add texture and visual interest to your walls.
Placement: Hang these pieces in prominent locations, such as above a sofa or dining table, to draw attention and enhance the cozy atmosphere.
Table Settings:
Linens: Swap out summer tablecloths for ones made from linen or burlap. These materials add a rustic touch and complement the natural textures of your decor.
Placements: Use wooden or ceramic chargers under plates and consider using woven placemats for added texture.
5.*Additional Tips
Layering: Don’t be afraid to layer different textures to create a rich, inviting atmosphere. Combining textiles like wool throws with jute rugs and wooden accents can create a multi-dimensional look.
Seasonal Elements: Incorporate seasonal elements like pinecones, acorns, or dried leaves into decor arrangements. These natural items blend seamlessly with textured fabrics and materials.
By focusing on these natural textures, you can create a fall decor that feels warm, inviting, and effortlessly cozy.
4.Seasonal Candles
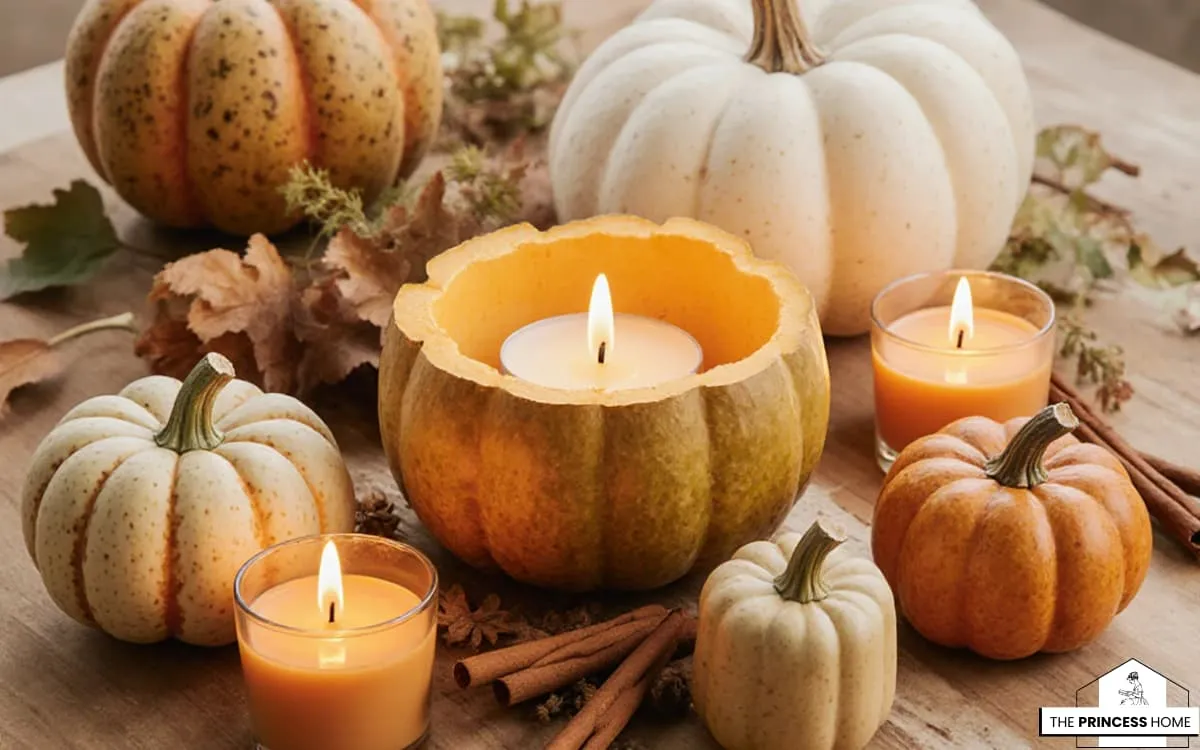
Candles are a quintessential part of fall home decor. Opt for scented candles that evoke the essence of autumn, such as apple cinnamon, pumpkin spice, or cedarwood. Place them strategically throughout your home for a warm and comforting ambiance. You can also place candles inside hollowed-out gourds for a unique touch. Seasonal candles are a fantastic way to enhance the cozy and inviting atmosphere of your fall home decor.
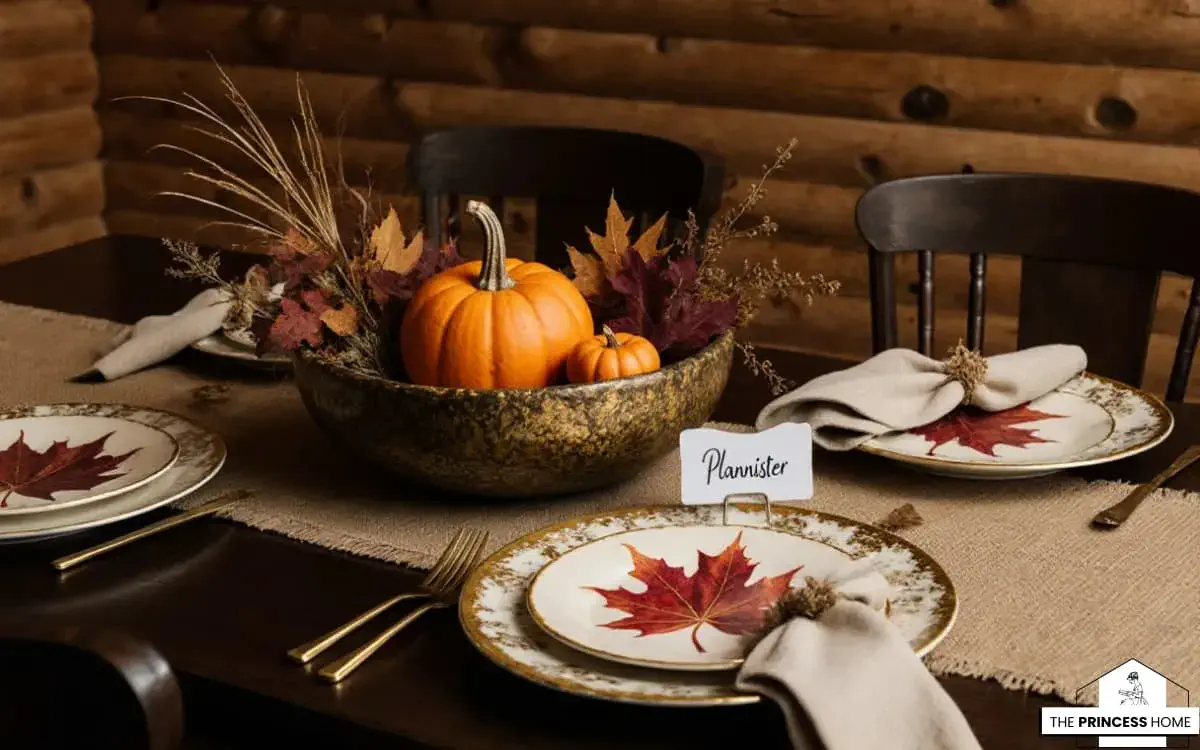
Here’s how to make the most of candles during the autumn season:
1.*Choosing the Right Scents
Apple Cinnamon:
Aroma: This scent combines the sweet, fruity notes of apples with the warm, spicy aroma of cinnamon. It’s perfect for creating a homey and comforting atmosphere.
Placement: Ideal for kitchens or dining areas, where the scent can blend with cooking aromas or be enjoyed during meals.
Pumpkin Spice:
Aroma: Pumpkin spice candles capture the essence of fall with notes of pumpkin, cinnamon, nutmeg, and clove. It’s a quintessential autumn scent that evokes cozy, seasonal memories.
Placement: Great for living rooms or entryways, where the rich scent can create an inviting ambiance.
Cedarwood:
Aroma: Cedarwood offers a warm, woody scent that adds a touch of rustic charm to your decor. It’s subtle yet grounding, with a hint of freshness.
Placement: Ideal for bedrooms or home offices, where its calming aroma can create a serene environment.
2.*Hollowed-Out Gourds:
Preparation: Choose small to medium-sized gourds or pumpkins. Hollow them out carefully, making sure to remove all the seeds and pulp.
Candles: Place a small votive or tea light candle inside each gourd. You can use real candles or LED tealights for safety.
Decoration: Arrange these gourd candles on a tray, or scatter them across your dining table or mantle for a festive touch.
Candle Holders:
Materials: Use holders made from natural materials such as wood, metal with a patina finish, or stone. Look for designs that feature autumnal motifs or rustic finishes.
Types: Consider using hurricane lamps, lantern-style holders, or simple glass votives wrapped in burlap or twine.
3.*Arranging Candles
Mantle Display:
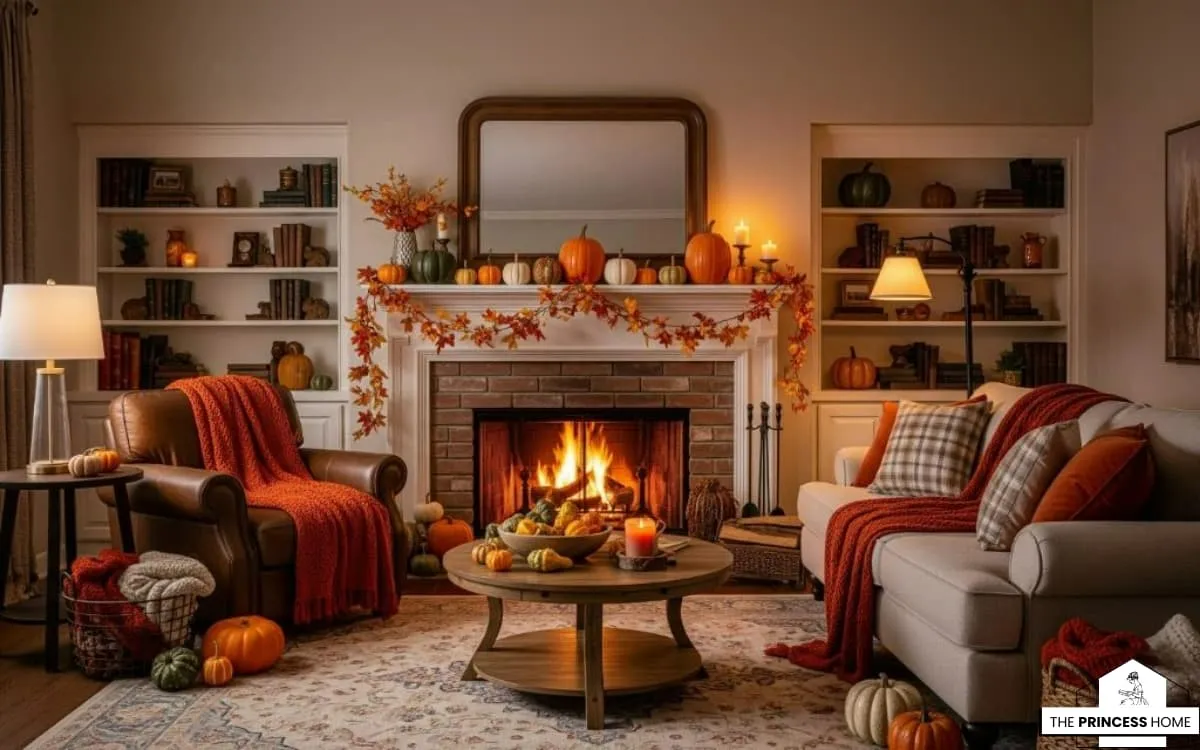
Arrangement: Place candles of varying heights along the mantle. Combine scented candles with decorative elements like autumn leaves, pinecones, or small pumpkins.
Layering: Use candle holders or trays to elevate some candles and create visual interest.
Dining Table Centerpiece:
Setup: Create a centerpiece with a mix of candles and seasonal decorations. Arrange candles on a wooden tray or in a rustic basket, surrounded by gourds, leaves, or acorns.
Height Variation: Use candles of different heights to add dimension to the centerpiece.
Entryway:
Welcome: Place candles in lanterns or on trays near the entryway to create a warm and inviting welcome for guests. Add seasonal decorations like small pumpkins or pinecones around them.
Windowsills:
Ambiance: Place candles on windowsills to cast a warm glow both inside and outside. Use lantern-style holders or glass votives for a soft, diffused light.
4.*Safety Tips
Supervision: Never leave burning candles unattended, especially if you have pets or small children.
Ventilation: Ensure proper ventilation when burning scented candles to avoid overpowering the scent or smoke buildup.
Placement: Keep candles away from flammable materials and ensure they are placed on stable, heat-resistant surfaces.
By strategically placing and creatively arranging seasonal candles, you can infuse your home with the comforting scents of fall and enhance the overall ambiance of your space.
5.Harvest-themed Table Settings
Set a charming and rustic fall table by using harvest-themed dinnerware, such as plates adorned with autumn leaves or pumpkin-shaped bowls. Layer your table with linen napkins in fall hues, and consider adding a personalized touch with name cards featuring dried leaves or mini pumpkins as placeholders. Creating a harvest-themed table setting is a wonderful way to celebrate fall with rustic charm and seasonal elegance.
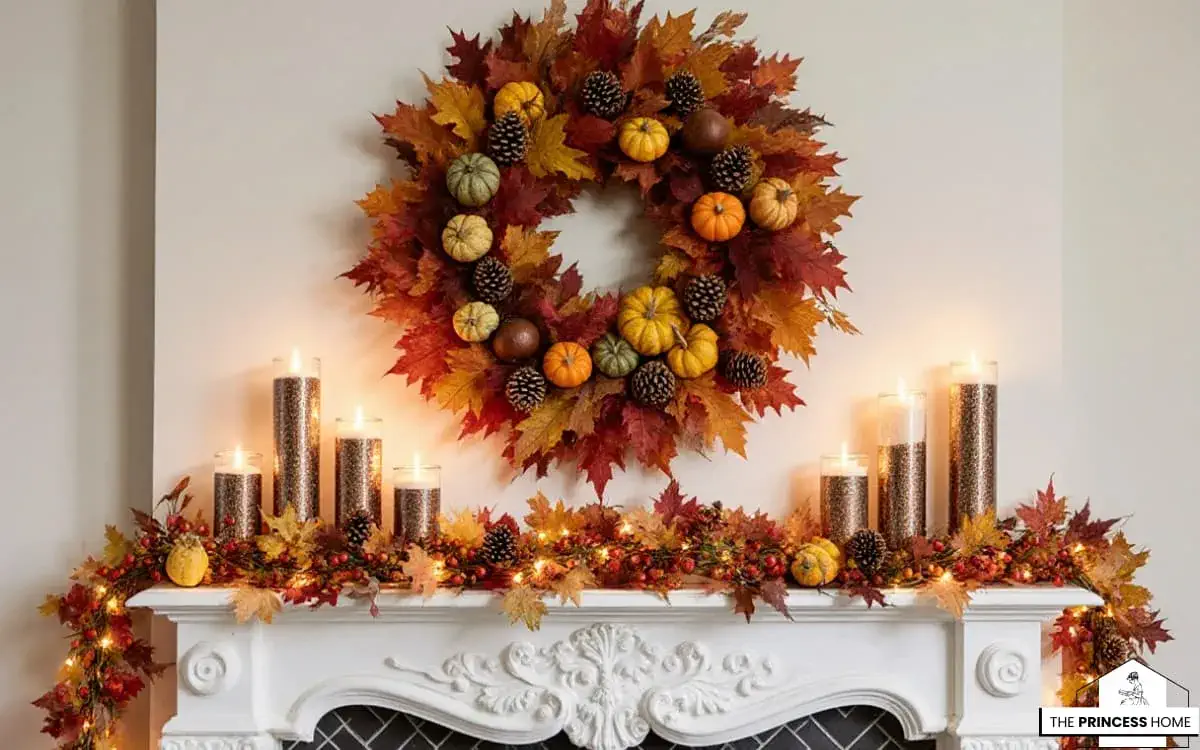
Here’s a detailed approach to setting a fall table that captures the essence of the harvest season:
1.*Dinnerware
Autumn Leaf Plates:
Design: Choose plates adorned with autumn leaves in warm hues like red, orange, and yellow. These can be hand-painted or printed with leaf patterns.
Material: Opt for ceramic or stoneware for a traditional, rustic feel. Look for plates with a slightly textured or glazed finish for added depth.
Pumpkin-Shaped Bowls:
Design: Use bowls shaped like pumpkins for a playful touch. These can be in classic orange or in more muted, earthy tones.
Material: Consider ceramic or porcelain for durability and easy cleaning. Some bowls might have a slight sheen or matte finish, which adds to their charm.
2.*Table Linens
Linen Napkins:
Colors: Choose napkins in fall hues such as deep burgundy, mustard yellow, burnt orange, or earthy browns. These colors complement the harvest theme and enhance the seasonal ambiance.
Textures: Look for linen or cotton napkins with a textured finish. Consider ones with subtle patterns like checks or stripes for added visual interest.
Tablecloth or Runner:
Material: Use a tablecloth or runner in natural fabrics like burlap, linen, or cotton. A burlap runner with a simple autumn leaf or pumpkin print can add a rustic touch.
Color: Opt for neutral tones like cream or beige as a base, or choose a patterned runner that incorporates autumnal colors and motifs.
3.*Personalized Touches
Name Cards:
Dried Leaves: Attach name cards to dried autumn leaves. You can write guests’ names on the leaves using a calligraphy pen or a fine-tipped marker.
Mini Pumpkins: For a more playful touch, use mini pumpkins as place card holders. Attach a small tag with the guest’s name to each pumpkin using twine or ribbon.
Table Favors:
Harvest Treats: Consider small fall-themed favors like caramel apples, spiced nuts, or homemade pumpkin cookies. Place them in small burlap bags or clear cellophane tied with a ribbon.
4.*Centerpiece
Seasonal Arrangement:
Elements: Create a centerpiece using a mix of autumn gourds, mini pumpkins, and fresh or faux fall foliage. Arrange them in a wooden tray or a large, rustic bowl.
Candles: Add candles to the centerpiece for a warm glow. Use tall candlesticks or small votives, and consider placing them in pumpkin-shaped holders or lanterns.
Floral Arrangements:
Flowers: Include fall flowers like chrysanthemums, sunflowers, and marigolds. Arrange them in a vase or a wooden crate for a rustic look.
Foliage: Add dried wheat stalks, cotton bolls, or eucalyptus branches for added texture and a touch of nature.
5.*Additional Details
Cutlery and Glassware:
Cutlery: Use rustic or vintage-style cutlery to complement the harvest theme. Look for pieces with wooden handles or a slightly aged finish.
Glassware: Opt for glassware in amber or deep green hues to add a rich, autumnal touch. Consider vintage-inspired wine glasses or tumblers.
Table Decor:
Scatter Elements: Scatter small decorative items like acorns, pinecones, or cinnamon sticks across the table for added texture and seasonal charm.
Table Runner Accents: Add a few small fabric pumpkins or leaf-shaped confetti along the table runner for an extra touch of fall.
By incorporating these elements into your table setting, you’ll create a beautiful, harvest-themed dining experience that celebrates the fall season with warmth and style.
6.DIY Leaf Garland
Get creative with a DIY leaf garland to adorn your mantel, staircase, or window frames. Collect fallen leaves from your backyard and press them between pages of a heavy book to preserve their vibrant colors. Then, string them together with twine to create a beautiful and cost-effective fall decoration. A DIY leaf garland is a wonderful way to bring the natural beauty of fall indoors.
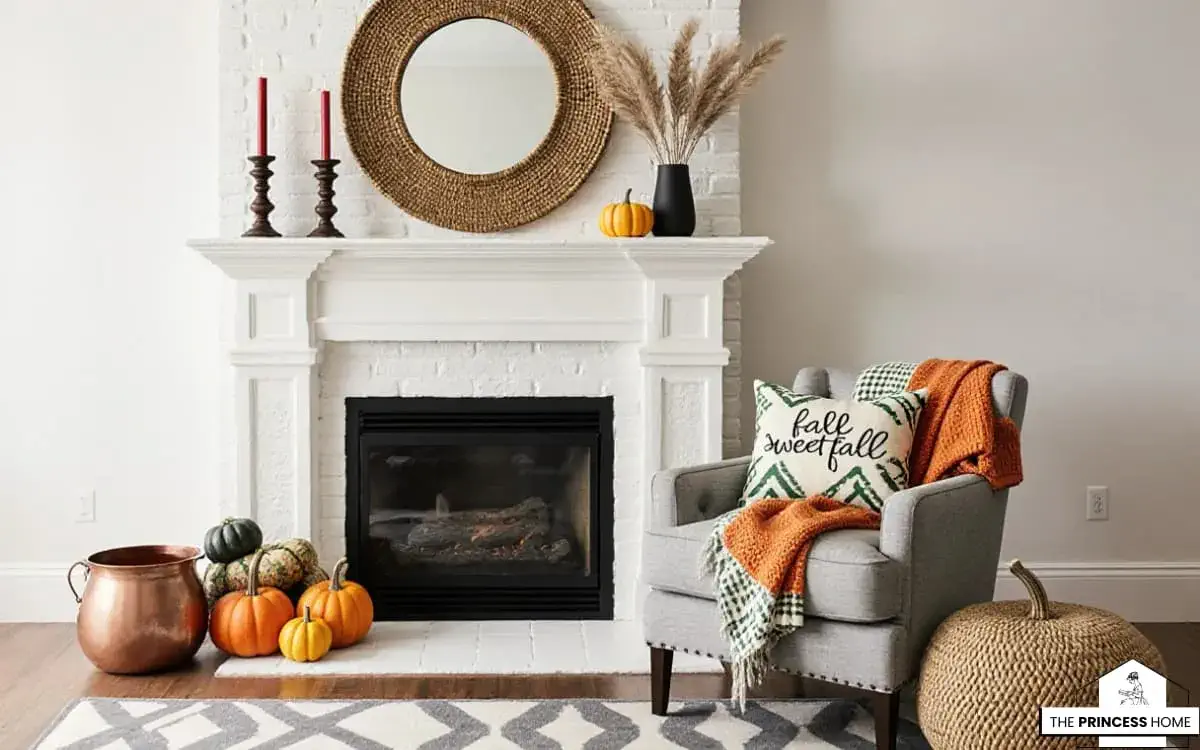
Here’s a step-by-step guide to creating a stunning and budget-friendly leaf garland that you can use to decorate your mantel, staircase, or window frames:
1.*Materials Needed
Fallen Leaves: Collect leaves in vibrant fall colors like red, orange, yellow, and even some browns. Choose leaves that are relatively flat and in good condition for the best results.
Heavy Book or Press: Use a heavy book or a leaf press to preserve the leaves. This will help keep them flat and prevent them from curling up.
Twine or String: Choose natural jute twine or a rustic string to string the leaves together. You can also use ribbon for a more decorative touch.
Scissors:To cut the twine or string to the desired length.
Hot Glue Gun (Optional): For additional security if the leaves don’t stay in place on the twine.
2.*Instructions
Prepare the Leaves:
Collect: Gather a variety of fallen leaves. Look for different shapes and colors to add visual interest to your garland.
Press: Lay the leaves between sheets of wax paper or parchment paper, and place them in the middle of a heavy book. Leave them for at least a week to ensure they are fully pressed and dried.
Create the Garland Base:
Cut Twine: Measure and cut a length of twine or string. The length will depend on where you plan to hang the garland and how long you want it to be. Leave a bit of extra length on each end for hanging.
Attach the Leaves:
Position: Arrange the pressed leaves on the twine to determine the placement and spacing. You can alternate colors and shapes for a more dynamic look.
Attach: Use a hot glue gun to attach the leaves to the twine. Apply a small dab of glue to the back of each leaf and press it onto the twine. Hold it in place for a few seconds until the glue sets. Alternatively, you can simply string the leaves through the veins using a needle and thread if the leaves are sturdy enough.
Spacing: Space the leaves evenly along the twine. You can also layer the leaves or use different sizes to create a more organic and natural look.
Finish and Hang:
Check: Once all the leaves are attached, check for any loose leaves or gaps. Add extra glue if needed.
Hang: Find a suitable spot for your garland. You can drape it over a mantel, staircase railing, or window frame. Use small nails, hooks, or adhesive strips to secure the ends of the twine.
3.*Tips for Success
Leaf Preservation: If you want to ensure the leaves retain their color and stay flat for longer, you can spray them with a light coating of clear acrylic spray to seal them.
Garland Variations: Consider adding small decorative elements like pinecones, acorns, or tiny fabric pumpkins between the leaves for added texture and interest.
Multiple Garlands: Create multiple garlands of different lengths and drape them in layers for a more dramatic effect.
By following these steps, you’ll create a beautiful and personal fall decoration that celebrates the season’s natural beauty.
7.Cozy Throw Blankets
As the temperatures drop, there’s nothing quite like curling up with a good book and a warm throw blanket. Choose cozy blankets in autumn-inspired colors, such as deep oranges, rich reds, and warm browns, to drape over your couches and chairs. Adding textured, knitted or faux fur blankets can elevate the cozy factor. Cozy throw blankets are perfect for enhancing the comfort and warmth of your home during the fall season.
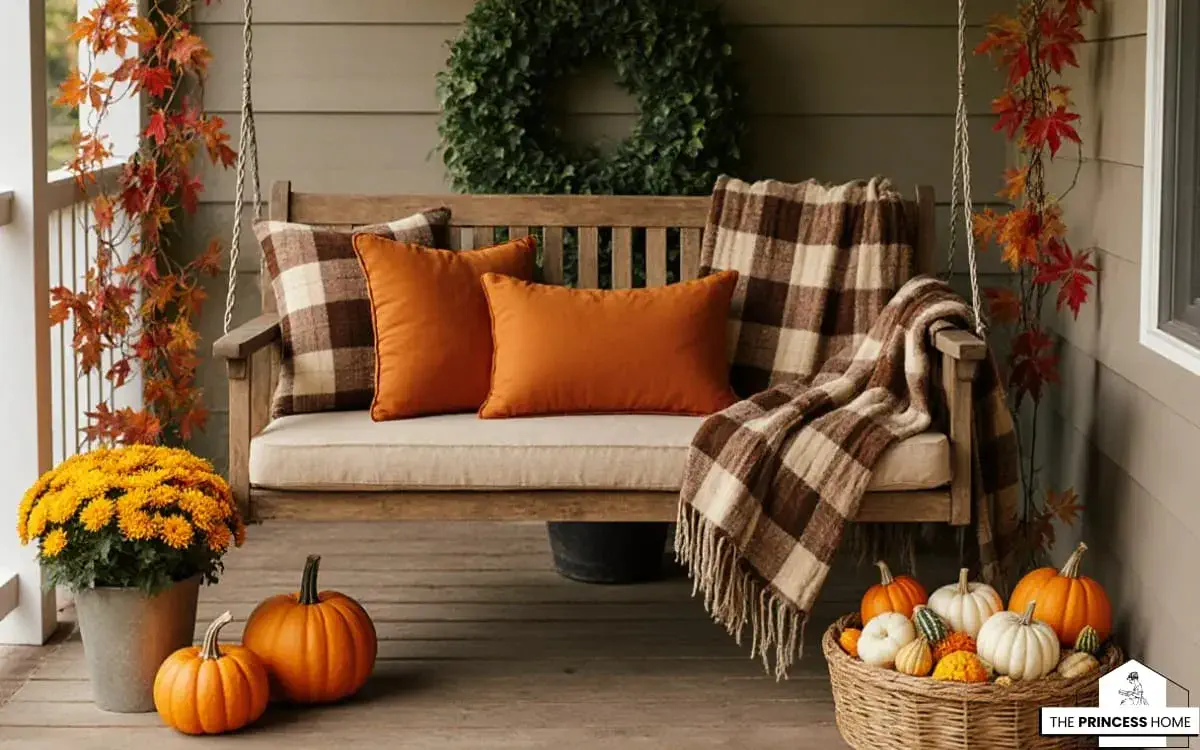
Here’s how to choose and style throw blankets to create an inviting, autumn-inspired atmosphere:
1.*Choosing Cozy Throw Blankets
Autumn-Inspired Colors:
Deep Oranges: Reflects the vibrant hues of fall foliage. Perfect for adding a pop of seasonal color.
Rich Reds: Adds warmth and a touch of sophistication. Great for creating a cozy, inviting space.
Warm Browns: Complements other fall colors and adds a grounded, earthy feel.
Materials:
Chunky Knit: Offers a textural appeal and provides warmth. Ideal for layering on couches or beds.
Faux Fur: Adds luxury and a touch of glamour while keeping you warm. Perfect for draping over the back of a sofa or on the edge of a bed.
Wool: Classic and durable, wool blankets provide excellent warmth and a traditional look.
Plush Velvets: Offers a soft, luxurious feel. Adds an elegant touch to your decor.
Patterns and Textures:
Cable Knit: Adds a cozy, textured element to your space. Great for a rustic or farmhouse aesthetic.
Plaid or Checkered: Embraces the autumn theme with classic patterns. Perfect for a cabin-inspired look.
Herringbone or Chevron: Adds a modern touch while still providing warmth and texture.
2.*Styling Your Throw Blankets
On Couches:
Drape Over the Arm: Fold the throw in half and drape it over the arm of the couch for a casual, stylish look.
Layered Look: Fold the throw neatly and place it on the seat of the couch. Layer it with other cushions or blankets for added texture.
On Chairs:
Tossed Over the Back: Drape the blanket over the back of a chair. This not only adds color and texture but also keeps it easily accessible.
Rolled and Placed: Roll the blanket and place it in a basket or on a side table next to the chair for a practical and decorative touch.
On Beds:
Layered at the Foot: Fold the throw and place it at the foot of the bed. This adds a pop of color and texture without overwhelming the space.
Over the Bedspread: Drape the throw over the bedspread or duvet to create a layered look that adds warmth and style.
In Baskets:
Decorative Storage: Fold or roll throws and place them in woven baskets or decorative bins. This not only keeps them organized but also adds a touch of rustic charm to your decor.
3.*Additional Tips
Mix and Match:
Combine different textures and colors to create a dynamic and cozy look. For example, pair a chunky knit throw with a faux fur pillow.
Seasonal Changes:
Swap out lighter summer throws for heavier, fall-inspired blankets. Consider changing the blankets with each season to keep your decor fresh and relevant.
Maintenance:
Follow care instructions for each type of blanket to keep them looking and feeling their best. For instance, some wool throws may need gentle hand washing or dry cleaning.
By choosing the right materials, colors, and textures, and by styling your throws thoughtfully, you can create a warm and inviting space perfect for the fall season.
8.Pumpkin Displays
No fall decor is complete without pumpkins. Decorate your home with an assortment of pumpkins in various shapes, sizes, and colors. From traditional orange pumpkins to heirloom varieties, you can create stunning displays on your porch, mantel, or even as a centerpiece. Pumpkins are a quintessential element of fall decor, adding warmth, texture, and a touch of whimsy to your home.
Here’s how to create beautiful and versatile pumpkin displays for various areas of your home:
1.*Porch Displays
Front Steps:
Stacked Pumpkins: Create a visually striking display by stacking pumpkins of different sizes. Paint or decorate them with fall-themed designs for a personalized touch.
Pumpkin Patch: Arrange a collection of pumpkins in various sizes and colors around the front steps or porch. Add some hay bales or corn stalks to enhance the harvest theme.
Entryway:
Pumpkin Welcome: Place a large, decorated pumpkin with a welcome sign on the entryway. Surround it with smaller pumpkins or gourds for added visual interest.
Lanterns and Pumpkins: Combine pumpkins with lanterns or candle holders. Use LED candles or real candles for a cozy glow.
2.*Mantel Displays
Layered Look:
Groupings: Arrange pumpkins in clusters on your mantel. Use varying heights by placing some on decorative pedestals or risers.
Mixed Elements: Combine pumpkins with other fall elements such as candles, garlands, and autumn leaves for a balanced display.
Themed Decor:
Color Coordination: Choose pumpkins in colors that match your existing decor, such as white, gray, or deep green. This creates a cohesive look.
Accent Pieces: Add small accents like mini scarecrows, faux acorns, or dried flowers to complement the pumpkins.
3.*Centerpiece Displays
Dining Table:
Pumpkin Arrangement: Place a selection of pumpkins in the center of the table. Mix sizes and colors for a dynamic centerpiece.
Pumpkin and Floral Mix: Combine pumpkins with fresh or faux flowers. Use a large pumpkin as a vase or place smaller pumpkins around a floral arrangement.
Coffee Table:
Pumpkin Trio: Arrange a trio of pumpkins of varying sizes and colors on a tray or decorative runner. Add candles or small fall-themed decorations around them.
Pumpkin Bowl: Hollow out a pumpkin and use it as a bowl for fall treats like nuts, candy, or seasonal fruits.
4.*Other Creative Displays
Window Sills:
Pumpkin Row: Line your window sills with a row of small pumpkins. Add some faux autumn leaves or garland for extra charm.
Decorative Jars: Place small pumpkins inside decorative glass jars or cloches for a unique, enclosed display.
Bookshelves:
Pumpkin Accents: Place small pumpkins among your books and decorative objects on bookshelves. They can add a pop of color and seasonal touch without overwhelming the space.
Side Tables:
Pumpkin and Tray: Set a small pumpkin on a decorative tray or plate on side tables. Add a candle or small fall-themed decoration for a cozy touch.
5.*Pumpkin Varieties &Styling Tips
Traditional Orange Pumpkins:
Classic Look: These pumpkins are perfect for a traditional fall look. Use them as focal points in your displays.
Heirloom Pumpkins:
Unique Shapes and Colors: Heirloom varieties come in diverse shapes and colors, such as blue-gray, white, or striped. Mix these with traditional pumpkins for an eclectic display.
Painted Pumpkins:
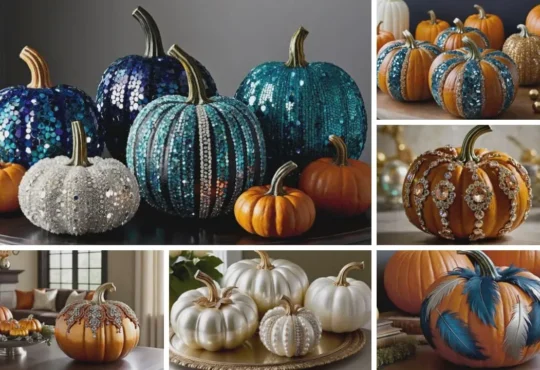
Custom Designs: Paint pumpkins in colors that match your home decor or add designs like polka dots, stripes, or fall motifs for a personalized touch.
Mini Pumpkins:
Versatile Decor: Use mini pumpkins as accents in various displays. They’re great for adding a touch of fall to smaller spaces or incorporating into centerpieces.
By incorporating these ideas, you can create beautiful pumpkin displays that bring the spirit of fall into your home, enhancing the cozy and inviting atmosphere of the season.
9.Fall Scented Potpourri
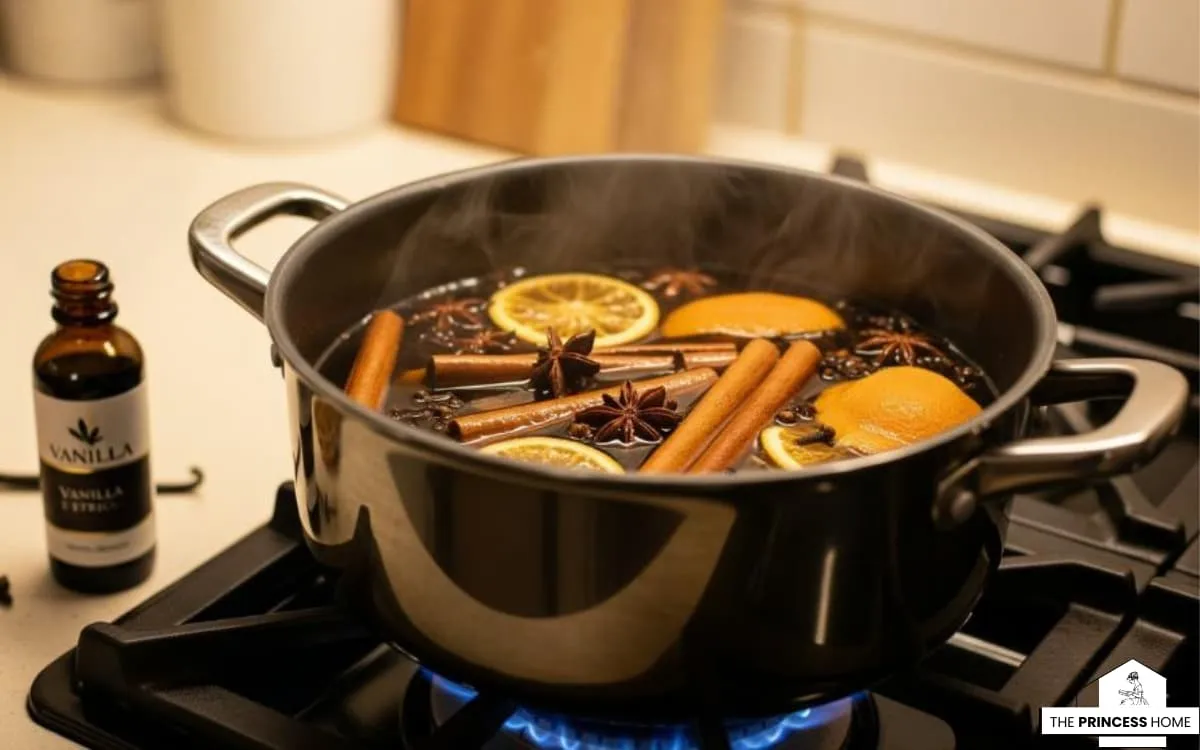
Enhance the sensory experience of your fall decor by simmering a pot of homemade potpourri on the stove. Combine cinnamon sticks, cloves, dried orange peel, and a dash of vanilla extract in a pot of simmering water. The comforting aroma will fill your home with the scents of autumn. Creating a homemade fall-scented potpourri is a wonderful way to fill your home with the cozy, inviting aromas of autumn.
Here’s a detailed guide on how to make and use your fall potpourri:
How to Make and Use Fall Scented Potpourri
Creating a fall-scented potpourri is a delightful way to bring the essence of autumn into your home. Here’s a step-by-step guide:
1.*Ingredients:
- Cinnamon Sticks: 4-5 sticks for a warm, spicy aroma.
- Cloves: 1-2 tablespoons of whole cloves for a rich, deep scent.
- Dried Orange Peel: Peel from 1-2 oranges, dried for a zesty, citrusy note.
- Vanilla Extract: 1 teaspoon for a sweet, comforting undertone.
- Additional Options:
- Star Anise: For a licorice-like fragrance.
- Dried Apple Slices: Adds a sweet, fruity scent.
- Bay Leaves: For a subtle earthy note.
2.*Preparation:
Dry the Orange Peel:
Peel the oranges, avoiding too much of the white pith, and spread the peels on a baking sheet.
Bake at a low temperature (around 200°F or 90°C) for 2-3 hours, or until completely dry.
Alternatively, air dry them for a few days in a warm, dry place.
Assemble the Potpourri:
In a small pot, combine the cinnamon sticks, cloves, dried orange peel, and any additional ingredients you choose.
Add 2-3 cups of water, ensuring the ingredients are fully submerged.
Simmer the Potpourri:
Place the pot on the stove over low heat.
Add the vanilla extract once the water begins to simmer.
Allow the mixture to simmer, keeping an eye on the water level and adding more as needed to prevent burning.
Refresh the Scent:
As the potpourri simmers, it will release a beautiful aroma throughout your home.
You can continue to simmer it for several hours, adding water and additional ingredients to refresh the scent as needed.
Storing the Potpourri:
Once finished, strain the liquid and store the remaining solid ingredients in an airtight container.
You can reuse the potpourri a few more times by simmering it with fresh water.
3.*Tips for Use:
Versatile Placement: You can simmer the potpourri on the stove during gatherings or simply to enjoy the seasonal scents throughout the day.
Gift Idea: Package dried potpourri ingredients in a decorative jar, tie with a ribbon, and include a small instruction card for a thoughtful fall-themed gift.
Alternative Heating: If you don’t want to simmer on the stove, you can place the mixture in a slow cooker on low heat for a similar effect.
By using these steps, you can enjoy the comforting and inviting scents of fall in your home, enhancing the seasonal ambiance and creating a cozy atmosphere.
10.Seasonal Floral Arrangements
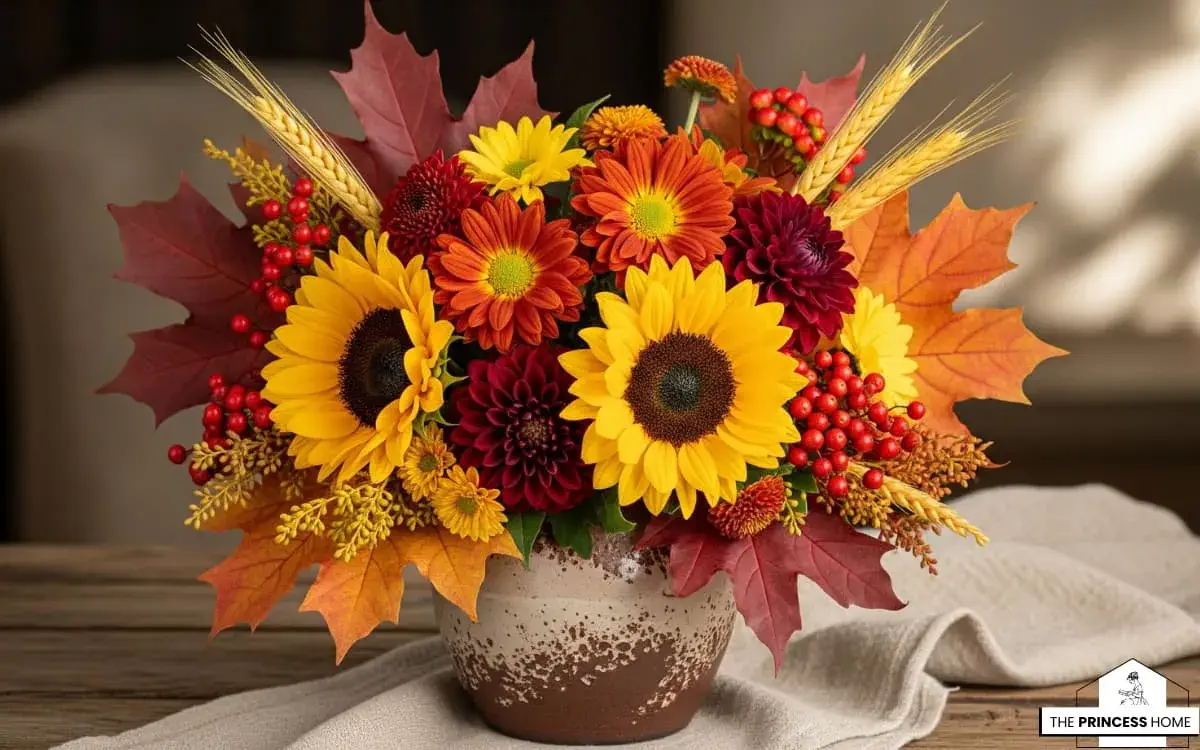
Fall offers an abundance of stunning flowers and foliage to create beautiful floral arrangements. Consider incorporating flowers like sunflowers, chrysanthemums, and dahlias in rich, autumnal shades. Pair them with branches of colorful leaves, berries, or wheat stalks for a rustic and seasonal bouquet. Place these arrangements in vases or mason jars to add a touch of natural elegance to your home. Seasonal floral arrangements are a fantastic way to bring the beauty of fall indoors.
Here’s how to create stunning fall floral arrangements using autumn blooms and natural elements:
1.*Choosing Your Flowers
Sunflowers:
Description: Bright and bold with large, cheerful blooms. Ideal for adding a touch of sunshine and warmth to your arrangements.
Color Options: Traditional yellows, deep oranges, or even rich burgundies for a fall twist.
Chrysanthemums:
Description: Versatile flowers that come in a variety of shapes and colors. They are perfect for adding texture and depth to your arrangements.
Color Options: Shades of red, orange, yellow, and purple. Opt for full blooms for a more dramatic effect.
Dahlias:
Description: Elegant and abundant, dahlias add a touch of sophistication with their layered petals.
Color Options: Rich tones such as deep burgundy, burnt orange, and creamy whites.
Other Seasonal Flowers:
Zinnias: Bright and hardy, available in rich fall colors.
Marigolds: Vibrant orange and yellow blooms that complement fall decor.
Celosia: Unique, feather-like blooms in shades of red, orange, and yellow.
2.*Incorporating Foliage &Natural Elements
Colorful Leaves:
Types: Use leaves from maple, oak, or birch trees. These leaves add vibrant colors and a touch of the outdoors.
Usage: Arrange leaves around the base of your bouquet or tuck them in among the flowers for added texture.
Berries:
Types: Incorporate branches with berries such as hypericum berries or bittersweet. They add pops of color and visual interest.
Usage: Place them around the flowers or use them as a filler to add depth to your arrangement.
Wheat Stalks:
Description: Add a rustic touch with golden wheat stalks.
Usage: Mix wheat stalks with your flowers or use them as a standalone element for a natural, autumnal feel.
3.*Arranging Your Flowers
Vases and Containers:
Vases: Opt for mason jars, glass vases, or ceramic pitchers. For a rustic touch, use vintage or weathered containers.
Containers: You can also use wooden crates, metal buckets, or wicker baskets for a more farm-inspired look.
Design Techniques:
Base: Start with a clean vase and add floral foam if needed to hold the flowers in place.
Focal Point: Arrange the largest blooms (like sunflowers or dahlias) in the center or as the focal point of the arrangement.
Filler Flowers: Add chrysanthemums and zinnias around the focal flowers, filling in gaps and creating balance.
Foliage and Fillers: Insert branches of leaves, berries, and wheat stalks around the flowers to create a lush, full look.
Layering:
Depth: Layer flowers by height, with taller stems in the back and shorter ones in the front.
Color Balance: Distribute colors evenly throughout the arrangement to ensure a cohesive and balanced look.
Final Touches:
Water: Make sure to keep the floral foam wet or add fresh water to the vase regularly to keep flowers hydrated.
Maintenance: Remove any wilted flowers or leaves to keep your arrangement looking fresh and vibrant.
4.*Additional Tips
Seasonal Scents: Enhance the arrangement with seasonal scents by adding a few sprigs of scented herbs like rosemary or sage.
Personal Touches: Incorporate personal elements such as small pumpkins or pinecones around the base of the arrangement for added fall charm.
Arrangement Styles: Experiment with different styles, such as a loose, cascading bouquet or a more structured, symmetrical arrangement, depending on your decor.
By following these guidelines, you can create beautiful, seasonal floral arrangements that bring the essence of fall into your home, adding warmth and elegance to any space.
11.Autumn-inspired Wall Art
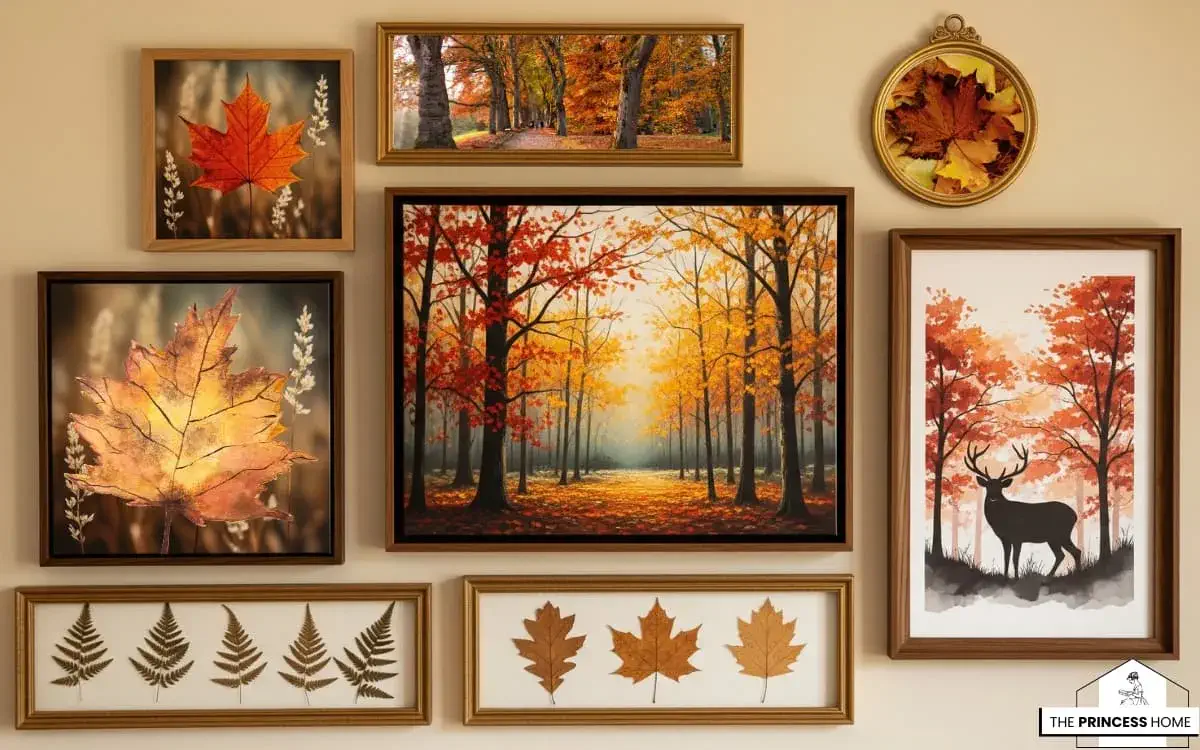
Change up your wall decor to reflect the season by introducing autumn-inspired artwork. You can find or create paintings, prints, or framed botanical specimens that showcase the beauty of fall leaves or woodland scenes. These pieces can be rotated seasonally to keep your home decor fresh and inviting. Autumn-inspired wall art is a fantastic way to refresh your home decor and embrace the beauty of the season.
Here’s how to incorporate fall-themed artwork into your space:
1.*Types of Autumn-Inspired Wall Art
Paintings and Prints:
Fall Landscapes: Look for artwork featuring autumn landscapes, with vibrant foliage, rolling hills, and serene lakes. These pieces capture the essence of fall and bring a warm, inviting feeling to your walls.
Botanical Prints: Choose prints that showcase fall leaves, branches, or flowers. These can include detailed illustrations of leaves or more abstract representations of fall colors.
Seasonal Quotes: Consider artwork with fall-themed quotes or sayings like “Autumn Leaves and Pumpkins Please” or “Hello Fall.” These can add a cozy and welcoming touch to your space.
Framed Botanical Specimens:
Pressed Leaves: Frame pressed fall leaves or flowers. This not only highlights the beauty of natural elements but also creates a unique and personal touch.
Herbarium Frames: Use herbarium-style frames to showcase dried autumn plants or branches. This method gives a scientific, vintage look that works well in traditional or rustic interiors.
DIY Art Projects:
Leaf Silhouettes: Create your own wall art by collecting and pressing leaves, then framing them in a series or as a single large piece. Use a contrasting background color to make the leaves stand out.
Painted Canvases: Paint your own autumn scenes or abstract art using fall colors like deep oranges, reds, and golds. Consider incorporating patterns or textures for added interest.
Wall Hangings and Tapestries:
Fabric Tapestries: Hang a tapestry with fall themes such as woodland creatures, fall foliage, or harvest scenes. These can be a versatile addition that works well in both casual and formal spaces.
Macramé or Weaving: Incorporate macramé or woven wall hangings in warm autumn colors. They add texture and can complement other fall decor elements.
2.*Displaying Autumn-Inspired Wall Art
Gallery Walls:
Arrangement: Create a gallery wall with a mix of fall artwork, including paintings, prints, and botanical frames. Arrange them in a cohesive layout to create a focal point in your living or dining area.
Mix and Match: Combine different styles and sizes of frames for an eclectic look, or use uniform frames for a more polished appearance.
Single Large Pieces:
Focal Point: Choose a large piece of artwork, such as a fall landscape or a statement botanical print, to serve as the focal point of a room. This can be a great way to anchor your fall decor.
Seasonal Rotation:
Swap Art: To keep your decor fresh and seasonally appropriate, rotate your artwork with the seasons. Store your autumn pieces carefully and replace them with winter or holiday-themed art as the seasons change.
Framing and Matting:
Frame Style: Choose frames that complement your existing decor. Wooden frames in warm tones can enhance the rustic feel, while sleek metal frames might suit a more modern aesthetic.
Matting: Use matting to add a professional touch to your artwork. Select colors that enhance the artwork’s colors or create contrast.
3.*Additional Tips
Lighting: Use picture lights or spotlights to highlight your artwork and draw attention to the details.
Color Coordination: Ensure the colors in your artwork harmonize with your room’s color scheme. Warm tones like burgundy, gold, and brown typically work well in fall decor.
Personal Touches: Incorporate personal elements or family photos with fall-themed frames to add a unique touch to your decor.
By incorporating autumn-inspired wall art into your home, you can create a warm, seasonal atmosphere that celebrates the beauty of fall. Whether you choose ready-made pieces or create your own, these decorations will help enhance the cozy charm of your living spaces.
12.Woodland Creatures and Decor
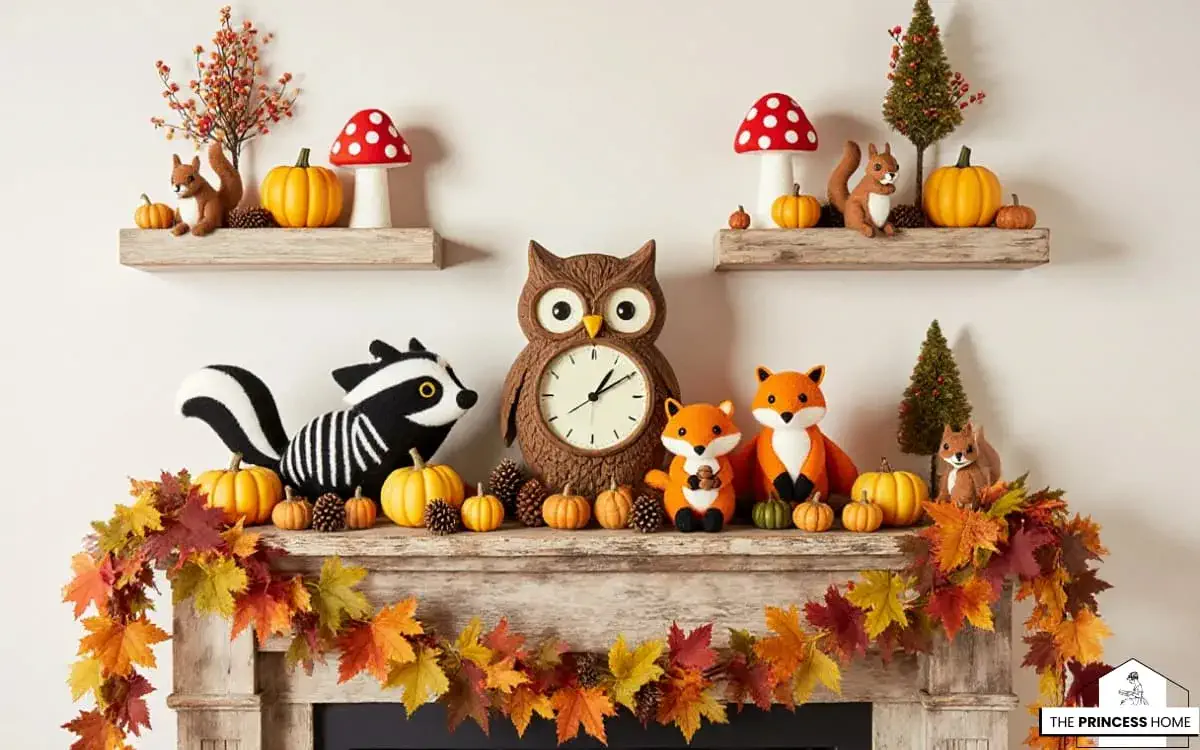
Introduce some whimsical woodland creatures into your fall decor. Squirrel figurines, owl-themed decor, or even DIY felted forest animals can add a touch of charm to your home. These critters can be placed on shelves, mantels, or incorporated into your table settings for a delightful, nature-inspired theme. Adding woodland creatures to your fall decor brings a playful, nature-inspired touch to your home.
Here’s how to seamlessly incorporate these charming elements into your seasonal decor:
1.*Woodland Creature Decor Ideas
Squirrel Figurines:
Types: Look for squirrel figurines made from materials like ceramic, metal, or wood. Choose ones that match your overall decor style—rustic for a farmhouse look or sleek for a modern twist.
Placement: Place squirrel figurines on shelves, mantels, or side tables. They also work well as part of a centerpiece or in a display with other fall items like pumpkins and acorns.
Owl-Themed Decor:
Owl Figurines: Opt for owl figurines in various materials such as wood, ceramic, or plush. They can add a whimsical element to your decor.
Wall Art: Hang owl-themed prints or paintings that feature these creatures in their natural habitat.
Accent Pieces: Use owl-shaped candle holders, pillows, or even doormats to bring a touch of owl charm into different areas of your home.
DIY Felted Forest Animals:
Materials: Create your own felted animals using felt, needle-felting tools, and other craft supplies. Common animals include foxes, rabbits, and hedgehogs.
Instructions: Start with basic shapes and gradually add details like eyes, ears, and textures. You can find many tutorials online for felted woodland creatures.
Usage: Display your DIY creations on shelves, in glass cloches, or as part of a larger fall-themed display.
2.*Incorporating Woodland Creatures into Decor
Mantel Displays:
Arrangement: Create a woodland scene on your mantel by arranging figurines, candles, and natural elements like pinecones and branches.
Backdrop: Use fall-colored garlands or autumn leaves as a backdrop to enhance the woodland theme.
Table Settings:
Place Holders: Use small woodland creature figurines or DIY felted animals as place card holders for a playful touch.
Centerpieces: Incorporate woodland creatures into your table centerpiece by placing them among seasonal flowers, pumpkins, and foliage.
Shelves and Tables:
Grouping: Group several woodland creature figurines together to create a mini forest scene. Mix and match with other fall decor items like acorns and candles.
Accents: Scatter smaller figurines around your home for unexpected touches of charm.
Wreaths and Garlands:
Decorative Elements: Add small woodland creature ornaments to your fall wreaths or garlands. Secure them with wire or hot glue for a whimsical touch.
Customization: Incorporate elements like small faux mushrooms, tiny owls, or felted animals into the garlands.
3.*Additional Tips
Theme Consistency: Ensure that the woodland creatures you choose fit with your overall fall decor theme. Mix different types of creatures while maintaining a cohesive look.
Craft Projects: Consider involving family members or friends in DIY projects. Creating felted animals or other craft items can be a fun and engaging activity.
Seasonal Transition: Swap out woodland creatures for other seasonal items as the year progresses to keep your decor fresh and interesting.
By integrating woodland creatures into your fall decor, you can infuse your home with a touch of whimsy and celebrate the charm of nature. These elements can enhance your seasonal decor, adding character and delight to your space.
13.Fall-themed Front Porch
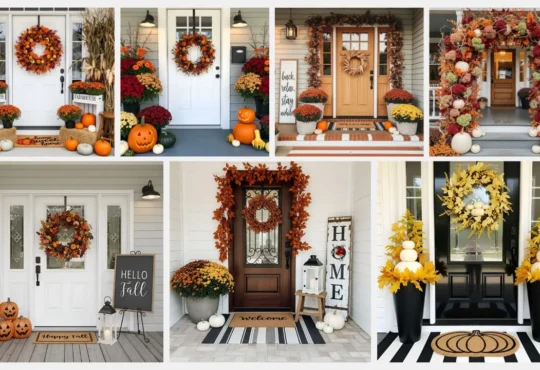
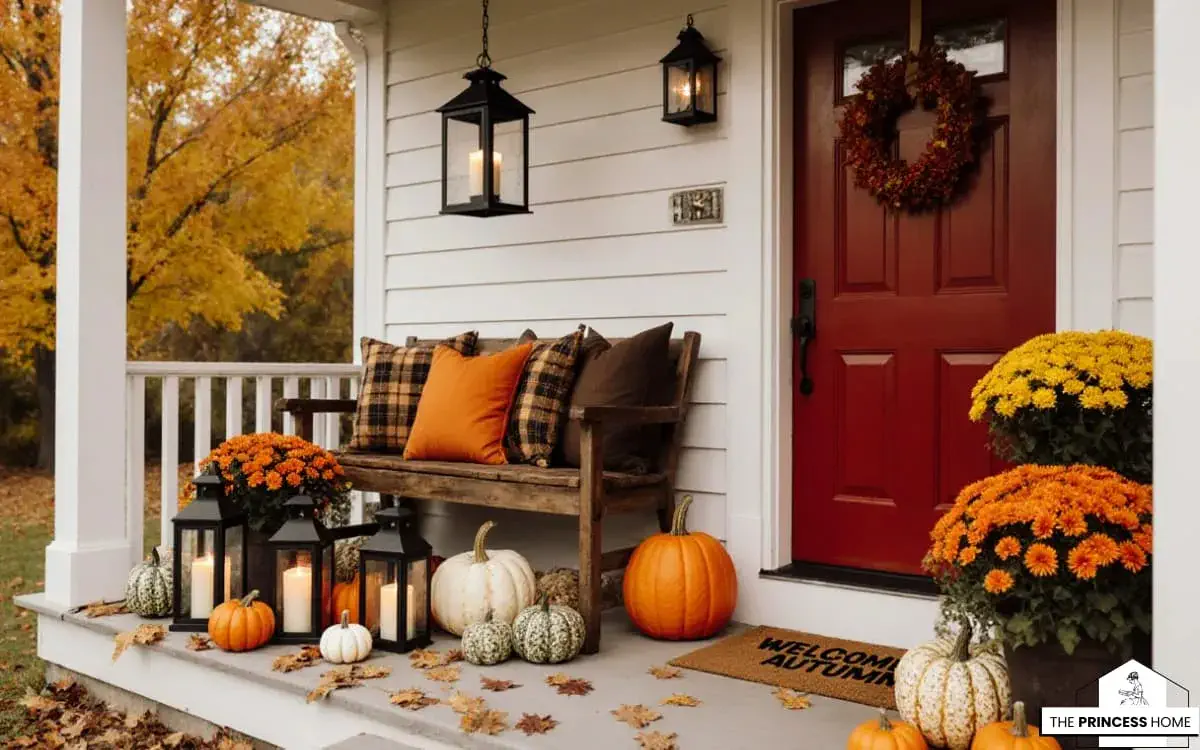
Extend your fall decor to your front porch or entryway to create a warm welcome for guests and passersby. Adorn your porch with pumpkins, mums, and lanterns. Consider placing a cozy bench or chairs with plaid cushions for a charming outdoor seating area. A fall-themed doormat can be the perfect finishing touch. Creating a fall-themed front porch can set a welcoming tone for your home and celebrate the beauty of the season.
Here’s a detailed guide on how to achieve a charming and cozy autumnal look for your entryway:
1.*Pumpkins and Gourds
Variety: Decorate with an assortment of pumpkins and gourds in different sizes, shapes, and colors. Include traditional orange pumpkins, as well as white, green, and striped varieties.
Arrangements: Create eye-catching displays by stacking pumpkins, placing them in clusters, or arranging them on a porch bench or in front of the entryway.
DIY Projects: Paint or carve pumpkins to add a personal touch. Use natural elements like branches or moss for additional decoration.
2.*Mums and Seasonal Flowers
Potted Mums: Place potted chrysanthemums in vibrant fall colors such as deep reds, oranges, and yellows. These hardy flowers thrive in cooler temperatures and add a burst of seasonal color.
Flower Boxes: Use flower boxes or containers to create a layered look with mums and other fall flowers like pansies or ornamental kale.
Arrangement: Arrange the potted mums in symmetrical groupings or staggered heights for visual interest.
3.*Lanterns and Lighting
Lanterns: Place lanterns along the steps, porch railing, or entryway. Choose lanterns with LED candles for a safe, warm glow. Opt for rustic metal or glass designs to complement the fall theme.
Fairy Lights: Wrap string lights or fairy lights around the porch railing or garlands to create a magical, inviting atmosphere in the evenings.
Accent Lighting: Use spotlights or uplights to highlight your fall decor elements and create a cozy glow.
4.*Cozy Seating Area
Bench or Chairs: Add a bench or outdoor chairs to your porch for a cozy seating area. Choose weather-resistant materials for durability.
Plaid Cushions and Throws: Outfit the seating with plaid or flannel cushions in warm autumn colors. Add cozy throws or blankets for extra comfort and warmth.
Decorative Pillows: Incorporate pillows with fall motifs like pumpkins, leaves, or autumnal sayings.
5.*Fall-Themed Doormat
Design Options: Choose a doormat with fall-themed designs, such as pumpkins, leaves, or autumn quotes. This adds a warm and inviting touch right at the entrance.
Personalization: Consider a personalized doormat with your family name or a seasonal greeting to add a unique touch.
Layering: For added texture, place the fall-themed doormat over a larger, neutral-colored mat.
6.*Additional Decorative Elements
Wreaths: Hang a fall-themed wreath on the front door. Opt for wreaths made from dried leaves, pinecones, or a mix of faux autumnal elements.
Garlands: Drape fall garlands made of faux leaves, acorns, or berries along the porch railing or entryway. Add fairy lights for extra sparkle.
Scarecrows: Place a friendly scarecrow near the entrance for a whimsical touch. Dress it in fall attire for added charm.
Cornstalks: Bundle cornstalks and tie them with a ribbon or twine. Place them flanking the entryway or porch for a rustic look.
Tips for Creating a Cohesive Look
Color Scheme: Stick to a cohesive color palette that includes warm autumn tones like deep reds, oranges, and browns, complemented by neutrals like beige or gray.
Balance: Ensure that your porch decor is balanced and not overcrowded. Arrange items to create focal points and maintain visual harmony.
Seasonal Transition: Update your porch decor as the seasons change to keep your entryway fresh and inviting throughout the year.
By thoughtfully incorporating these elements, you can create a front porch that not only celebrates the fall season but also provides a warm and welcoming atmosphere for guests.
14.DIY Scarecrow and Hay Bales
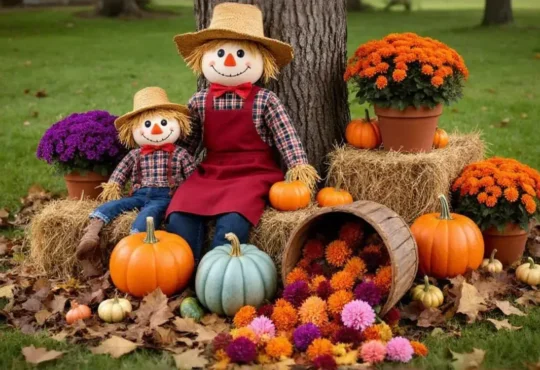
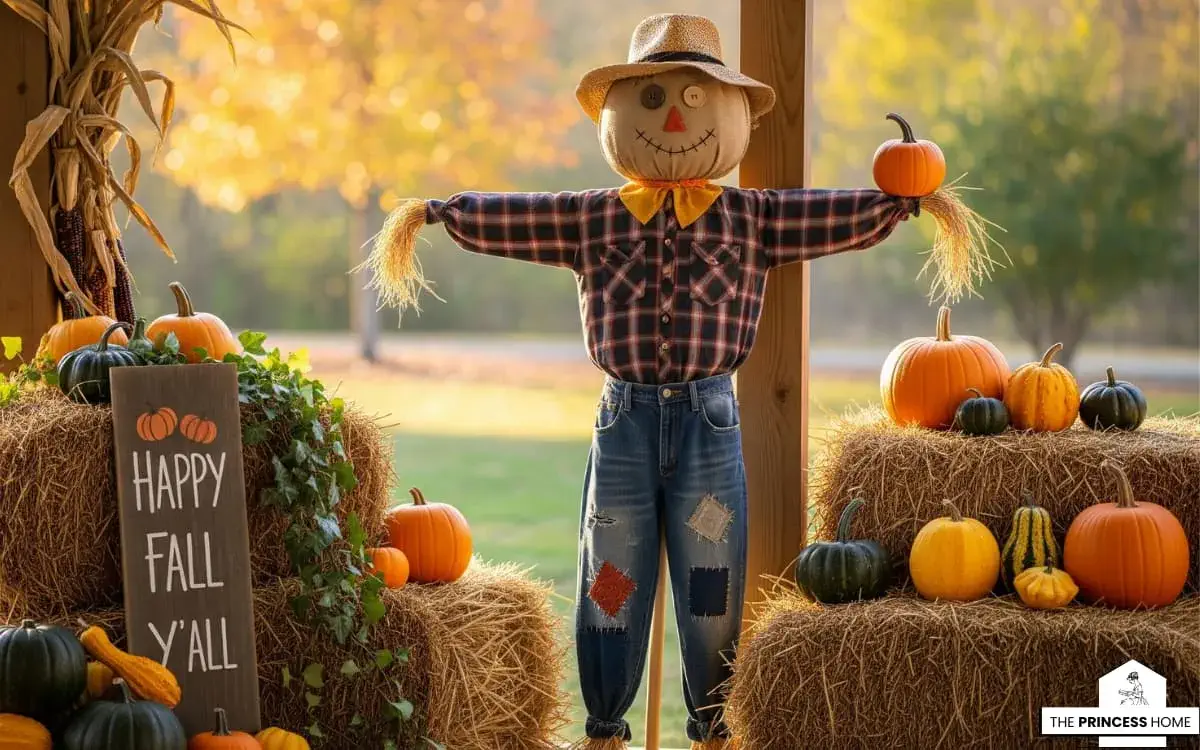
For a playful nod to the harvest season, craft your own scarecrow and arrange hay bales on your porch or in your garden. Dress the scarecrow in a plaid shirt, jeans, and a straw hat, and use it as a focal point in your outdoor decor. Surround it with bales of hay and pumpkins for a delightful autumnal scene. Creating a DIY scarecrow and incorporating hay bales into your fall decor adds a charming, harvest-inspired touch to your porch or garden.
Here’s how to craft a scarecrow and arrange hay bales for a festive autumn display:
Step 1: Gather Your Materials
Before you start, gather all the materials you’ll need for your scarecrow and hay bale display:
- For the Scarecrow:
- Old clothes (e.g., plaid shirt, jeans, overalls, or a dress)
- Straw or hay for stuffing
- Burlap sack or pillowcase for the head
- Twine or string
- Wooden stakes or dowels (for the frame)
- Straw hat, bandana, or cap
- Old gloves, boots, or shoes
- Fabric markers or paint for the face
- Optional: buttons, patches, or other accessories for added personality
- For the Hay Bale Display:
- Hay bales (small or medium-sized)
- Pumpkins and gourds
- Corn stalks or bundles of dried wheat
- Fall foliage, such as faux leaves, branches, or vines
- Additional decorations like lanterns, scarecrow figurines, or seasonal signs
Step 2: Build the Scarecrow Frame
Create the Frame: Start by constructing a simple cross-shaped frame using wooden stakes or dowels. The vertical stake should be taller than the height of the scarecrow, while the horizontal stake will form the arms. Secure them together using twine or nails.
Position the Frame: Decide where you want your scarecrow to stand and place the vertical stake firmly into the ground or a hay bale. Ensure it’s sturdy enough to support the weight of the scarecrow.
Step 3: Dress the Scarecrow
Add Clothing: Dress your scarecrow by slipping the shirt over the top of the frame and securing it at the wrists and waist with twine. If using overalls, pull them up over the shirt and tie them in place. For pants or jeans, tie off the legs at the ankles and secure them to the frame, leaving the waist open for stuffing.
Stuff the Scarecrow: Begin stuffing the scarecrow with straw, hay, or any other soft material like old rags or newspaper. Start with the arms and legs, and then move on to the torso. Make sure it’s stuffed enough to hold its shape but not too tightly packed.
Create the Head: Fill a burlap sack or pillowcase with straw to form the head. Tie the open end securely to prevent the stuffing from falling out. Draw or paint a face on the front, adding features like eyes, a nose, and a smile. For added character, you can sew on buttons for eyes or add a patch for a nose.
Attach the Head: Secure the head to the top of the vertical stake, making sure it’s firmly in place. You can tuck the shirt collar around the base of the head to hide any gaps.
Add Accessories: Finish dressing your scarecrow by adding a straw hat, bandana, or cap. Put old gloves on the ends of the arms and boots on the bottom of the legs. If you want to personalize your scarecrow, consider adding a scarf, buttons, or even a sign.
Step 4: Arrange the Hay Bales
Position the Hay Bales: Arrange your hay bales in a staggered formation to create depth and interest. You can stack them in a corner of your porch, along a garden path, or beside your scarecrow. Consider using different sizes to add variety.
Add Pumpkins and Gourds: Place a variety of pumpkins and gourds around the hay bales. Mix colors, sizes, and shapes to create a visually appealing arrangement. You can also carve some pumpkins or paint them for added flair.
Incorporate Corn Stalks: Position corn stalks or bundles of dried wheat behind the hay bales or to the side of the scarecrow. These tall elements add height and texture to your display.
Add Fall Foliage: Drape faux leaves, branches, or vines over the hay bales and around the base of the scarecrow. This adds a touch of color and connects your display to the natural beauty of fall.
Include Additional Decorations: To complete the scene, consider adding lanterns with LED candles, small scarecrow figurines, or a rustic “Welcome Fall” sign. These elements enhance the overall theme and make your display more inviting.
Step 5: Final Touches
Lighting: If you plan to enjoy your scarecrow and hay bale display in the evenings, add some warm string lights or place lanterns with LED candles around the area. This creates a cozy glow and makes your display visible after dark.
Safety and Stability: Ensure that your scarecrow and hay bales are securely positioned, especially if they’re exposed to wind or weather. Anchor the scarecrow and heavier decorations so they remain stable.
Personalization: Give your scarecrow a name and a personality! You could even create a family of scarecrows with different outfits and styles to add humor and charm to your display.
Creating a DIY scarecrow and arranging hay bales for your fall decor is a fun and festive way to celebrate the season. Not only does this project bring a harvest-inspired touch to your porch or garden, but it also offers a great opportunity for creativity and family bonding. With your homemade scarecrow standing proudly amidst hay bales, pumpkins, and fall foliage, your outdoor space will be ready to welcome the autumn season with open arms.
15.Seasonal Table Runners
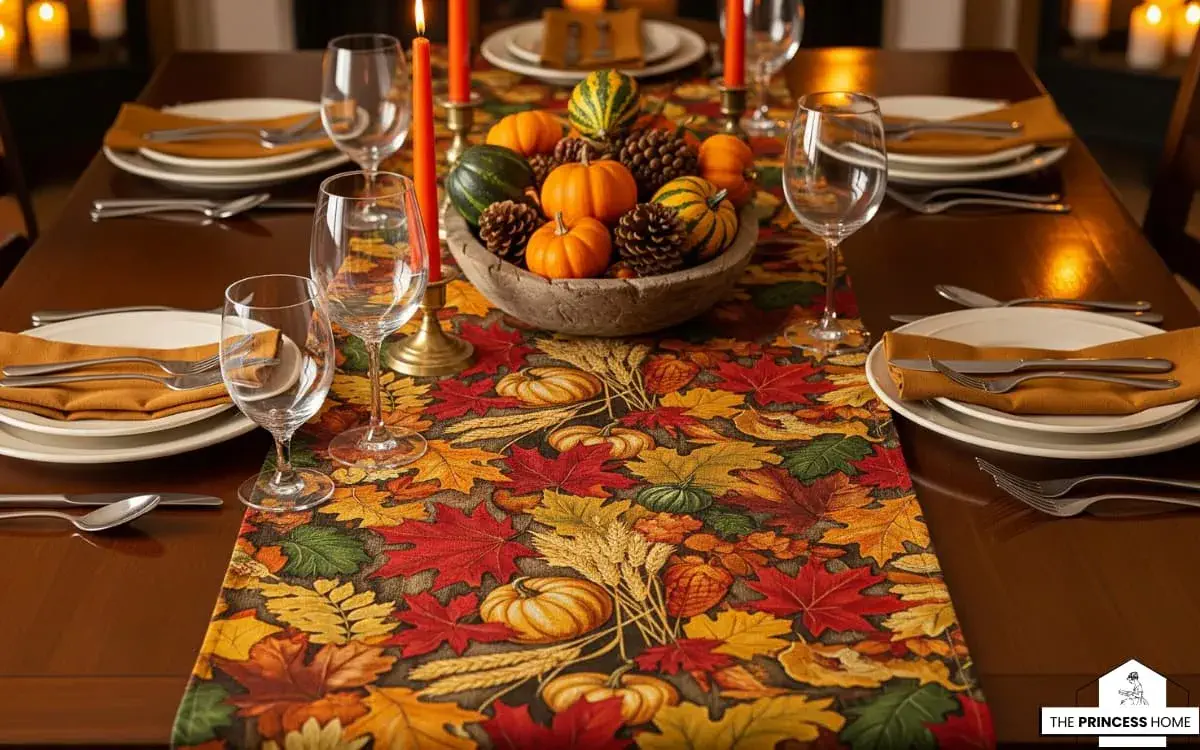
Elevate your dining experience with a seasonal table runner that reflects the colors and themes of fall. Look for table runners featuring fall foliage, harvest patterns, or warm, earthy tones. A well-chosen table runner can tie together your entire dining area and make every meal feel like a special occasion. Seasonal table runners are a fantastic way to enhance your dining experience during fall, bringing warmth and style to your table.
Here’s how to choose and use fall-themed table runners to create a cozy, festive atmosphere:
1.*Choosing the Perfect Fall Table Runner
The right table runner can transform your table setting and add a touch of seasonal elegance. Consider the following elements when selecting a fall table runner:
1. Material
Linen: Linen table runners are classic and versatile, offering a natural, textured look that works well with both casual and formal settings. Linen’s neutral tones complement the earthy colors of fall.
Cotton: Cotton runners are durable and easy to care for, making them ideal for everyday use. They can feature intricate patterns or bold colors that highlight the autumn season.
Burlap: Burlap is a rustic material that perfectly embodies the fall season. Its rough texture adds a touch of farmhouse charm, making it an excellent choice for a cozy, country-inspired table setting.
Velvet: For a more luxurious look, consider a velvet table runner. Velvet’s rich texture and deep hues like burgundy, mustard, or forest green add warmth and opulence to your table.
2. Color Palette
Fall is known for its rich, warm colors. Here are some popular color schemes for fall table runners:
Earth Tones: Think deep browns, burnt oranges, olive greens, and warm yellows. These colors echo the natural landscape of fall and create a grounded, harmonious look.
Neutrals: Beige, cream, and soft gray table runners can serve as a subtle backdrop for more colorful centerpieces. They provide a sophisticated and understated elegance.
Bold Accents: For a more vibrant approach, opt for table runners in shades of red, burgundy, or deep plum. These colors stand out and add a festive touch to your table.
3. Patterns and Designs
The pattern or design on your table runner can set the theme for your entire table setting:
Fall Foliage: Table runners featuring leaves, acorns, or pinecones bring the beauty of the outdoors inside. These patterns are perfect for a nature-inspired, autumnal look.
Harvest Motifs: Designs that include pumpkins, gourds, or wheat stalks are quintessentially fall. They evoke the harvest season and add a touch of rustic charm to your table.
Plaid or Gingham: Classic plaid or gingham patterns in fall colors like red, orange, or green are ideal for a cozy, country-style table. These patterns add a sense of warmth and tradition.
Floral: Fall-themed floral patterns with sunflowers, chrysanthemums, or marigolds can bring a vibrant and cheerful atmosphere to your table.
2.*Styling Your Table Runner
Once you’ve chosen your table runner, it’s time to style it to complement your fall decor:
1. Centerpieces
Your table runner serves as the foundation for your centerpiece. Consider these options to enhance the look:
Candles: Place pillar candles or taper candles along the length of the runner. Choose candles in fall colors or in glass holders filled with autumn leaves or berries for a cozy, ambient glow.
Floral Arrangements: A bouquet of fall flowers in a rustic vase or a collection of smaller vases filled with seasonal blooms can add height and color. Position these along the center of the runner for a balanced look.
Pumpkins and Gourds: Arrange small pumpkins, gourds, and pinecones along the runner for a natural, harvest-themed centerpiece. You can mix real and faux elements to achieve the perfect look.
Mason Jars: Decorated mason jars filled with fairy lights, dried flowers, or seasonal foliage can add a whimsical touch. Line them up along the runner for a casual, rustic vibe.
2. Table Settings
Coordinate your table settings with the runner for a cohesive look:
Placemats: If using placemats, choose ones that complement the color and texture of your table runner. Burlap or woven placemats pair well with a rustic runner, while linen placemats add elegance to a more formal setting.
Napkins: Opt for cloth napkins in a color that complements or contrasts with your runner. You can also use napkin rings that feature fall elements like leaves or berries to tie everything together.
Dinnerware: Consider using dinnerware that enhances the theme of your table runner. Earth-toned plates or vintage-inspired dishes can add to the overall aesthetic. Mixing and matching different patterns can create an eclectic, personalized table setting.
3. Layering
Layering your table runner with other textiles can add depth and dimension:
Tablecloths: Place your runner over a solid-colored tablecloth for a layered look. The tablecloth can either contrast with or match the runner, depending on the desired effect.
Additional Runners: For a more dynamic look, consider using two runners placed side by side or crisscrossed. This approach can create an interesting visual effect and highlight different sections of the table.
3.*Placement Tips
Length: Your table runner should ideally hang about 6-12 inches over each end of the table. This provides a balanced look without overwhelming the space.
Width: The runner should be about one-third the width of the table, allowing enough space on either side for place settings.
Alignment: Center the runner along the length of the table, ensuring it’s straight and evenly spaced. For a more casual look, you can offset the runner slightly to one side or place it at an angle.
4.*Incorporating Seasonal Themes
To fully embrace the season, consider switching out your table runner as the fall progresses:
Early Fall: Start with lighter, more neutral runners that reflect the transition from summer to fall.
Mid-Fall: As the season deepens, introduce richer colors and more intricate patterns that reflect the peak of autumn.
Late Fall: As Thanksgiving approaches, opt for runners with harvest motifs or darker, more dramatic colors to celebrate the end of the season.
A seasonal table runner is more than just a piece of fabric; it’s a versatile decor element that can define the look and feel of your dining area. By carefully choosing and styling your fall table runner, you can create a warm, inviting space that captures the essence of the season and makes every meal a special occasion.
16.Dried Flower Arrangements
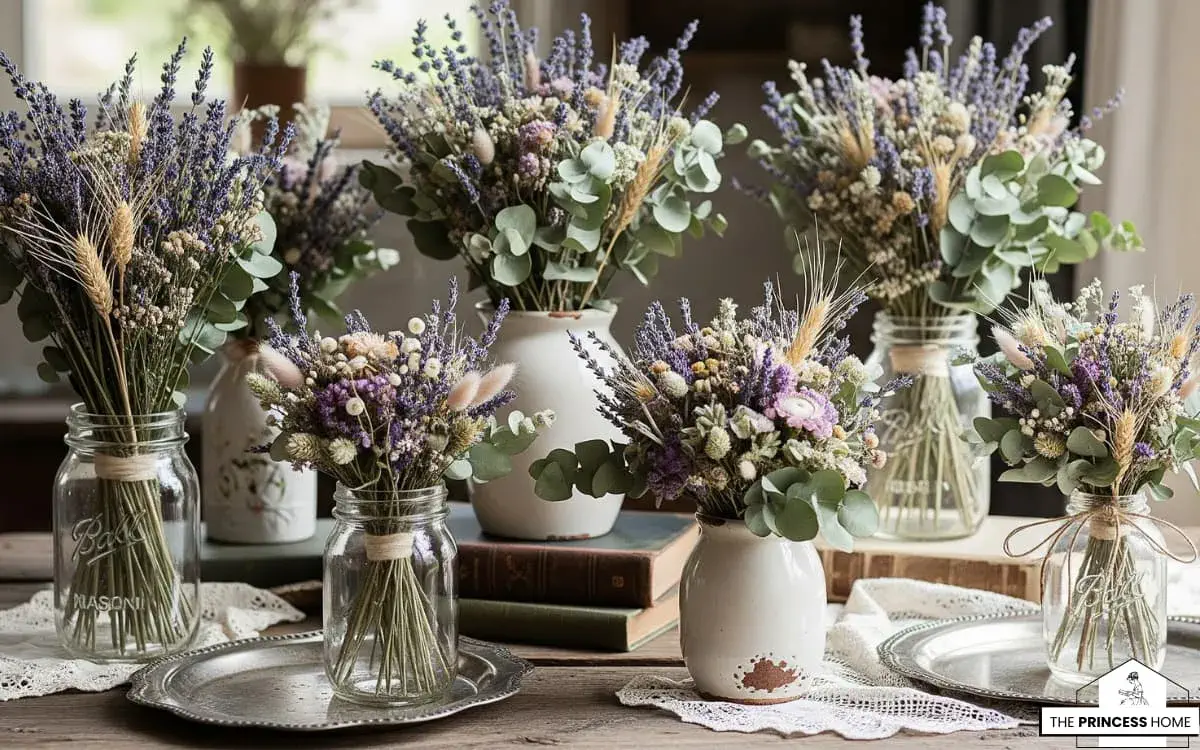
Dried flowers can add a timeless and rustic touch to your fall decor. Create dried flower arrangements using blooms like lavender, eucalyptus, or dried wheat. Place them in vintage-style vases or mason jars for a charming and long-lasting centerpiece or display. Dried flower arrangements bring a rustic, timeless quality to your fall decor, adding texture and natural beauty to your home.
Here’s how to create and display dried flower arrangements for a stunning fall centerpiece:
1.*Choosing Dried Flowers
Selecting the right flowers is crucial for creating a beautiful dried arrangement. Consider the following options, which offer both visual appeal and durability:
Lavender: Lavender’s soft purple hues and soothing fragrance make it a popular choice for dried arrangements. Its slender stems and delicate blooms add height and texture, while its calming scent infuses a space with tranquility.
Eucalyptus: Known for its silvery-green leaves, eucalyptus adds a lush, textured element to dried arrangements. It pairs well with almost any other dried flower and retains its shape and color over time. Eucalyptus also adds a subtle, refreshing scent to the arrangement.
Dried Wheat: Wheat stalks are a quintessential fall element that symbolizes abundance and harvest. Their golden tones add warmth and height to arrangements, making them perfect for creating a classic fall look.
Statice: Available in a variety of colors, statice is a versatile dried flower that holds its shape and color beautifully. Its small, papery blooms add a pop of color and texture to any arrangement.
Hydrangea: Dried hydrangeas bring volume and a romantic touch to arrangements. Their large, multi-petal blooms are perfect for filling out a vase or adding a statement piece to your decor.
Craspedia (Billy Buttons): With their bright yellow, spherical blooms, craspedia adds a whimsical and modern touch to dried arrangements. They stand out beautifully against more muted tones.
Roses: Dried roses retain much of their original beauty and add a touch of vintage charm. Their deep, rich colors make them an excellent choice for fall-themed arrangements.
2.*Selecting a Vase or Container
The container you choose plays a significant role in the overall look of your arrangement. Here are some ideas:
Vintage Vases: Look for vases with an antique or vintage feel, such as milk glass, copper, or ceramic. These materials complement the natural tones of dried flowers and enhance the rustic appeal of your arrangement.
Mason Jars: Mason jars are a versatile and budget-friendly option. They work well for smaller arrangements or when you want to create a casual, country-inspired look. Consider tying a piece of twine or burlap around the jar for added charm.
Baskets: Woven baskets offer a rustic and earthy vibe, making them perfect for fall decor. They can hold larger arrangements and look particularly inviting on a mantel or entryway table.
Pitchers: Vintage pitchers, especially those made of enamel, metal, or stoneware, add a farmhouse feel to your arrangement. They’re great for holding taller stems like wheat or eucalyptus.
3.*Creating the Arrangement
When arranging your dried flowers, keep in mind the principles of balance, proportion, and texture:
Start with Filler: Begin by placing the larger, more voluminous elements in the vase, such as dried wheat, eucalyptus, or hydrangea. These will act as the filler and provide the base structure of the arrangement.
Add Focal Flowers: Next, add your focal flowers, such as dried roses or lavender. These should be placed at varying heights to create depth and draw the eye. Remember to turn the vase as you work to ensure the arrangement looks good from all angles.
Incorporate Smaller Blooms and Accents: Finally, fill in any gaps with smaller flowers like statice or craspedia. These add texture and detail to the arrangement. For a more dynamic look, allow some stems to extend beyond the main structure of the arrangement, creating a slightly wild and organic feel.
4.*Arranging Tips
Layering and Grouping: Layering different flowers together in groups can create a more cohesive look. For example, cluster a few stems of lavender together and position them next to a bunch of wheat for contrast.
Varying Heights: Vary the heights of the stems within the arrangement to create visual interest. Taller stems should be placed towards the back or center, with shorter stems towards the front or edges.
Asymmetry: Consider creating an asymmetrical arrangement for a more natural and relaxed appearance. This approach mimics the way flowers grow in nature and adds a sense of movement to the display.
5.*Displaying Your Arrangement
Dining Table Centerpiece: A dried flower arrangement can serve as a beautiful centerpiece for your dining table. Pair it with candles or place it on a rustic tray to complete the look.
Mantel Display: Place your arrangement on the mantel, accompanied by seasonal decor like pumpkins, pinecones, or lanterns. The natural tones of the dried flowers will complement other autumnal elements.
Entryway Accent: Position the arrangement on an entryway table to welcome guests with a touch of fall elegance. Consider adding a mirror or decorative sign behind it for added dimension.
6.*Caring for Dried Flowers
Dried flowers require minimal care, but following these tips will help maintain their beauty:
Avoid Direct Sunlight: Keep your arrangement out of direct sunlight to prevent the colors from fading.
Dust Regularly: Use a soft brush or a can of compressed air to gently remove dust from the flowers.
Keep Dry: Avoid placing the arrangement in a humid environment, as moisture can cause the flowers to become limp or moldy.
Dried flower arrangements are a timeless addition to fall decor, bringing warmth, texture, and a touch of nature into your home. Their durability and enduring beauty make them a perfect choice for celebrating the season’s splendor.
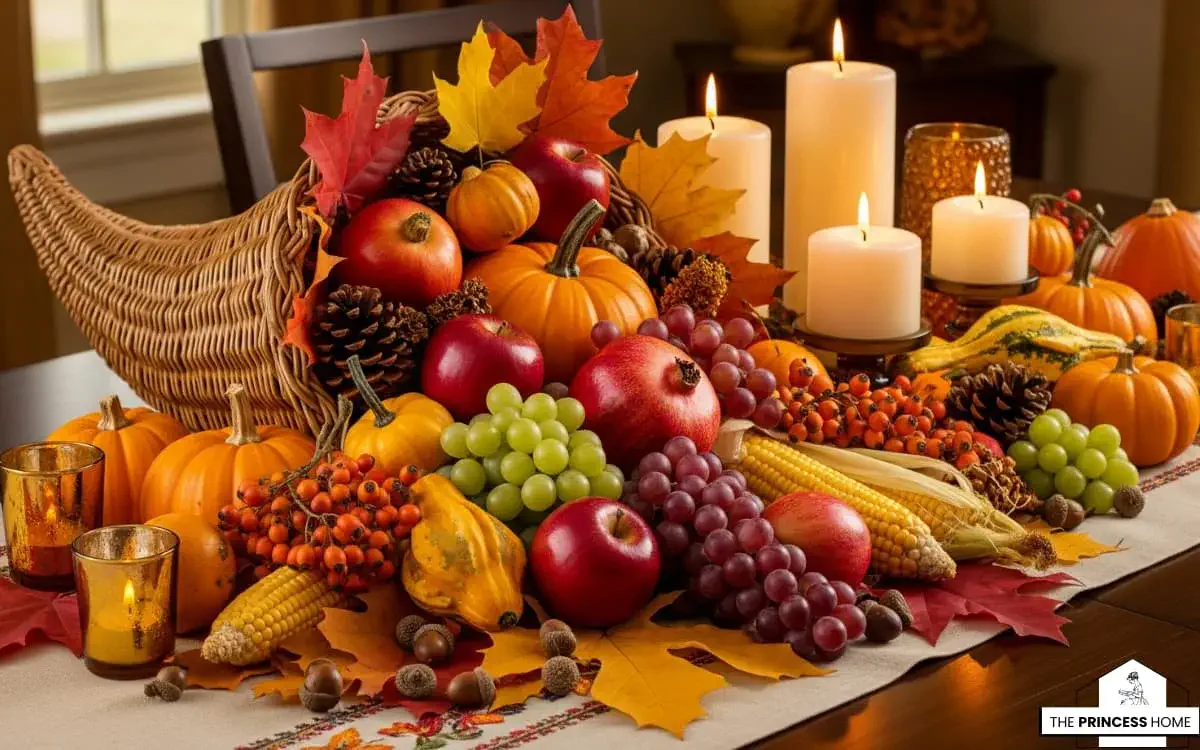
17.Cornucopia Centerpiece
The cornucopia, or horn of plenty, is a traditional symbol of abundance and harvest. Fill a decorative cornucopia with an assortment of fruits, vegetables, and autumnal foliage for a stunning centerpiece. This classic fall symbol can be placed on your dining table or mantel to celebrate the season’s bounty. The cornucopia, or horn of plenty, is a timeless symbol of harvest and abundance, making it a perfect centerpiece for fall decor.
Here’s how to create a captivating cornucopia centerpiece to celebrate the season:
1.*Choosing the Cornucopia
Material: Start by selecting a cornucopia made from materials that suit your decor style. Woven wicker or grapevine cornucopias are classic choices that add a rustic touch. If you prefer a more modern or elegant look, consider using a metal or ceramic cornucopia with intricate details.
Size: The size of your cornucopia will depend on where you plan to place it. A larger cornucopia works well as a dining table centerpiece, while a smaller one is perfect for a mantel or entryway table.
2.*Filling the Cornucopia
The contents of the cornucopia should reflect the richness of the harvest season. Here are some ideas:
Fruits: Fill the cornucopia with a variety of fall fruits like apples, pears, pomegranates, grapes, and figs. These not only add vibrant colors but also create a sense of abundance. You can also use faux fruits if you want the display to last longer.
Vegetables: Incorporate seasonal vegetables such as small pumpkins, gourds, squashes, and artichokes. These add texture and visual interest to the arrangement. Mini pumpkins in white or orange can provide a lovely contrast to the other elements.
Foliage and Greenery: To bring the arrangement to life, add autumnal foliage like oak leaves, maple leaves, or eucalyptus. You can also include dried wheat stalks, corn husks, or branches for a touch of rustic elegance. The greenery will spill out of the cornucopia, creating a cascading effect that enhances the overall look.
Flowers: For a pop of color, add fall flowers such as chrysanthemums, sunflowers, or marigolds. These flowers not only add beauty but also symbolize the season’s vibrancy. You can tuck the flowers among the fruits and vegetables or let them peek out from the cornucopia’s opening.
Nuts and Berries: Scatter nuts like walnuts, hazelnuts, and acorns around the base of the cornucopia for added texture. You can also incorporate faux berries, like cranberries or hypericum berries, to add small bursts of color.
3.*Arranging the Cornucopia
Balance and Symmetry: When arranging the items in your cornucopia, aim for a balanced yet slightly asymmetrical look. The contents should appear as though they are naturally spilling out, with the larger, heavier items placed towards the back and smaller, lighter elements towards the front and edges.
Layering: Begin by placing the larger fruits and vegetables inside the cornucopia. Layer them with foliage and greenery to create depth. Add flowers and smaller items like nuts and berries last, positioning them where they will be most visible.
Finishing Touches: Once you have arranged everything, step back and assess the overall look. Make adjustments to ensure that the arrangement feels cohesive. You can also add a decorative ribbon or twine around the base of the cornucopia for an extra touch of charm.
4.*Displaying the Cornucopia
Dining Table: Place the cornucopia in the center of your dining table as the main centerpiece. Surround it with candles or smaller autumnal decorations like mini pumpkins or additional foliage to complete the look.
Mantel: If displaying on a mantel, place the cornucopia on one side, balanced by a grouping of candles, framed photos, or other fall-themed decorations on the opposite side.
Entryway Table: Position the cornucopia on an entryway table to greet guests with a warm, festive display as they enter your home. Pair it with a fall-themed sign or a bowl of seasonal potpourri.
A cornucopia centerpiece is not only a beautiful and meaningful addition to your fall decor, but it also serves as a reminder of the season’s abundance and the blessings of the harvest.
Conclusion
Decorating your home for fall doesn’t need to be complicated or expensive. By incorporating these simple and natural fall home decor ideas, you can infuse your living space with the warmth, colors, and textures of autumn. Whether you prefer a rustic, farmhouse-inspired look or a more elegant and minimalist approach, there are endless ways to embrace the beauty of fall and make your home a cozy haven during this magical season. So, gather your materials, let your creativity flow, and enjoy the process of transforming your home into a fall-inspired retreat.
Here are some frequently asked questions related to fall home decor, along with their answers:
Q1: How can I incorporate fall decor into a small living space?
Answer: In smaller spaces, it’s essential to focus on subtle touches that don’t overwhelm. Consider using smaller decorative items like mini pumpkins, scented candles, and compact table centerpieces. Opt for neutral or earthy color palettes to create a cozy atmosphere without making the space feel crowded.
Q2: What are some budget-friendly fall decor ideas?
Answer: Fall decor doesn’t have to break the bank. You can use natural elements like leaves, pinecones, and branches, which are often free. Thrift stores and discount retailers are also great places to find affordable fall-themed decor items, such as candleholders, vases, and table runners.
Q3: Can I combine different fall decor themes and styles?
Answer: Absolutely! Fall decor is versatile, and you can blend various themes and styles to create a unique look that suits your taste. For example, you can mix rustic elements with elegant accents or incorporate both traditional and modern decor for a harmonious blend that reflects your personal style.
Q4: How do I preserve the freshness of pumpkins and gourds in my decor?
Answer: To prolong the freshness of pumpkins and gourds used in your decor, keep them out of direct sunlight and away from extreme temperatures. Spraying them with a clear sealer can help prevent mold and slow down the drying process. Be sure to check and replace any items that start to show signs of deterioration.
Q5: Are there any safety considerations when using candles in fall decor?
Answer: Safety is crucial when using candles in your fall decor. Always place candles on stable surfaces, away from flammable materials like curtains or paper decorations. Consider using flameless LED candles for a safer alternative, especially in homes with pets or small children.
Q6: How can I incorporate family traditions into my fall decor?
Answer: Fall is a great time to celebrate family traditions. You can display heirloom items like grandma’s quilt or grandpa’s old lantern as part of your decor. Additionally, involve family members in crafting homemade decorations like leaf garlands or hand-painted pumpkins to create meaningful and personal touches.
Q7: Can I transition my fall decor into Thanksgiving decor?
Answer: Absolutely! Many fall decor items, like pumpkins, leaves, and candles, can easily transition into Thanksgiving decor. Simply add elements like cornucopias, turkey figurines, and Thanksgiving-themed tableware to complement your existing fall decor for a seamless transition from one season to the next.
Q8: How do I store my fall decor items after the season is over?
Answer: Properly storing your fall decor will ensure it stays in good condition for years to come. Use clear, airtight containers to keep items free from dust and moisture. Label each container to make it easy to find specific items next year, and store them in a cool, dry place.