As the crisp autumn air arrives and the leaves begin to turn brilliant shades of red, orange, and gold, it’s time to transform your home with seasonal decor that embraces the spirit of fall. One of the simplest yet most impactful ways to welcome the season is by adorning your front door with a beautiful fall wreath. From classic to contemporary, fall wreaths can set the tone for the entire season, creating a warm and inviting entryway.
Here are 22 fall wreath ideas to help you infuse your home with the cozy charm of autumn.
1. Classic Autumnal Elegance
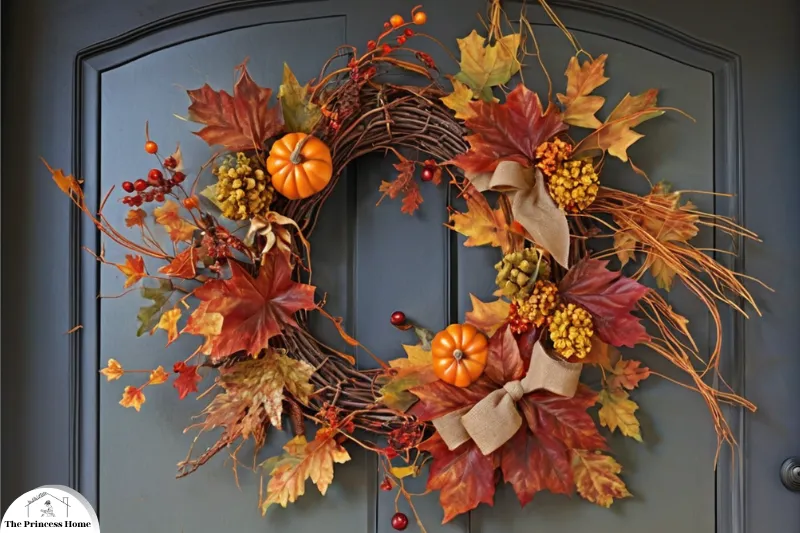
Create a classic fall wreath using a base of faux or real grapevine and adorn it with a mixture of faux fall leaves in vibrant reds, oranges, and yellows. Add clusters of mini pumpkins, acorns, and a burlap bow for a traditional touch. This wreath evokes the timeless beauty of fall foliage and harvest.
To create a Classic Autumnal Elegance wreath, follow these steps for a timeless fall decoration:
Materials Needed:
- Grapevine wreath base (faux or real)
- Faux fall leaves in rich reds, oranges, and yellows
- Mini pumpkins (foam or plastic)
- Acorns (real or faux)
- Burlap ribbon for the bow
- Floral wire and hot glue gun
Instructions:
1.Prepare the Base:
Start with a grapevine wreath base to give a natural, rustic look. This also provides a sturdy foundation for attaching your decorations.
2.Attach the Leaves:
Begin by attaching the faux fall leaves in layers around the wreath using a hot glue gun or floral wire. Make sure to overlap the leaves for a full and vibrant effect, focusing on creating a balance of colors.
3.Add Mini Pumpkins and Acorns:
Glue clusters of mini pumpkins and acorns at different points around the wreath. Focus on symmetry, placing them in groups of two or three to add dimension.
4.Finish with the Burlap Bow:
Create a large, elegant burlap bow and attach it to the bottom or side of the wreath. This adds a warm, rustic touch and completes the traditional autumnal look.
This wreath brings the classic beauty of fall foliage into your home with an elegant and welcoming touch.
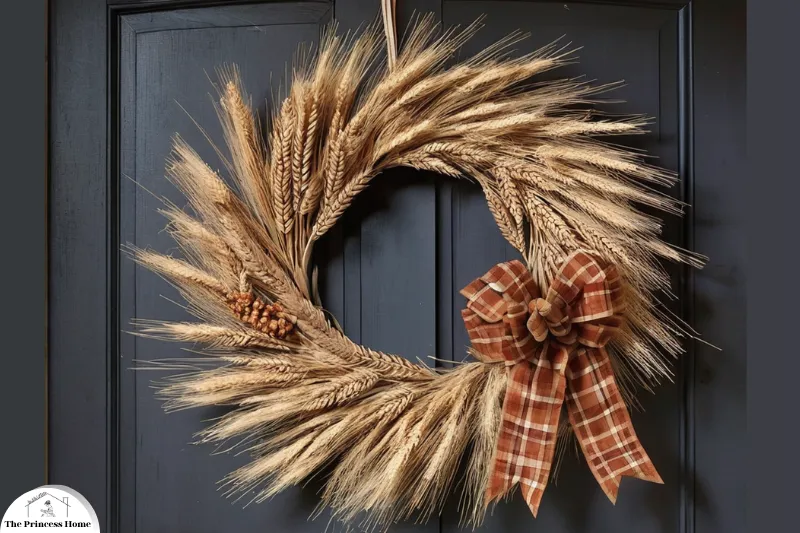
2. Rustic Farmhouse Charm
For a rustic farmhouse look, use a base of weathered wood or burlap. Decorate it with dried wheat stalks, cotton bolls, and soft plaid ribbon. This combination creates a cozy, country feel that welcomes guests with a warm, homey embrace.
To achieve the Rustic Farmhouse Charm wreath, here’s a guide for a cozy and welcoming look:
Materials Needed:
- Wreath base made from weathered wood, burlap, or a grapevine base wrapped in burlap
- Dried wheat stalks
- Cotton bolls (real or faux)
- Soft plaid ribbon in warm, neutral tones (like beige, brown, or muted reds)
- Floral wire, twine, and hot glue gun
Instructions:
1.Prepare the Base:
Start by selecting a wreath base that fits the rustic farmhouse theme. A weathered wood base adds a natural charm, while a burlap-wrapped grapevine wreath gives a soft, rustic texture.
2.Attach Dried Wheat Stalks:
Arrange the dried wheat stalks around the wreath in small bundles. Secure them with floral wire or twine, spacing them evenly or clustering them for a fuller look.
3.Add Cotton Bolls:
Place cotton bolls between the wheat stalk bundles for contrast. The soft texture of the cotton complements the rustic wheat and adds a cozy farmhouse vibe. Use hot glue or floral wire to secure them.
4.Finish with a Plaid Ribbon:
Tie a soft plaid ribbon into a large bow and attach it to the wreath. Opt for warm, subtle colors like beige, browns, or muted reds to enhance the farmhouse feel without overpowering the natural elements.
This wreath captures the essence of rustic charm, bringing the warmth and simplicity of a cozy farmhouse to your entryway.
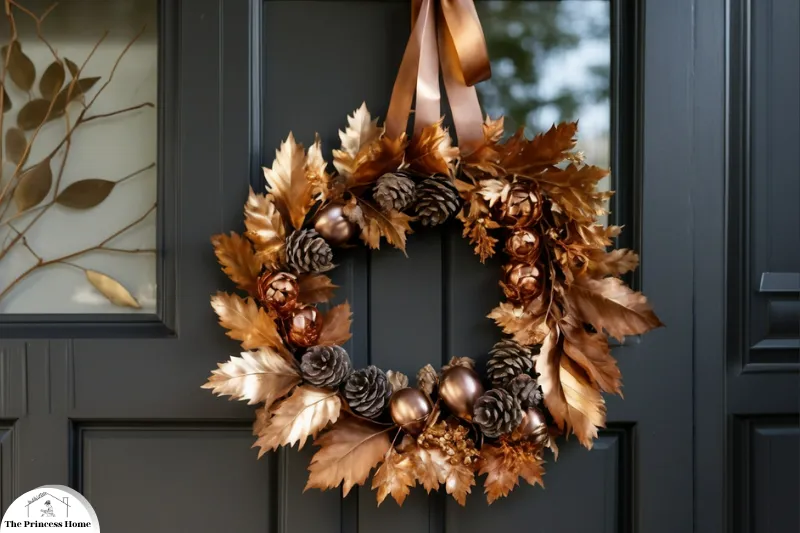
3. Elegant Metallic Accents
Add a touch of sophistication with a wreath featuring metallic elements. Choose a base of grapevine or wire and embellish it with copper or gold-painted leaves, pinecones, and acorns. A metallic bow completes the look, making it perfect for a chic, modern entryway.
To create a wreath with Elegant Metallic Accents, follow these steps to add a touch of modern sophistication to your decor:
Materials Needed:
- Grapevine or wire wreath base
- Faux leaves (or real dried leaves), pinecones, and acorns
- Metallic spray paint (copper, gold, or a mix of both)
- Metallic ribbon for a bow (gold, copper, or champagne)
- Floral wire and hot glue gun
Instructions:
1.Prepare the Base:
Choose a grapevine wreath for a natural, organic look or a wire wreath for a more streamlined, modern feel.
2.Paint the Accents:
Spray the faux leaves, pinecones, and acorns with metallic spray paint. Use gold or copper tones to create a sophisticated and cohesive look. Allow them to dry fully before attaching.
3.Attach the Accents:
Arrange the painted leaves, pinecones, and acorns around the wreath, spacing them evenly for a balanced look. Use floral wire or hot glue to secure them in place, layering the elements for added texture and dimension.
4.Add the Metallic Bow:
Tie a luxurious metallic ribbon into a large bow and attach it to the wreath, either at the bottom or slightly off-center for a modern touch.
This Elegant Metallic Accents wreath blends natural elements with shimmering metallics, creating a chic, contemporary design that’s perfect for adding subtle luxury to your entryway.
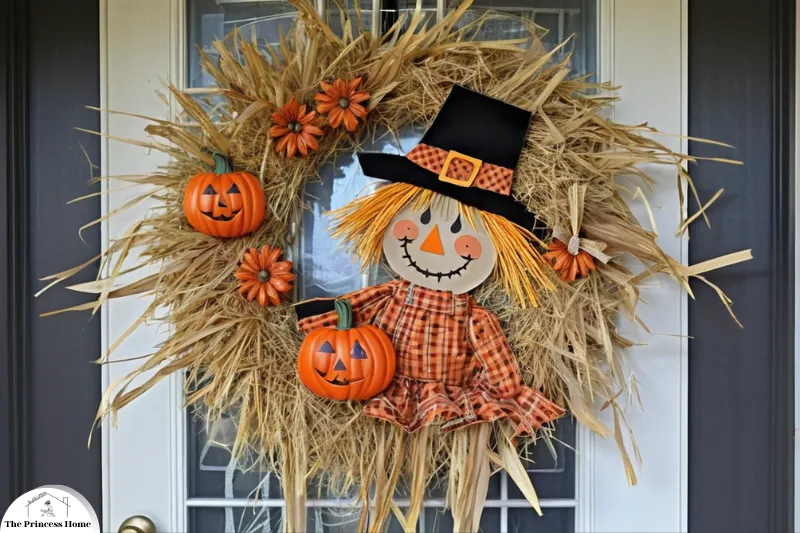
4. Whimsical Scarecrow Wreath
Incorporate a playful touch with a scarecrow-themed wreath. Use a base of hay or grapevine and add a friendly scarecrow face, straw hair, and fall-themed accessories like mini pumpkins and corn husks. This whimsical wreath is sure to bring smiles to all who see it.
To craft a Whimsical Scarecrow Wreath, follow these fun and creative steps for a playful fall decor piece:
Materials Needed:
- Hay or grapevine wreath base
- Scarecrow face (you can make one from fabric or buy a pre-made one)
- Straw or raffia for hair
- Mini pumpkins and corn husks
- Burlap or plaid fabric for the scarecrow’s hat and clothing accents
- Fall-themed accessories like faux leaves, sunflowers, and acorns
- Hot glue gun and floral wire
Instructions:
1.Prepare the Base:
Choose a hay wreath for an authentic rustic feel, or use a grapevine base for a natural, sturdy foundation. Both options work well for the scarecrow theme.
2.Create the Scarecrow Face:
Attach a scarecrow face in the center of the wreath. You can use a pre-made scarecrow face from a craft store or make one with burlap or fabric, drawing or stitching eyes, a nose, and a smile.
3.Add Straw Hair:
Glue or tuck raffia or straw around the top and sides of the scarecrow’s face to create hair. Let it spill out playfully to give the wreath a whimsical touch.
4.Dress the Scarecrow:
Add a burlap or plaid fabric “hat” at the top of the scarecrow’s head, securing it with hot glue. For extra fun, you can add little patches or buttons to the hat or fabric.
5.Decorate with Fall Accessories:
Embellish the wreath with mini pumpkins, corn husks, and faux leaves. Scatter them around the scarecrow’s face for a harvest-inspired look. You can also add small sunflowers or acorns for added charm.
6.Final Touches:
Use a plaid or burlap ribbon to create a bow, and attach it to the bottom of the wreath to tie the whole design together.
This Whimsical Scarecrow Wreath brings a playful and festive touch to your fall decor, perfect for making your entryway feel inviting and fun!
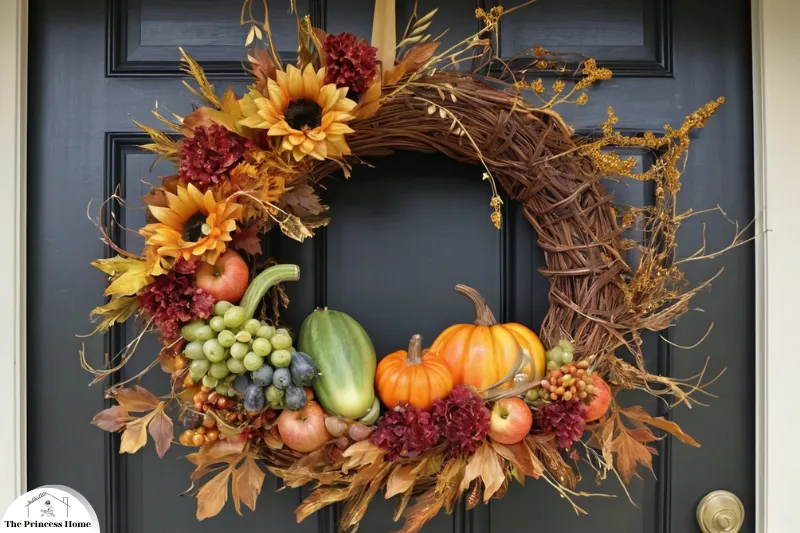
5. Bountiful Cornucopia
Celebrate the harvest season with a cornucopia-inspired wreath. Use a base of grapevine and fill it with faux fruits, vegetables, and flowers. This wreath symbolizes abundance and is a beautiful way to reflect the richness of the season.
To create a Bountiful Cornucopia wreath that captures the spirit of the harvest season, follow these steps to craft a symbol of abundance:
Materials Needed:
- Grapevine wreath base
- Faux fruits (apples, pears, grapes) and vegetables (gourds, squash, pumpkins)
- Faux fall flowers (sunflowers, chrysanthemums, marigolds)
- Faux leaves in autumn colors
- Dried wheat stalks or other harvest-inspired elements
- Hot glue gun and floral wire
Instructions:
1.Prepare the Base:
Start with a grapevine wreath base, which mimics the natural feel of a cornucopia and serves as a sturdy foundation for holding the harvest-themed decorations.
2.Arrange Faux Fruits and Vegetables:
Begin by placing the larger faux fruits and vegetables at the bottom or side of the wreath, allowing them to appear as if they are spilling out of a cornucopia. Secure them with hot glue or floral wire.
3.Add Fall Flowers:
Fill in the gaps around the fruits and vegetables with faux fall flowers like sunflowers, chrysanthemums, or marigolds. These bright, colorful flowers will add vibrancy and texture to the wreath.
4.Incorporate Faux Leaves and Wheat Stalks:
Weave faux leaves in rich reds, oranges, and yellows throughout the wreath. Add dried wheat stalks or other harvest elements to enhance the theme of abundance. Use floral wire to secure them in place.
5.Layer for Fullness:
To create a bountiful effect, layer smaller fruits like grapes or berries and additional flowers to fill out the wreath. Keep layering until you achieve the desired look of abundance and fullness.
6.Final Touches:
You can finish with a burlap or satin ribbon, tying it into a bow at the top or bottom for an added touch of rustic elegance.
This Bountiful Cornucopia wreath beautifully reflects the richness and prosperity of the harvest season, making it an ideal statement piece for fall.
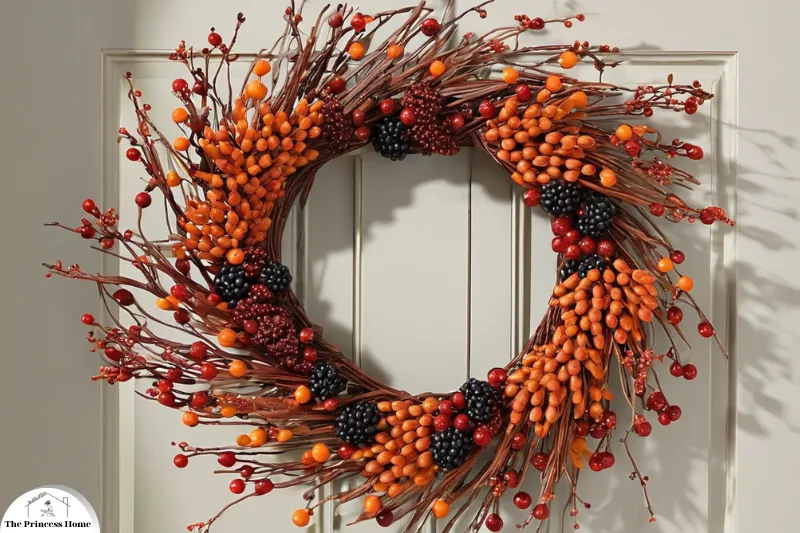
6. Berry Burst
Opt for a wreath that bursts with autumn berries. Choose a base of grapevine or wire and adorn it with clusters of faux or real berries in shades of red, orange, and burgundy. The berry clusters add a touch of natural beauty and a pop of color.
To create a Berry Burst wreath, follow these steps to bring vibrant color and natural beauty to your fall decor:
Materials Needed:
- Grapevine or wire wreath base
- Faux or real berry clusters in shades of red, orange, and burgundy (cranberries, holly berries, or other autumn-inspired berries)
- Faux fall leaves in coordinating colors (optional)
- Floral wire and hot glue gun
- Twine or burlap ribbon for hanging
Instructions:
1.Prepare the Base:
Start with a grapevine wreath base for a rustic, natural look, or choose a wire wreath for a minimalist foundation.
2.Attach Berry Clusters:
Begin by clustering the faux or real berries in small bunches. Secure them to the wreath with floral wire or hot glue, starting at one point and gradually working around the wreath. For a more organic feel, vary the size and density of the clusters.
3.Incorporate Optional Leaves:
To enhance the natural autumn theme, tuck in a few faux fall leaves in between the berry clusters. Use shades that complement the berries, such as deep oranges and burgundies, for a rich look.
4.Create a Burst Effect:
Focus on making the berries appear as if they are bursting from the wreath. Let some berries extend slightly beyond the edges to create movement and dimension.
5.Final Touch:
If desired, finish the wreath with a simple twine or burlap ribbon for hanging, allowing the berries to remain the star of the design.
This Berry Burst wreath brings a vibrant pop of autumn color to your home, offering a fresh and natural touch that celebrates the beauty of the season.
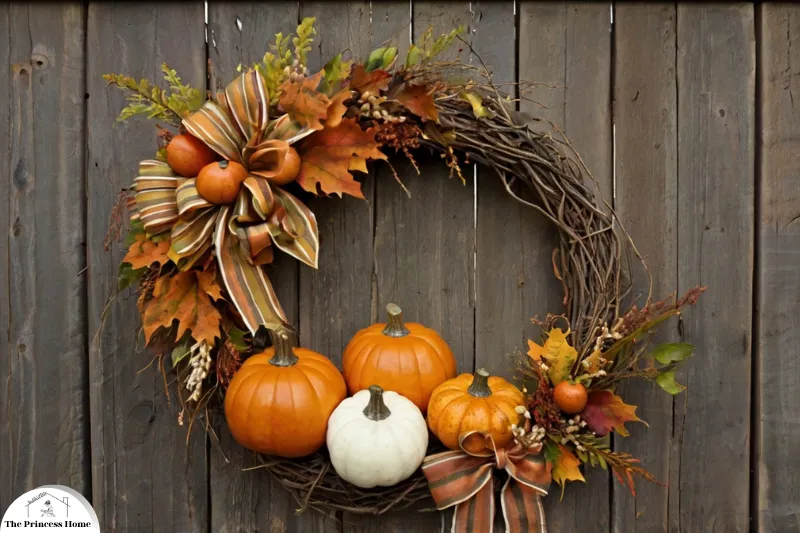
7. Pumpkin Patch Delight
Create a wreath that showcases the charm of a pumpkin patch. Use a base of grapevine and decorate it with a variety of faux pumpkins in different sizes and colors. Add some fall leaves and a rustic ribbon for a wreath that celebrates the quintessential symbol of fall.
To craft a Pumpkin Patch Delight wreath that embodies the charm of a fall pumpkin patch, follow these easy steps:
Materials Needed:
- Grapevine wreath base
- Faux pumpkins in various sizes and colors (white, orange, green, etc.)
- Faux fall leaves in autumn hues (reds, oranges, yellows)
- Rustic ribbon (burlap, plaid, or twine)
- Hot glue gun and floral wire
Instructions:
1.Prepare the Base:
Start with a grapevine wreath to give your design a natural, rustic look that complements the pumpkin patch theme.
2.Attach the Pumpkins:
Begin by positioning the larger faux pumpkins around the wreath base. Secure them using hot glue or floral wire. Add smaller pumpkins between the larger ones to create variety and dimension. Use pumpkins in different colors—like white, orange, and green—to mimic the diversity of a real pumpkin patch.
3.Add Fall Leaves:
Tuck faux fall leaves between the pumpkins, allowing them to peek out naturally. Layer the leaves in clusters to create fullness and movement. Use shades like deep reds, oranges, and yellows for a vibrant autumn feel.
4.Incorporate a Rustic Ribbon:
Tie a rustic ribbon, such as burlap or plaid, into a large bow and attach it to the wreath for a charming, country-inspired finish. You can place the bow at the bottom or off to the side for a playful look.
5.Final Touches:
If desired, add small details like faux acorns, pinecones, or dried wheat stalks to enhance the natural, bountiful theme of the pumpkin patch.
This Pumpkin Patch Delight wreath celebrates the essence of fall with its colorful pumpkins and rustic elements, creating a warm and welcoming decoration for your home.
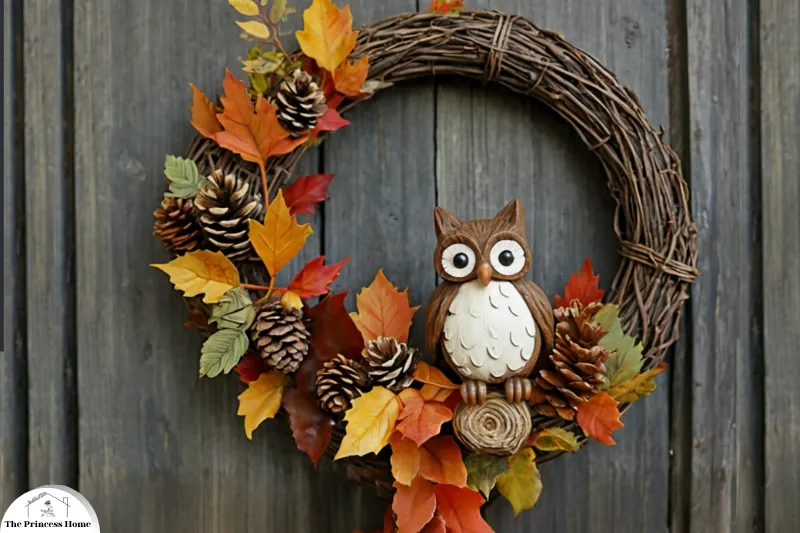
8. Woodland Creature Charm
Incorporate adorable woodland creatures like owls or squirrels into your fall wreath. Use a base of grapevine or twig and add figurines along with faux leaves, acorns, and pinecones. This whimsical design adds a touch of nature to your decor.
To create a Woodland Creature Charm wreath, follow these steps for a whimsical design that adds nature-inspired charm to your fall decor:
Materials Needed:
- Grapevine or twig wreath base
- Small woodland creature figurines (such as owls, squirrels, or foxes)
- Faux fall leaves in warm autumn tones
- Acorns and pinecones (real or faux)
- Moss or small twigs for a natural texture
- Floral wire and hot glue gun
- Twine or burlap ribbon for hanging
Instructions:
1.Prepare the Base:
Use a grapevine or twig wreath as your foundation to create an organic, forest-like look. These natural materials provide the perfect backdrop for a woodland theme.
2.Place Woodland Creature Figurines:
Choose small, adorable figurines of woodland creatures like owls, squirrels, or even foxes. Position them strategically on the wreath, perhaps perching an owl on the top or tucking a squirrel into the side. Secure them with hot glue.
3.Add Faux Leaves:
Tuck faux fall leaves around the wreath, framing the figurines and giving the design an autumnal feel. Use a variety of reds, oranges, and yellows to mimic the changing fall foliage.
4.Incorporate Acorns and Pinecones:
Scatter small clusters of acorns and pinecones throughout the wreath for added texture and a nod to the woodland theme. Use hot glue to attach them, placing them near the woodland creatures to create a cohesive look.
5.Enhance with Moss and Twigs:
Add bits of moss or small twigs to the wreath for extra texture and to enhance the forest-like feel. These elements help ground the design in nature and give it an authentic woodland charm.
6.Final Touch:
Finish the wreath with a simple twine or burlap ribbon for hanging, keeping the overall look rustic and natural.
This Woodland Creature Charm wreath brings the playful, enchanting world of the forest to your home, combining the cuteness of woodland animals with the warm colors and textures of fall.
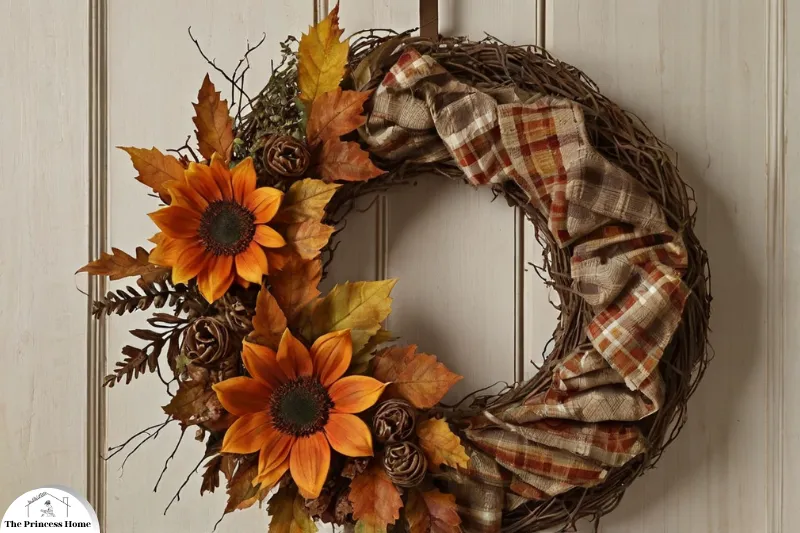
9. Plaid Perfection
Embrace the cozy feel of fall with a plaid-themed wreath. Choose a base of grapevine or burlap and add plaid fabric strips, bows, and accents. This design brings a touch of warmth and classic style to your entryway.
To create a Plaid Perfection wreath that embodies the warmth and coziness of fall, follow these simple steps for a classic and inviting design:
Materials Needed:
- Grapevine or burlap wreath base
- Plaid fabric in fall colors (reds, oranges, browns, or greens)
- Plaid ribbons for bows (coordinate with fabric)
- Faux fall leaves, acorns, or small pumpkins (optional)
- Hot glue gun and floral wire
Instructions:
1.Prepare the Base:
Begin with a grapevine or burlap wreath base to establish a rustic and cozy foundation. The natural textures of these materials complement the plaid theme perfectly.
2.Add Plaid Fabric Strips:
Cut plaid fabric into strips about 1-2 inches wide. Weave or wrap the strips around the wreath base, securing them with hot glue or tying them in place. You can wrap the entire wreath or just sections to allow the base to show through.
3.Create Plaid Bows:
Use plaid ribbons to create large, fluffy bows. Tie one or two and attach them to the top or bottom of the wreath for a bold, classic plaid statement. Secure them with floral wire or hot glue.
4.Incorporate Optional Fall Accents:
To enhance the fall theme, tuck in faux fall leaves, acorns, or small pumpkins around the wreath, placing them near the plaid bows or fabric strips. This adds a seasonal touch without overshadowing the plaid design.
5.Final Touch:
If you like, add a few smaller plaid accents, like mini bows or fabric ties, around the wreath to balance the design. A small strip of plaid fabric or ribbon can also be used as a hanger for the wreath, adding to the cohesive look.
This Plaid Perfection wreath combines the timeless charm of plaid with the warm textures of fall, making it a perfect addition to your entryway for the season.

10. Falling Leaves
Celebrate the beauty of falling leaves with a wreath made entirely of faux or real autumn leaves. Arrange the leaves in a layered, cascading fashion for a dynamic and eye-catching wreath that captures the essence of the season.
To create a Falling Leaves wreath that beautifully captures the essence of autumn, follow these steps to design a vibrant and dynamic wreath:
Materials Needed:
- Grapevine or wire wreath base
- Faux or real autumn leaves in a variety of colors (reds, oranges, yellows, browns)
- Hot glue gun and floral wire
- Optional: Small twigs, acorns, or berries for added texture
Instructions:
1.Prepare the Base:
Start with a grapevine or wire wreath base to provide a natural, unobtrusive background that allows the leaves to take center stage.
2.Layer the Leaves:
Begin by attaching the largest faux or real leaves to the wreath base. Use hot glue or floral wire to secure them, starting from one point and working your way around the wreath. Arrange the leaves so they overlap slightly, mimicking the natural look of falling leaves.
3.Create a Cascading Effect:
To capture the movement of falling leaves, position some leaves so they extend beyond the wreath’s edges in a flowing, downward pattern. Let them “fall” naturally, layering smaller leaves along the outer and lower parts of the wreath to emphasize the cascading effect.
4.Add Variety in Color and Texture:
Use a mixture of colors—rich reds, golden yellows, warm oranges, and deep browns—to add depth and interest. You can also incorporate a few small twigs, acorns, or faux berries for texture and contrast.
5.Final Touch:
For an even more dynamic look, position a few leaves as if they are gently floating off the wreath. Use floral wire to extend them slightly beyond the base to give the illusion of movement.
This Falling Leaves wreath is a stunning celebration of autumn’s natural beauty, with its layered and cascading design capturing the magic of falling leaves throughout the season.
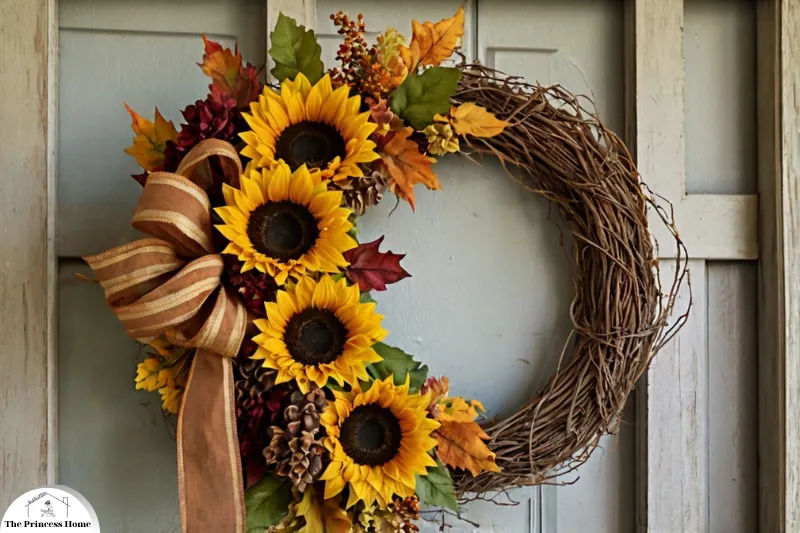
11. Sunflower Splendor
Brighten up your fall decor with a wreath featuring vibrant sunflowers. Use a base of grapevine and add clusters of faux sunflowers, along with some fall leaves and a rustic bow. This wreath adds a cheerful and sunny touch to your home.
To create a Sunflower Splendor wreath that brings cheerful and sunny vibes to your fall decor, follow these steps:
Materials Needed:
- Grapevine wreath base
- Faux sunflowers in various sizes
- Faux fall leaves in complementary colors (reds, oranges, yellows)
- Rustic ribbon or burlap for a bow
- Hot glue gun and floral wire
Instructions:
1.Prepare the Base:
Start with a grapevine wreath for a natural and rustic foundation that complements the vibrant sunflowers.
2.Attach the Sunflowers:
Begin by positioning the largest faux sunflowers around the wreath base. Secure them with hot glue or floral wire, placing them evenly for balance. Allow the sunflowers to be the focal point by placing them strategically around the wreath.
3.Add Fall Leaves:
Tuck faux fall leaves around the sunflowers to add depth and color contrast. Arrange the leaves in clusters or scattered around the sunflowers to complement their bright hues.
4.Create a Rustic Bow:
Use burlap or a rustic ribbon to tie a large bow. Attach the bow to the bottom or top of the wreath, or off to one side, to add a finishing touch of country charm.
5.Final Touch:
For added texture and visual interest, you can also incorporate a few small faux pumpkins or acorns among the sunflowers and leaves. Ensure everything is securely glued or wired in place.
This Sunflower Splendor wreath captures the joyful spirit of fall with its bright and cheerful sunflowers, making it a delightful addition to your home decor.
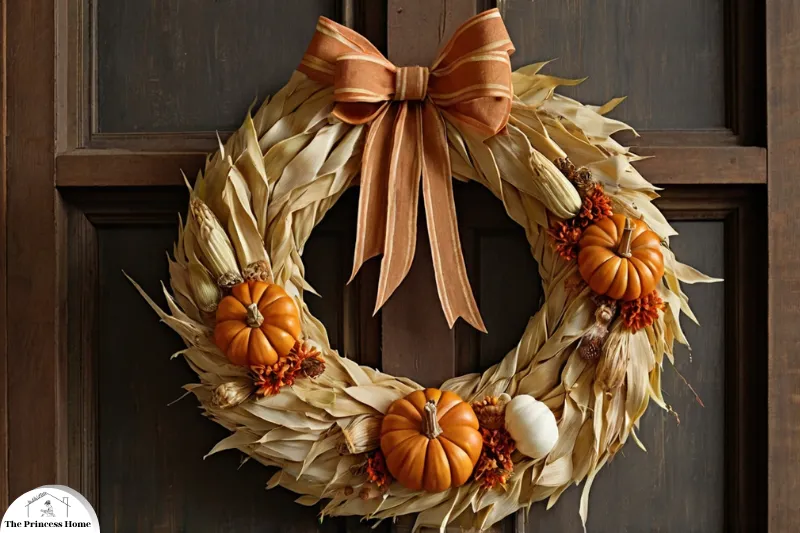
12. Corn Husk Elegance
Create a wreath with an elegant, rustic touch using corn husks. Form the husks into a wreath shape and embellish with small pumpkins, dried flowers, and a burlap bow. This design brings a farm-fresh feel to your fall decor.
To craft a Corn Husk Elegance wreath that combines rustic charm with elegant touches, follow these steps:
Materials Needed:
- Corn husks (dried or artificial)
- Grapevine or wire wreath base
- Small faux pumpkins
- Dried flowers (such as wheat, lavender, or straw flowers)
- Burlap ribbon for a bow
- Hot glue gun and floral wire
Instructions:
1.Prepare the Base:
Start with a grapevine or wire wreath base to provide a sturdy structure. If using a wire base, wrap it with floral tape or burlap to create a surface for attaching the corn husks.
2.Form the Corn Husk Shape:
Soak the corn husks in water for a few minutes to make them pliable if they are dried. Arrange the husks around the wreath base, overlapping them to form a layered look. Secure each husk with hot glue or floral wire, making sure to cover the base evenly.
3.Add Small Pumpkins:
Place small faux pumpkins around the wreath, tucking them into the layers of corn husks. Secure them with hot glue to ensure they stay in place.
4.Incorporate Dried Flowers:
Add dried flowers like wheat, lavender, or straw flowers among the corn husks and pumpkins. Arrange them in clusters or scattered around the wreath to enhance the rustic and farm-fresh feel.
5.Create a Burlap Bow:
Use burlap ribbon to tie a large bow. Attach the bow to the top or bottom of the wreath for a touch of rustic elegance. You can also add a few loops of burlap ribbon around the wreath for extra texture.
6.Final Touch:
Check the wreath to ensure all elements are securely attached and make any final adjustments to the arrangement of the corn husks, pumpkins, and flowers.
This Corn Husk Elegance wreath brings a sophisticated yet rustic charm to your fall decor, celebrating the harvest season with its natural textures and warm tones.
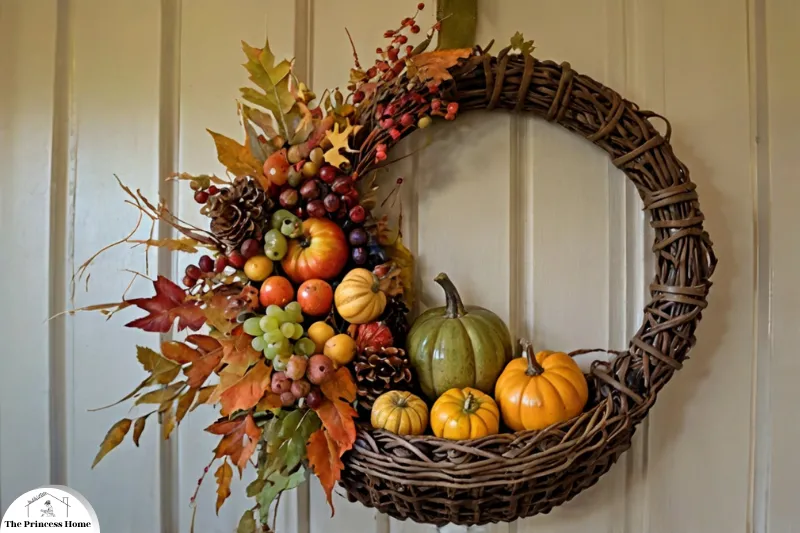
13. Harvest Basket Wreath
Incorporate the charm of a harvest basket into your wreath. Use a base of grapevine and add small woven baskets filled with faux fruits, vegetables, and fall leaves. This wreath celebrates the bounty of the season in a stylish and unique way.
To create a Harvest Basket Wreath that captures the essence of autumn’s bounty, follow these steps to design a stylish and unique decoration:
Materials Needed:
- Grapevine wreath base
- Small woven baskets (miniature or decorative)
- Faux fruits (apples, pears, grapes)
- Faux vegetables (corn, gourds, squash)
- Faux fall leaves in various colors (reds, oranges, yellows)
- Hot glue gun and floral wire
Instructions:
1.Prepare the Base:
Start with a grapevine wreath as your base. Its natural texture will complement the harvest basket theme.
2.Attach the Baskets:
Secure the small woven baskets to the wreath base. Arrange them evenly around the wreath or cluster them together. Use hot glue or floral wire to firmly attach each basket.
3.Fill the Baskets:
Fill each basket with faux fruits and vegetables. Arrange them so that they are visible and create a balanced look. For a natural appearance, vary the sizes and colors of the items.
4.Add Fall Leaves:
Tuck faux fall leaves around the baskets and between the fruits and vegetables. This adds color contrast and enhances the harvest theme. You can also drape some leaves over the edges of the baskets for a more integrated look.
5.Secure Everything:
Ensure all items are securely attached with hot glue or floral wire. Adjust the placement of the fruits, vegetables, and leaves to achieve a cohesive and visually appealing arrangement.
6.Final Touch:
If desired, you can add a ribbon or bow to the wreath for a finishing touch. A rustic or plaid ribbon would complement the harvest theme well.
This Harvest Basket Wreath celebrates the season’s bounty with its charming woven baskets and vibrant faux produce, making it a standout piece for your fall decor.
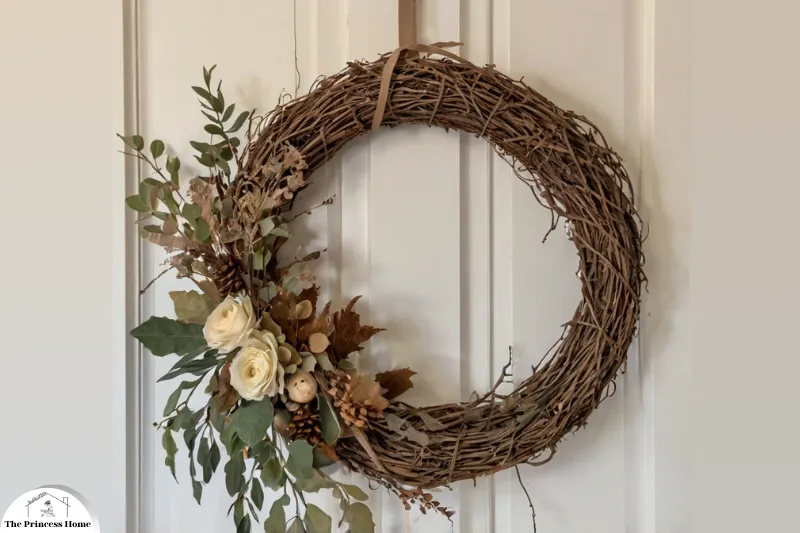
14. Neutral and Natural
For a sophisticated look, opt for a wreath in neutral tones. Use a base of grapevine and add natural elements like dried flowers, eucalyptus, and pinecones in shades of beige, brown, and cream. This minimalist design adds a touch of elegance to your entryway.
To create a Neutral and Natural wreath that embodies sophistication with a minimalist design, follow these steps:
Materials Needed:
- Grapevine wreath base
- Dried flowers (e.g., pampas grass, lavender, baby’s breath)
- Eucalyptus leaves (dried or faux)
- Pinecones (real or faux)
- Natural twine or ribbon in neutral tones (beige, cream, or brown)
- Hot glue gun and floral wire
Instructions:
1.Prepare the Base:
Begin with a grapevine wreath base. Its natural texture provides a perfect backdrop for a neutral and elegant design.
2.Attach Dried Flowers:
Arrange dried flowers like pampas grass, lavender, and baby’s breath around the wreath. Secure them with hot glue or floral wire. Create a balanced look by varying the placement and density of the flowers.
3.Incorporate Eucalyptus:
Add eucalyptus leaves to the wreath. Tuck them in among the dried flowers, layering them to create depth and texture. Eucalyptus adds a touch of greenery and complements the neutral tones.
4.Add Pinecones:
Place pinecones around the wreath, filling in any gaps and adding visual interest. Secure them with hot glue or floral wire. Arrange them so they are evenly distributed but not overwhelming.
5.Secure Everything:
Ensure all elements are securely attached. Adjust the placement of the flowers, eucalyptus, and pinecones to achieve a harmonious and elegant look.
6.Finish with Twine or Ribbon:
Use natural twine or a neutral-toned ribbon to create a simple bow or hanger. Attach it to the top of the wreath or use it to wrap around the base for a polished finish.
This Neutral and Natural wreath offers a sophisticated and minimalist touch, with its blend of dried flowers, eucalyptus, and pinecones in serene shades. It provides an elegant welcome to your entryway, embodying the quiet beauty of nature.
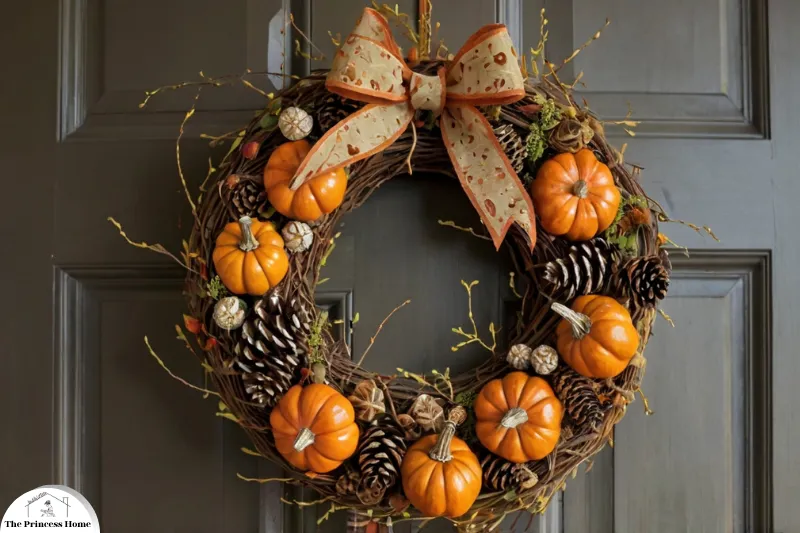
15. Pumpkin and Pinecone Fusion
Combine the cozy elements of pumpkins and pinecones for a stylish wreath. Use a base of grapevine and add faux pumpkins and pinecones, along with fall leaves and a ribbon. This wreath captures the essence of autumn in a charming and cohesive design.
To create a Pumpkin and Pinecone Fusion wreath that combines cozy autumn elements in a stylish and cohesive design, follow these steps:
Materials Needed:
- Grapevine wreath base
- Faux pumpkins in various sizes
- Pinecones (real or faux)
- Faux fall leaves (reds, oranges, yellows)
- Ribbon (such as plaid, burlap, or a rich autumn color)
- Hot glue gun and floral wire
Instructions:
1.Prepare the Base:
Start with a grapevine wreath base, which provides a rustic and natural backdrop for the cozy elements of pumpkins and pinecones.
2.Arrange the Pumpkins:
Position faux pumpkins around the wreath. You can use different sizes and colors to create visual interest. Secure them in place with hot glue or floral wire, making sure they are evenly distributed.
3.Add Pinecones:
Place pinecones around the wreath, tucking them between the pumpkins and around the edges. This adds texture and complements the warm autumn theme. Secure them with hot glue.
4.Incorporate Fall Leaves:
Tuck faux fall leaves around the pumpkins and pinecones. Arrange them to add color contrast and enhance the autumnal feel. Layer the leaves for a more natural look.
5.Create a Ribbon Bow:
Use a ribbon in a complementary color or pattern to create a bow. Attach the bow to the top or bottom of the wreath, or off to one side, for a stylish finishing touch.
6.Secure Everything:
Make sure all elements are securely attached. Adjust the placement of pumpkins, pinecones, and leaves to achieve a balanced and cohesive design.
This Pumpkin and Pinecone Fusion wreath beautifully captures the essence of autumn with its charming combination of pumpkins, pinecones, and fall leaves. It adds a warm and inviting touch to your home decor, perfect for celebrating the season.

16. Crisp Apple Wreath
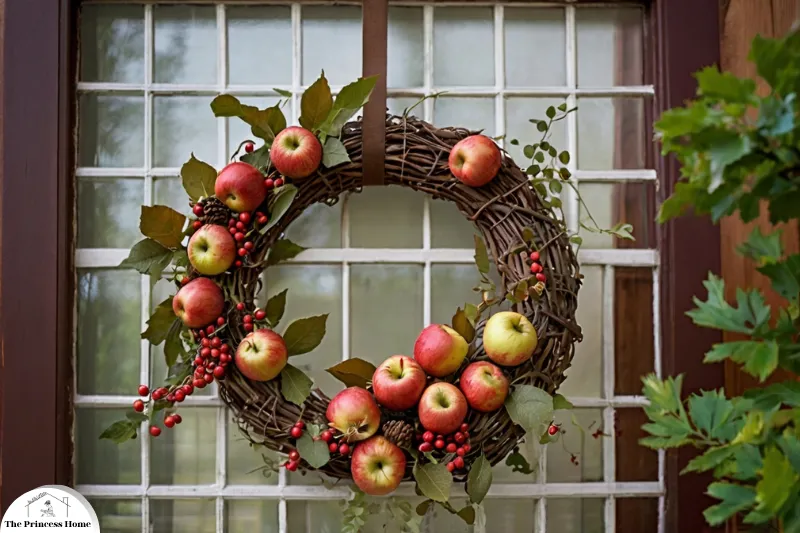
Celebrate the apple harvest with a wreath featuring faux or dried apples. Use a base of grapevine and add clusters of faux apples, cinnamon sticks, and fall leaves. This wreath adds a sweet and seasonal touch to your home.
To create a Crisp Apple Wreath that celebrates the apple harvest with a sweet and seasonal touch, follow these steps:
Materials Needed:
- Grapevine wreath base
- Faux or dried apples (various sizes)
- Cinnamon sticks (real or faux)
- Faux fall leaves (reds, oranges, yellows)
- Hot glue gun and floral wire
- Optional: Small burlap ribbon or twine
Instructions:
1.Prepare the Base:
Begin with a grapevine wreath base, which provides a natural and rustic backdrop for the apple-themed design.
2.Attach the Apples:
Arrange clusters of faux or dried apples around the wreath. Secure them with hot glue or floral wire, placing them in a balanced pattern. You can vary the sizes and colors of the apples for a more dynamic look.
3.Add Cinnamon Sticks:
Tuck cinnamon sticks around the apples to add a fragrant and decorative touch. You can group them in small bundles or scatter them around for visual interest. Secure them with hot glue.
4.Incorporate Fall Leaves:
Place faux fall leaves around the apples and cinnamon sticks. Arrange them to add color contrast and enhance the seasonal feel. Layer the leaves to mimic the natural look of autumn foliage.
5.Secure Everything:
Ensure that all elements are securely attached. Adjust the placement of the apples, cinnamon sticks, and leaves to achieve a balanced and cohesive design.
6.Finish with Optional Touches:
For an extra touch of charm, you can add a small burlap ribbon or twine as a hanger or to create a simple bow. Attach it to the top of the wreath.
This Crisp Apple Wreath captures the essence of the apple harvest with its clusters of apples, cinnamon sticks, and fall leaves. It adds a sweet and seasonal touch to your home, celebrating the flavors and colors of autumn.
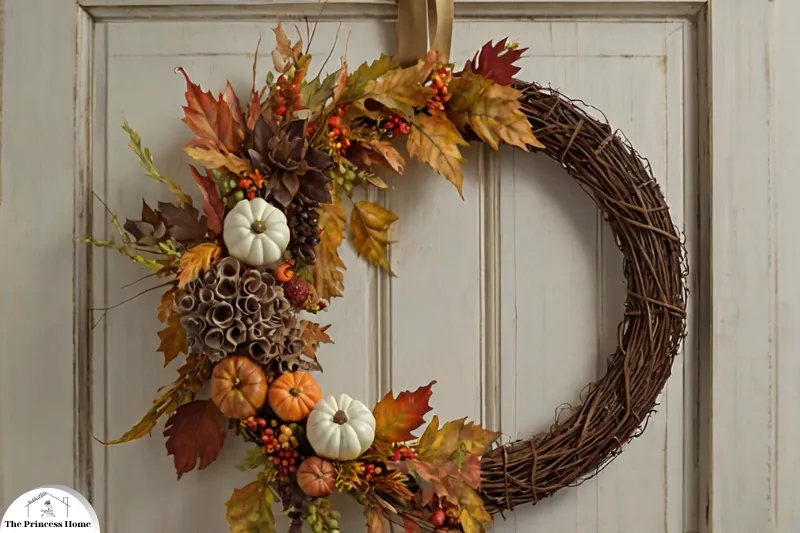
17. Harvest Moon Glow
Incorporate a touch of whimsy with a harvest moon-themed wreath. Use a base of grapevine and add a faux moon element along with fall leaves, stars, and a ribbon. This wreath adds a magical touch to your fall decor.
To create a Harvest Moon Glow wreath that adds a magical and whimsical touch to your fall decor, follow these steps:
Materials Needed:
- Grapevine wreath base
- Faux moon element (moon-shaped decoration or painted craft foam)
- Faux fall leaves (reds, oranges, yellows)
- Star decorations (e.g., glittery stars, star-shaped cutouts)
- Ribbon (such as satin, burlap, or a complementary autumn color)
- Hot glue gun and floral wire
Instructions:
1.Prepare the Base:
Start with a grapevine wreath base, which provides a natural and rustic foundation for your whimsical design.
2.Attach the Faux Moon:
Secure the faux moon element to the wreath. Position it prominently, either at the top or side of the wreath, using hot glue or floral wire. Ensure it is well-secured and balanced within the design.
3.Add Fall Leaves:
Arrange faux fall leaves around the moon element, tucking them in between the branches of the grapevine. Layer the leaves to create a full and textured look. Secure them with hot glue.
4.Incorporate Stars:
Place star decorations around the wreath, scattered among the fall leaves or near the moon. You can use glittery stars or star-shaped cutouts to add a magical touch. Attach them with hot glue.
5.Create a Ribbon Bow:
Use a ribbon in a complementary color to tie a large bow. Attach the bow to the bottom or top of the wreath, or off to one side, to add a finishing touch.
6.Secure Everything:
Ensure all elements are securely attached. Adjust the placement of the moon, leaves, stars, and ribbon to achieve a harmonious and whimsical design.
7.Final Touch:
For added sparkle, consider lightly spraying the stars or the moon with a shimmer spray to enhance their glow.
This Harvest Moon Glow wreath blends the beauty of fall with a touch of whimsy, featuring a faux moon, fall leaves, and star decorations. It adds a magical and enchanting element to your fall decor, perfect for welcoming the season.

18. Gourd and Squash Delight
Celebrate the variety of fall gourds and squashes with a wreath featuring a mix of these elements. Use a base of grapevine and add faux gourds, squashes, and fall foliage. This wreath reflects the richness of the harvest season.
To create a Gourd and Squash Delight wreath that celebrates the richness of the fall harvest, follow these steps:
Materials Needed:
- Grapevine wreath base
- Faux gourds and squashes (various shapes and sizes)
- Faux fall foliage (leaves in reds, oranges, yellows)
- Small pumpkins (optional for added variety)
- Hot glue gun and floral wire
Instructions:
1.Prepare the Base:
Begin with a grapevine wreath base. Its natural texture will complement the fall elements.
2.Attach the Gourds and Squashes:
Position faux gourds and squashes around the wreath. Arrange them in clusters or spread them out for balance. Secure them with hot glue or floral wire, ensuring they are firmly attached.
3.Add Fall Foliage:
Tuck faux fall foliage around the gourds and squashes. Arrange the leaves to fill in gaps and enhance the autumnal theme. Layer the leaves for a fuller look and secure them with hot glue.
4.Incorporate Pumpkins (Optional):
If using small pumpkins, place them among the gourds and squashes for added variety. Secure them with hot glue, positioning them to complement the overall arrangement.
5.Secure Everything:
Make sure all elements are securely attached. Adjust the placement of the gourds, squashes, and foliage to create a cohesive and visually appealing design.
6.Finish with Optional Touches:
For added charm, you can add a simple ribbon or bow in an autumn color or pattern. Attach it to the top or bottom of the wreath for a polished finish.
This Gourd and Squash Delight wreath reflects the abundance of the harvest season with its mix of colorful gourds, squashes, and fall foliage. It adds a festive and rich touch to your fall decor.
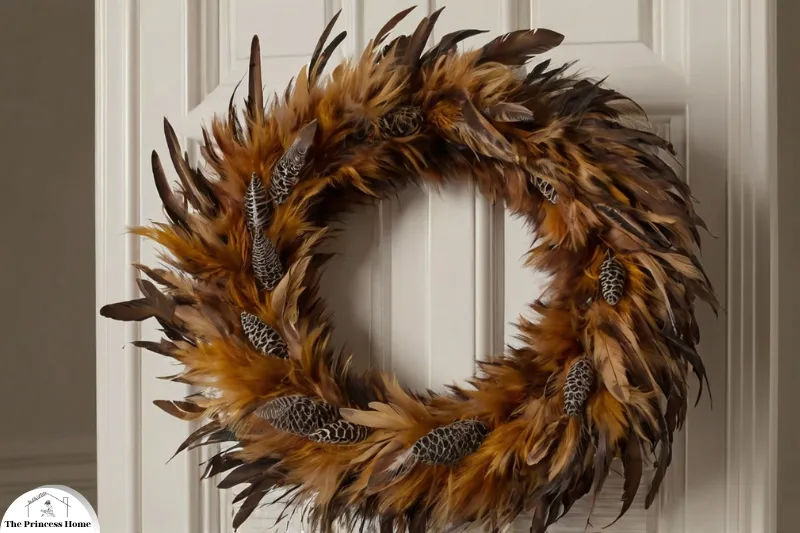
19. Faux Fur and Feathers
For a luxurious touch, create a wreath with faux fur and feathers. Use a base of grapevine and add faux fur accents and feathers in fall colors. This design adds a touch of elegance and warmth to your entryway.
To create a Faux Fur and Feathers wreath that adds a touch of elegance and warmth to your entryway, follow these steps:
Materials Needed:
- Grapevine wreath base
- Faux fur fabric or trim (in neutral or fall colors)
- Feathers (in colors like beige, brown, or rust)
- Hot glue gun and floral wire
- Optional: Metallic accents or small fall decorations for added flair
Instructions:
1.Prepare the Base:
Start with a grapevine wreath base. Its natural texture will provide a rustic backdrop for the luxurious faux fur and feathers.
2.Attach Faux Fur:
Cut faux fur fabric or trim into manageable pieces. Arrange and attach these pieces around the wreath base using hot glue. You can cover the entire wreath or add fur accents in selected areas for a balanced look.
3.Add Feathers:
Position feathers around the wreath, tucking them in among the faux fur. You can create clusters or scatter them for a natural look. Secure the feathers with hot glue, making sure they are well-attached and evenly distributed.
4.Incorporate Optional Accents:
For an extra touch of elegance, you can add small metallic accents (like gold or copper leaves) or subtle fall decorations (such as mini pumpkins or acorns) among the fur and feathers.
5.Secure Everything:
Ensure that all elements are securely attached. Adjust the placement of the faux fur, feathers, and any optional accents to achieve a cohesive and luxurious design.
6.Finish with a Ribbon (Optional):
For a polished finish, consider adding a ribbon in a complementary color or texture. Tie a simple bow and attach it to the top or bottom of the wreath.
This Faux Fur and Feathers wreath combines luxurious textures with fall colors to create an elegant and warm entryway decoration, perfect for welcoming guests with sophistication.
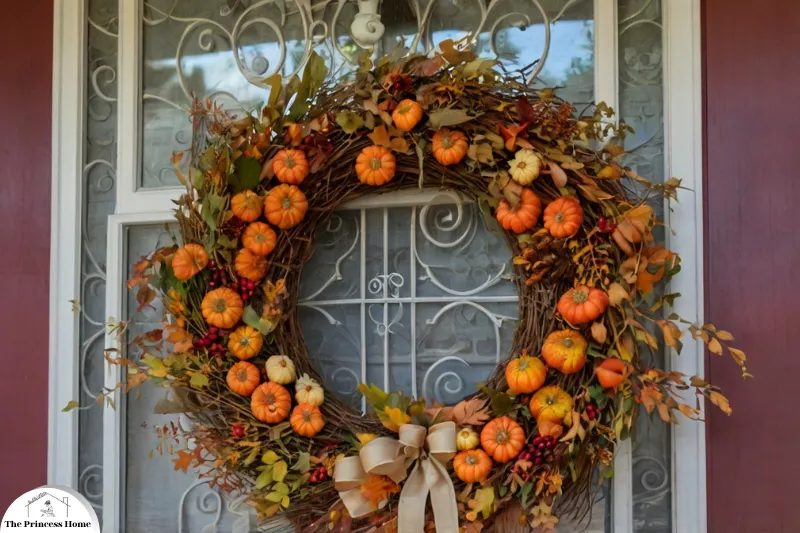
20. Miniature Pumpkin Patch
Design a wreath that mimics a miniature pumpkin patch. Use a base of grapevine and add an assortment of small faux pumpkins, fall leaves, and a burlap bow. This wreath captures the charm of a pumpkin patch in a compact and delightful form.
To create a Miniature Pumpkin Patch wreath that captures the charm of a pumpkin patch in a compact form, follow these steps:
Materials Needed:
- Grapevine wreath base
- Assortment of small faux pumpkins (various sizes and colors)
- Faux fall leaves (reds, oranges, yellows)
- Burlap ribbon (for a bow)
- Hot glue gun and floral wire
Instructions:
1.Prepare the Base:
Start with a grapevine wreath base. Its natural texture will provide a rustic backdrop for the miniature pumpkin patch.
2.Arrange the Pumpkins:
Position the small faux pumpkins around the wreath. Distribute them evenly or cluster them in sections for a more natural look. Secure each pumpkin with hot glue or floral wire.
3.Add Fall Leaves:
Tuck faux fall leaves around the pumpkins, filling in gaps and adding color contrast. Layer the leaves for a fuller look, and secure them with hot glue.
4.Incorporate a Burlap Bow:
Create a bow with burlap ribbon and attach it to the wreath. Position the bow at the bottom or top of the wreath, or off to one side, for a charming and rustic finish.
5.Secure Everything:
Ensure that all elements are securely attached. Adjust the placement of the pumpkins, leaves, and bow to achieve a balanced and cohesive design.
This Miniature Pumpkin Patch wreath beautifully mimics the charm of a pumpkin patch with its assortment of small pumpkins and fall leaves, enhanced by a rustic burlap bow. It’s a delightful and compact way to celebrate the season.
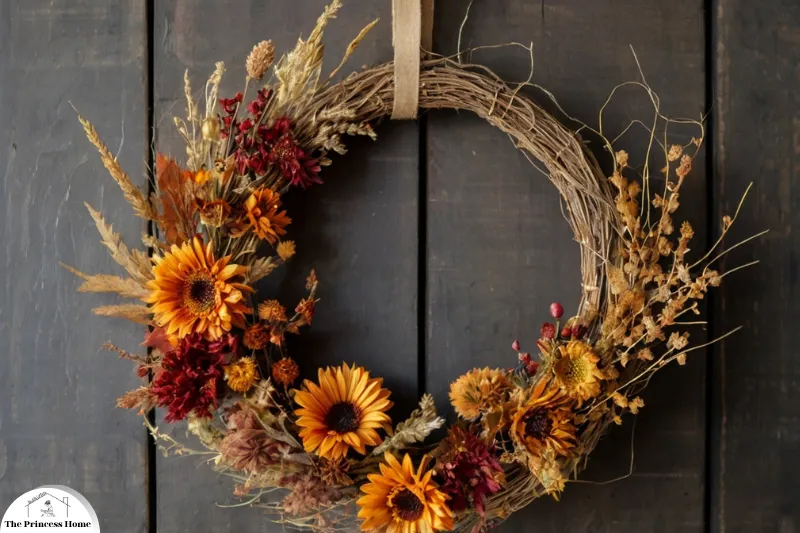
21. Dried Floral Beauty
Incorporate the beauty of dried flowers into your fall wreath. Use a base of grapevine or wire and add an assortment of dried blooms in autumn colors. This design adds a rustic and elegant touch to your fall decor.
To create a Dried Floral Beauty wreath that showcases the elegance of dried flowers, follow these steps:
Materials Needed:
- Grapevine or wire wreath base
- Assortment of dried flowers (e.g., lavender, sunflowers, strawflowers, grasses)
- Dried foliage (e.g., eucalyptus, fern)
- Hot glue gun and floral wire
- Optional: Small dried fruits or berries for added texture
Instructions:
1.Prepare the Base:
Begin with a grapevine or wire wreath base. The natural or metal structure will provide a solid foundation for the dried flowers.
2.Arrange Dried Flowers:
Start placing the dried flowers around the wreath. Arrange them in clusters or evenly distribute them for a balanced look. Secure the flowers with hot glue or floral wire. You can mix different types of dried blooms to add texture and depth.
3.Add Dried Foliage:
Incorporate dried foliage such as eucalyptus or fern to complement the flowers. Tuck the foliage in between the blooms, filling in any gaps and adding a touch of green. Secure with hot glue.
4.Optional Additions:
For added texture, you can include small dried fruits or berries. Arrange them among the flowers and foliage, and secure them with hot glue.
5.Secure Everything:
Ensure all elements are securely attached. Adjust the placement of the flowers and foliage to create a cohesive and elegant design.
6.Finish with a Ribbon (Optional):
For a refined finish, consider adding a ribbon in a complementary color. Tie a simple bow and attach it to the bottom or top of the wreath.
This Dried Floral Beauty wreath celebrates the rustic elegance of dried flowers and foliage, adding a sophisticated and timeless touch to your fall decor.
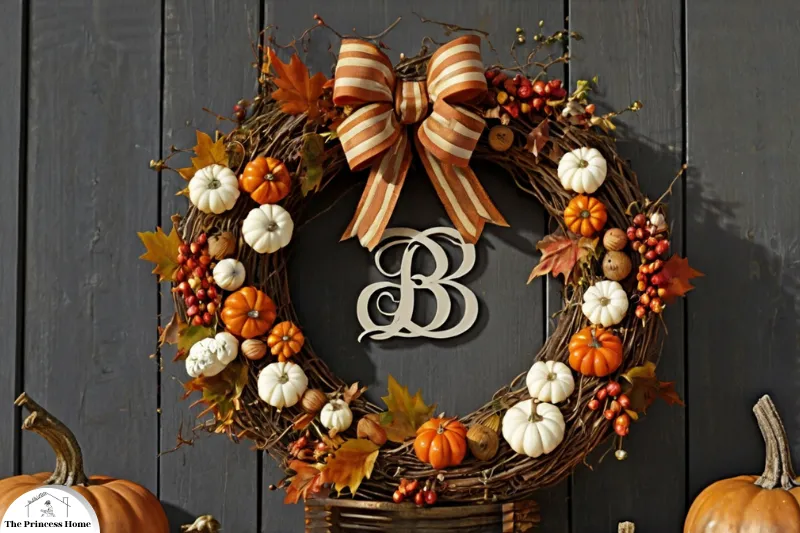
22. DIY Personalized Wreath
Create a wreath that reflects your personal style by incorporating your favorite fall elements. Use a base of grapevine and add items like mini pumpkins, personalized monograms, and a ribbon in your favorite fall colors. This customizable wreath adds a unique and personal touch to your home.
To create a DIY Personalized Wreath that reflects your personal style, follow these steps:
Materials Needed:
- Grapevine wreath base
- Mini pumpkins (various colors and sizes)
- Personalized monogram (wooden, metal, or painted craft foam)
- Ribbon in your favorite fall colors and patterns
- Additional fall elements (e.g., faux leaves, acorns, pinecones)
- Hot glue gun and floral wire
Instructions:
1.Prepare the Base:
Start with a grapevine wreath base. Its natural texture will provide a great foundation for your personalized design.
2.Attach the Monogram:
Position your personalized monogram prominently on the wreath. This could be a family initial, last name, or any custom design. Secure it with hot glue or floral wire, ensuring it is firmly attached.
3.Add Mini Pumpkins:
Arrange mini pumpkins around the wreath. You can distribute them evenly or cluster them in sections. Secure each pumpkin with hot glue or floral wire.
4.Incorporate Additional Fall Elements:
Add other fall elements such as faux leaves, acorns, or pinecones to complement the mini pumpkins. Tuck these items around the monogram and pumpkins, filling in gaps and enhancing the autumnal theme. Secure them with hot glue.
5.Add Ribbon:
Create a bow with your chosen ribbon and attach it to the wreath. Position the bow at the bottom, top, or side of the wreath, depending on your preference. You can use a single ribbon or layer different colors and patterns for added visual interest.
6.Secure Everything:
Ensure all elements are securely attached. Adjust the placement of the monogram, pumpkins, and other decorations to create a balanced and cohesive design.
7.Personalize Further (Optional):
If desired, add small personal touches such as family photos in mini frames or small, meaningful decorations that reflect your style and preferences.
This DIY Personalized Wreath allows you to celebrate the fall season with a unique touch that reflects your personal style. The combination of mini pumpkins, a custom monogram, and your favorite fall colors will create a warm and inviting entryway decoration.
Conclusion
With these 22 fall wreath ideas, you can bring the warmth and beauty of autumn right to your front door. Whether you prefer classic elegance, rustic charm, or whimsical designs, there’s a fall wreath to suit every style and taste. Embrace the season and make your home welcoming and festive with these creative wreath designs.
Here are some frequently asked questions related to the article, “22 Fall Wreath Ideas:
1. What materials do I need to make a fall wreath?
To create a fall wreath, you typically need a wreath base (grapevine, wire, or foam), faux or dried fall leaves, pumpkins, pinecones, acorns, floral wire, glue, and decorative ribbons. You can also add unique elements like dried flowers, berries, or even feathers depending on your chosen style.
2. How long does it take to make a fall wreath?
The time required to make a fall wreath depends on the complexity of the design. A simple wreath with basic elements like leaves and a bow can take about 30 to 45 minutes, while more intricate designs with personalized details may take an hour or longer.
3. Can I make a fall wreath with real leaves and flowers?
Yes, you can use real leaves and flowers for your wreath. However, keep in mind that real leaves may dry out and become brittle over time, which could shorten the lifespan of your wreath. To preserve the wreath longer, consider using faux or dried leaves and flowers.
4. How can I make my fall wreath last longer?
To extend the lifespan of your wreath, store it in a cool, dry place when not in use, especially if it’s made with real materials. For faux wreaths, cleaning off dust and debris and storing them in a wreath storage box or bag can help keep them in good condition year after year.
5. Can I use my fall wreath indoors as well?
Absolutely! While fall wreaths are commonly displayed on front doors, they can also be used indoors to add seasonal decor to a wall, mantel, or even as a centerpiece for your dining table.
6. What size wreath should I choose for my front door?
The size of your wreath depends on the size of your door. For standard-sized front doors (about 36 inches wide), a wreath between 24 and 30 inches in diameter works well. For larger doors, consider using a larger wreath for better proportion.
7. How do I hang a fall wreath without damaging my door?
To avoid damaging your door, use wreath hangers that fit over the top of the door, or adhesive hooks like Command hooks, which are designed to hold weight without leaving marks. Magnetic hooks can also work well if your door is metal.
8. Can I reuse my fall wreath from year to year?
Yes, if your wreath is made of durable materials like faux leaves, pumpkins, and pinecones, it can be reused for several years. Simply store it properly in a cool, dry space when not in use to preserve its appearance.
9. Are there eco-friendly options for making fall wreaths?
Yes! You can create an eco-friendly fall wreath by using natural materials like dried leaves, twigs, pinecones, and flowers. Avoid using plastic or synthetic elements and opt for biodegradable or reusable wreath bases like grapevine or wooden frames.
10. Can I customize a fall wreath for other seasons?
Yes, a fall wreath can easily be customized for other seasons by swapping out fall elements for winter or spring accents. For example, you can replace fall leaves and pumpkins with pinecones, holly, and berries for winter, or with pastel flowers and greenery for spring.
11. Where can I buy supplies for making a fall wreath?
You can find supplies for making a fall wreath at most craft stores, home decor shops, and online retailers. Popular stores include Michaels, Hobby Lobby, Joann Fabrics, and Amazon. Many stores also sell ready-made fall wreath kits.
12. How can I personalize a fall wreath?
To personalize your wreath, add unique elements like monogram initials, family name signs, or even small mementos that hold personal significance. You can also choose colors, flowers, and ribbons that complement your home’s decor or your personal style.
See more fall tips & Ideas
The princess home on Pinterest
