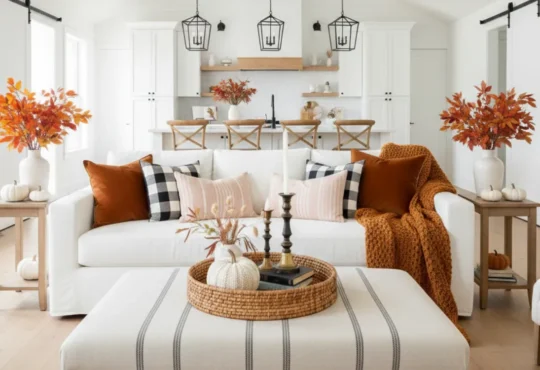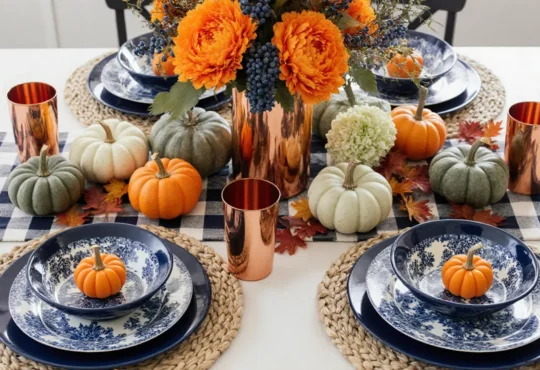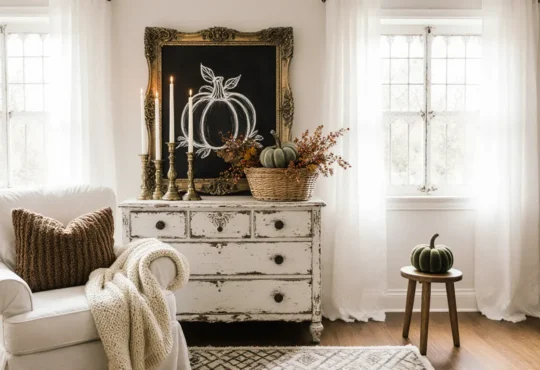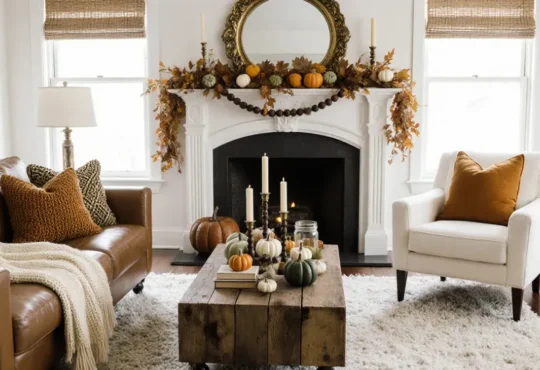
Pumpkin decorating doesn’t have to involve messy carving or sharp tools. With these no carve pumpkin decorating ideas, you can easily create stunning fall displays that match your home’s style—whether it’s cozy farmhouse, modern chic, or whimsical and fun. From painted pumpkins to fabric wraps and glitter accents, these creative ideas make seasonal decorating effortless and enjoyable.
Chic Black & White Striped Pumpkins
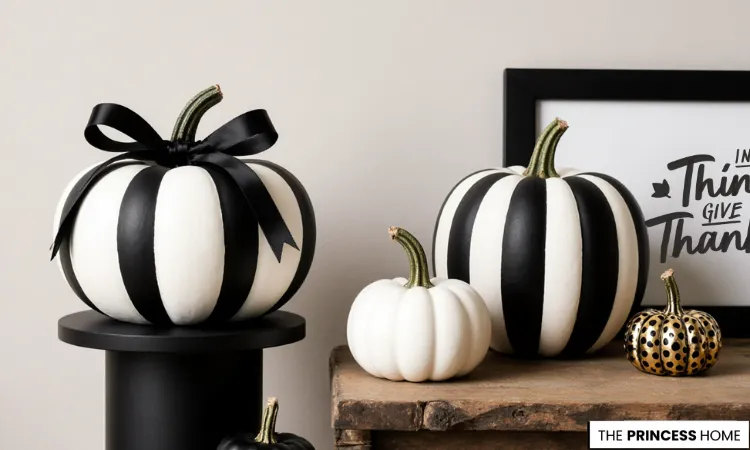
These no-carve pumpkins add a timeless, elegant touch to fall décor. Their classic black-and-white vertical stripes suit modern or minimalist Halloween styles. The set includes two striped pumpkins—one with a sleek satin black bow—plus a small solid white pumpkin and a black-and-gold polka dot accent piece.
To create this chic DIY display, start with a white base coat on a real or faux pumpkin. Use painter’s tape to mark vertical sections. Fill in alternating stripes with black acrylic paint. This simple, eco-friendly method gives a bold, high-contrast look. It’s sophisticated, long-lasting, and completely mess-free.
Polka Dot Painted Pumpkins
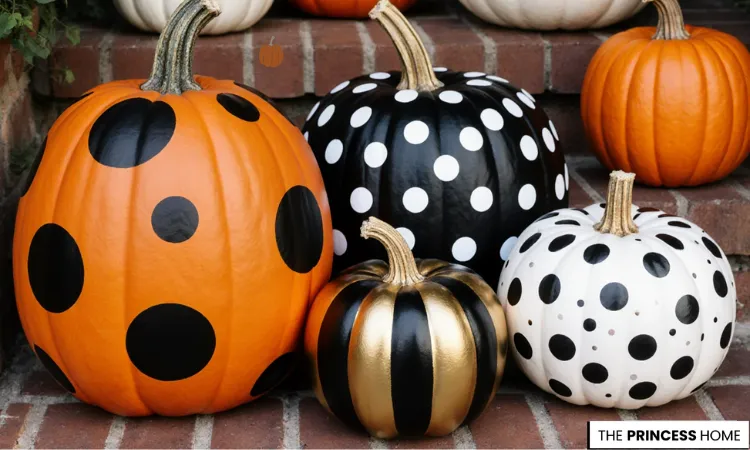
These vibrant no-carve pumpkins add a fun, modern twist to Halloween décor. Bold polka dots create a playful, eye-catching look. The set includes an orange pumpkin with black dots, a black pumpkin with white dots, and a white pumpkin with black dots. A metallic black-and-gold striped pumpkin adds a chic accent.
For an easy DIY display, paint real or faux pumpkins with acrylic paint. Use a sponge brush or vinyl stencil to add the dots. This no-carve method is safe, eco-friendly, and long-lasting. It’s a simple way to boost your front porch with festive fall style.
Elegant Floral Painted Pumpkins
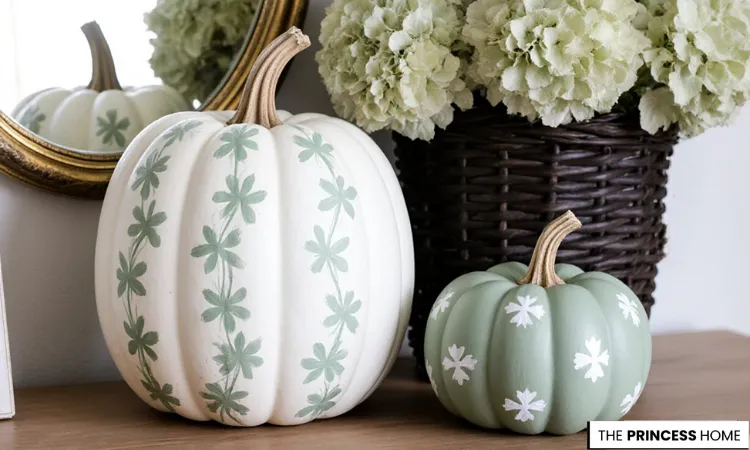
These charming no-carve painted pumpkins bring an elegant and modern touch to fall décor. Instead of carving, they use soft paint details for a lasting, refined look. The large pumpkin is creamy white with a delicate floral design in sage green. The smaller one is painted sage green with tiny white snowflakes or starburst accents.
To make this chic DIY autumn décor, start with a base coat of chalk or acrylic paint on a real or faux pumpkin. Then use a small brush or stencil to add your pattern in a contrasting color. This simple project keeps your pumpkin fresh, eco-friendly, and beautifully stylish all season.
Candy Corn Painted Pumpkins
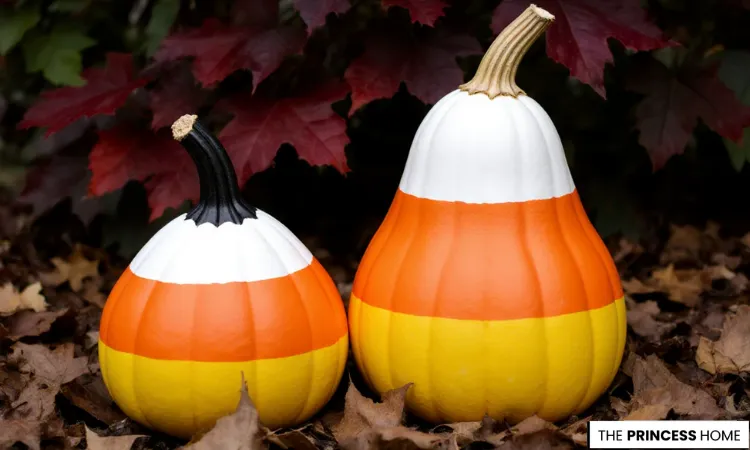
These charming no-carve painted pumpkins are transformed into giant candy corn, adding a festive and creative touch to your Halloween décor. Each pumpkin features the classic color bands — yellow on the bottom, orange in the middle, and white on top. The smaller pumpkin’s black-painted stem adds a bold contrast.
To make this fun DIY fall project, clean your real or faux pumpkin and use painter’s tape to divide it into three sections. Then apply bright yellow, orange, and white acrylic paint. This easy, eco-friendly technique gives your home cheerful autumn curb appeal while keeping the pumpkins intact and long-lasting.
Cozy Fabric Plaid Pumpkins
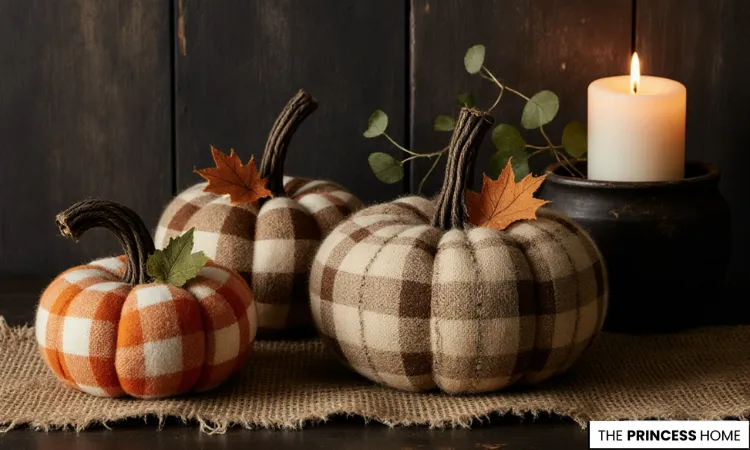
These charming plaid fabric pumpkins bring a cozy, no-carve, and humane touch to farmhouse fall décor. Each pumpkin is wrapped in soft flannel or felt for a warm, rustic look. The set includes one in orange and white gingham and two in brown and cream buffalo check, each topped with a textured stem and a small faux leaf.
To create these durable DIY fall decorations, wrap a foam or Styrofoam pumpkin with your favorite plaid fabric. Secure the edges with hot glue, then attach a real dried stem or a handmade fabric one. This simple project adds long-lasting charm and comfort to your seasonal home décor.
Elegant Black & Gold Pumpkins
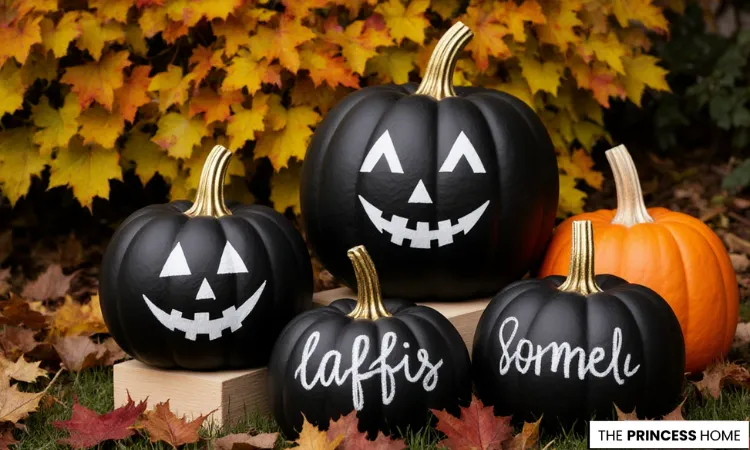
These no-carve pumpkins add a bold, modern touch to fall décor. Painted matte black with shiny gold stems, they are a chic alternative to traditional carving. Two feature classic white jack-o’-lantern faces, while smaller ones show elegant hand-lettering. All stand out beautifully against a vibrant autumn backdrop.
For an easy DIY display, paint real or faux pumpkins black and the stems gold. Add faces or festive words with white paint or a marker. This mess-free method creates a sleek, long-lasting seasonal display perfect for Halloween and beyond.
Vibrant Dripping Paint Pumpkins
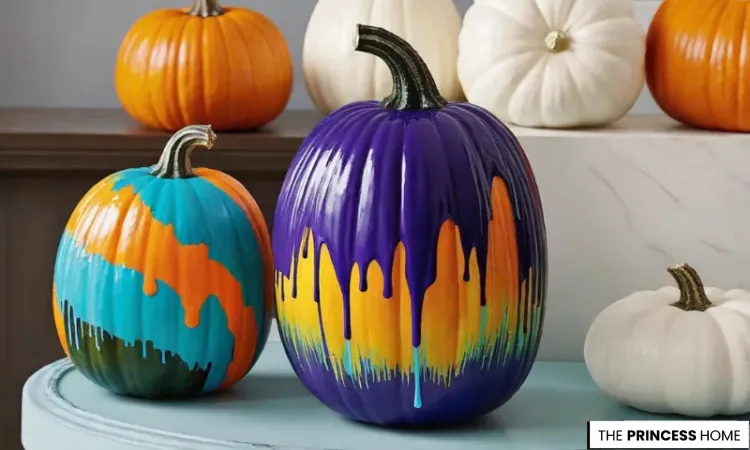
These no-carve painted pumpkins add a modern, artistic twist to fall décor. A humane paint-pour technique creates vibrant, abstract designs. The large pumpkin shows purple dripping over streaks of yellow, orange, and teal. The smaller one features flowing layers of teal and bright orange.
For an easy DIY craft, start with a solid base coat on a real or faux pumpkin. Pour or drizzle two or more contrasting acrylic paints from the top, letting them drip naturally. This eco-friendly, mess-free method makes unique, bold seasonal decorations.
Lace Stenciled Pumpkins
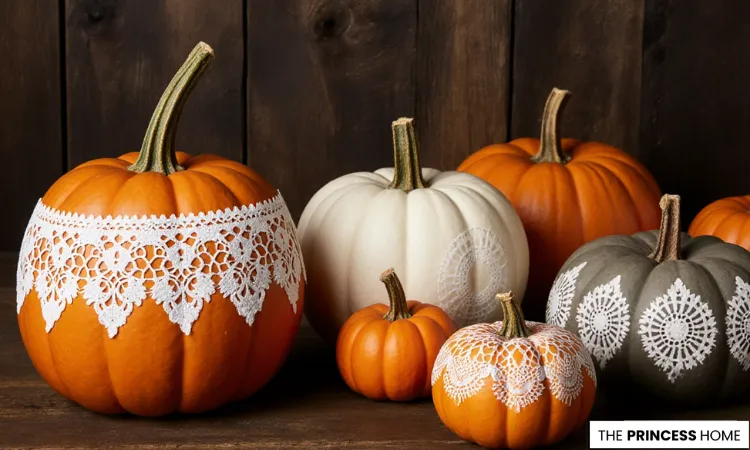
These no-carve pumpkins add bohemian elegance to fall décor. Traditional orange pumpkins are transformed with delicate, lace-inspired white designs. Some have a half-dipped white effect, while others feature intricate mandalas or border stencils.
To recreate this DIY project, secure a lace stencil or paper doily on a real or faux pumpkin. Dab white acrylic paint gently over it, then remove the stencil to reveal the design. This simple, humane method creates long-lasting, mess-free autumn decorations that elevate any seasonal display.
Elegant Damask Floral Pumpkin
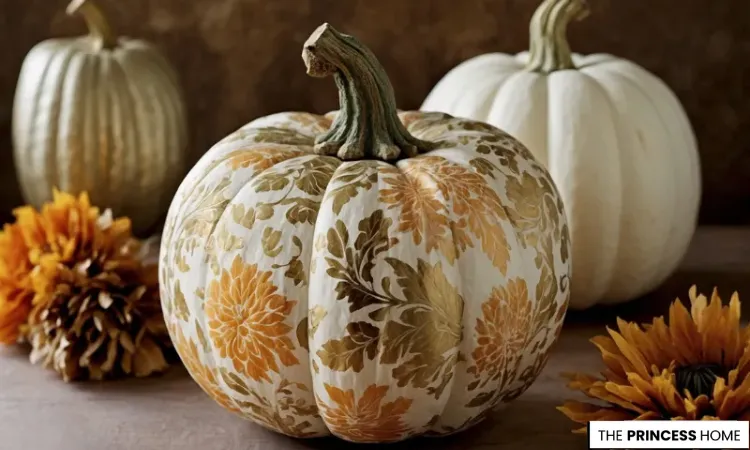
This beautiful features an elegantly decorated pumpkin, perfect for fall and Thanksgiving décor. The central pumpkin showcases a stunning white base adorned with a damask-style floral pattern in rich gold and warm orange tones, offering a sophisticated twist on traditional autumn decorations. Flanked by solid-colored pumpkins, including a metallic gold and a pure white one, this arrangement highlights a luxurious and stylish approach to seasonal home accents.
Black & White Minimalist Pumpkins
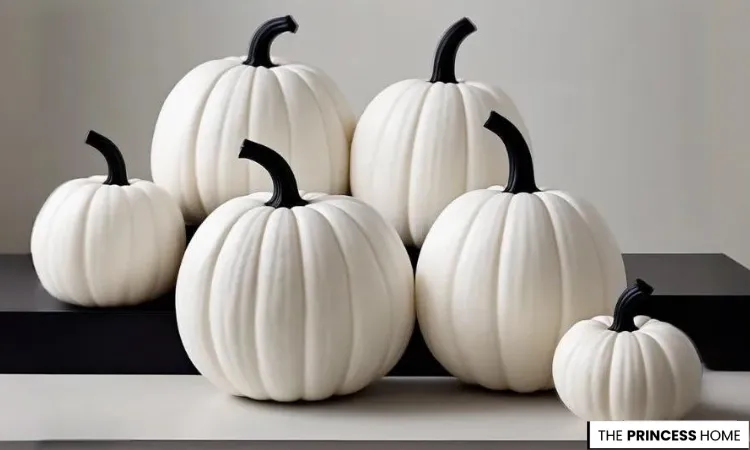
This elegant collection showcases six sleek white pumpkins in varying sizes, each topped with a matte black stem for the perfect touch of contrast. The result is a modern, minimalist look that suits any fall, Halloween, or Thanksgiving décor.
To achieve this simple no-carve design, paint real or faux pumpkins with white acrylic or spray paint, covering them evenly for a smooth finish. Once dry, paint the stems matte black or replace them with painted wooden or faux plastic stems for a polished effect.
Beautiful Pressed Flower Pumpkins
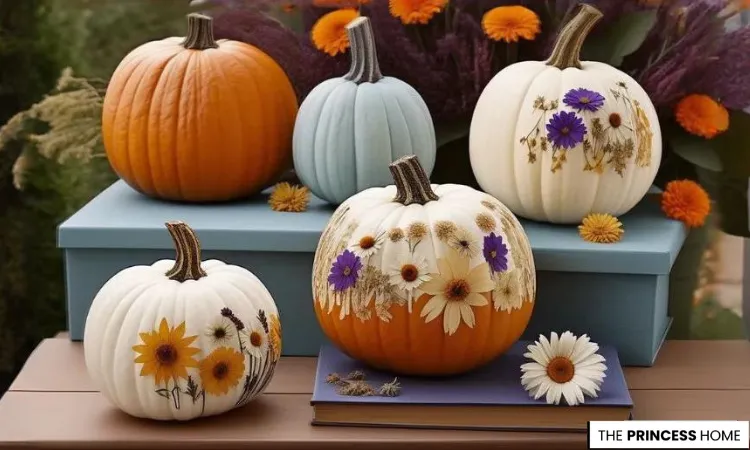
This lovely display features no-carve pumpkins adorned with pressed real or faux flowers, offering a soft, romantic touch perfect for boho or cottage-style fall décor. The combination of natural textures and pastel tones creates a whimsical, artistic autumn display.
To make this simple DIY pressed flower pumpkin, start by painting your real or faux pumpkins in gentle shades like white, cream, or pale blue. Once dry, use Mod Podge or clear-drying glue to carefully attach dried flowers—such as daisies, lavender, or small purple blooms—across the surface. Seal with a thin top coat for protection and shine.
Rustic Burlap & Yarn Pumpkins
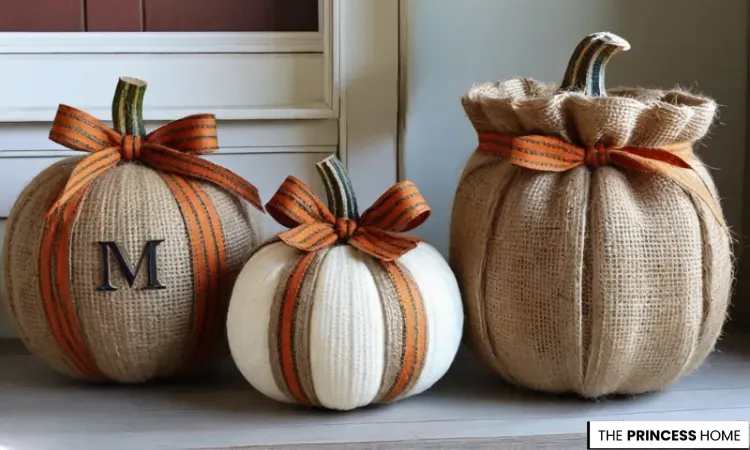
These charming no-carve pumpkins bring cozy farmhouse style to your fall décor with their rustic burlap and yarn wrapping. Two pumpkins are covered in natural burlap and accented with vertical orange-striped ribbons, while one features a black monogram “M” for a personalized touch. The soft textures and earthy tones create a warm, handcrafted look perfect for rustic autumn displays.
To make this simple DIY project, wrap foam or Styrofoam pumpkins with burlap or chunky yarn and secure with hot glue. Add vertical ribbons, tie a bow, and finish with an artificial or real stem. This easy, eco-friendly craft delivers a durable, mess-free seasonal accent that’s full of charm and character.
Rich Velvet Fabrics Touch
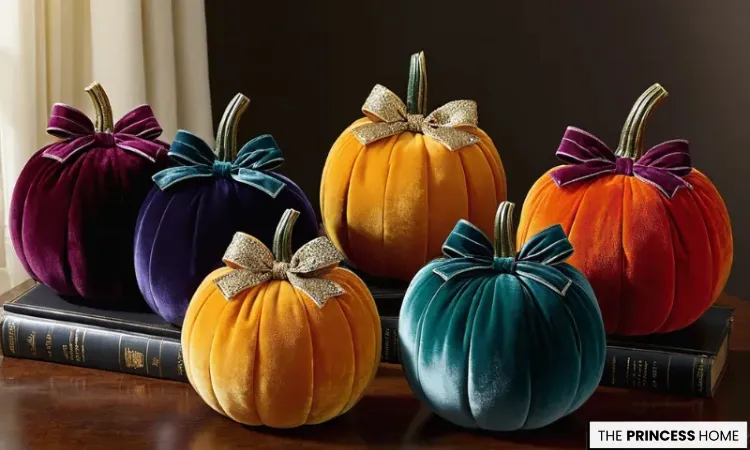
To add a touch of luxury and indulgence, wrap artificial pumpkins in rich velvet fabrics featuring opulent jewel tones. Secure the velvet carefully and finish each pumpkin with velvet or glittering bows to complete the elegant winter look. These handmade pieces create sophisticated fall and winter décor, highlighting rich textures and deep, beautiful colors.
Bold Ombre Dip Dye Pumpkins
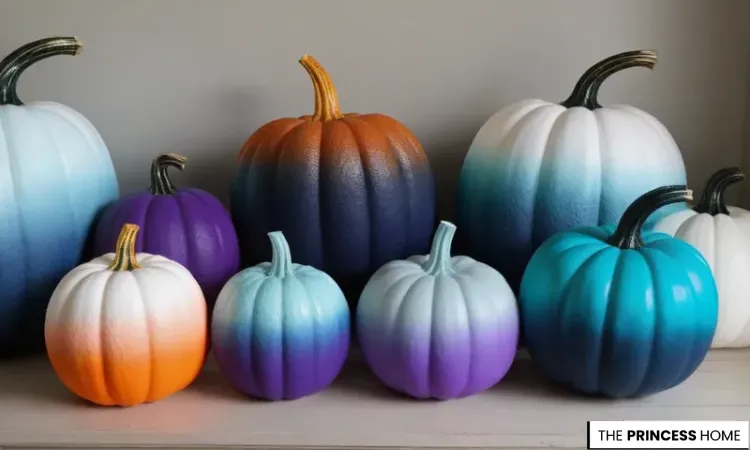
These no-carve pumpkins feature a vibrant ombré effect for modern fall décor. Colors blend seamlessly from deep indigo and purple to bright teal, white, and orange. The gradient creates an eye-catching display perfect for autumn or Halloween.
To DIY, start with a base coat of the lightest color. Use a sponge or paint sprayer to blend a darker shade from the bottom upward on a real or faux pumpkin. This eco-friendly, mess-free method creates a vivid, long-lasting statement piece for seasonal décor.
Velvet Bow Pumpkin Elegance
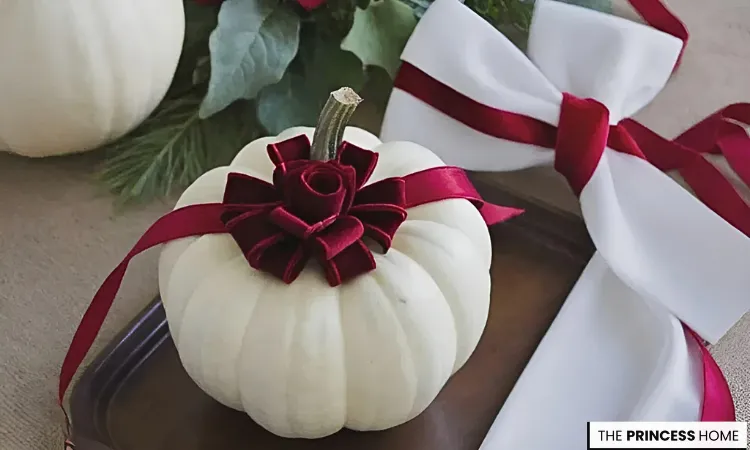
This no-carve pumpkin uses deep jewel-toned velvet ribbon for a rose-like bow. Wrap the ribbon around a white pumpkin, then glue a layered bow at the stem. This easy DIY creates a sophisticated autumn accent. Perfect for elegant fall décor or Thanksgiving place settings.
Botanical Decoupage Pumpkins
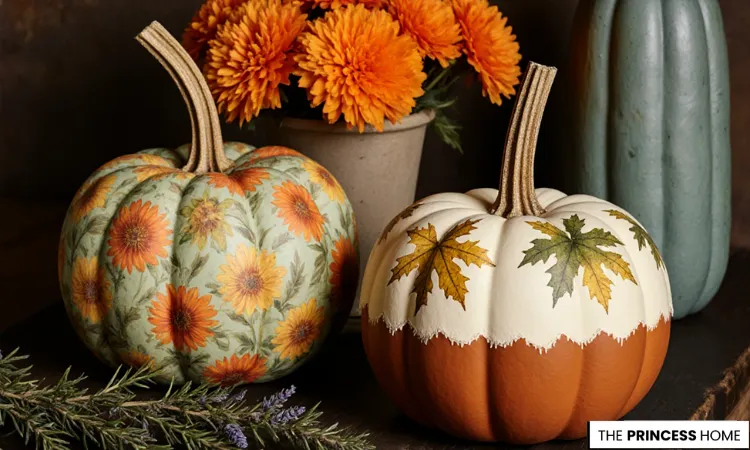
These no-carve pumpkins are decorated with vibrant autumn patterns using decoupage. Perfect for cozy fall and Thanksgiving décor, they bring an artistic touch to any home. Start by painting pumpkins in soft colors like sage green or creamy white. Then use Mod Podge to adhere patterned paper or napkin cutouts. Designs include a full sunflower/floral print and a white top with a maple leaf border. This simple DIY method creates unique, customized seasonal decorations with lasting charm.
Gold Sequin & Glitter Pumpkins
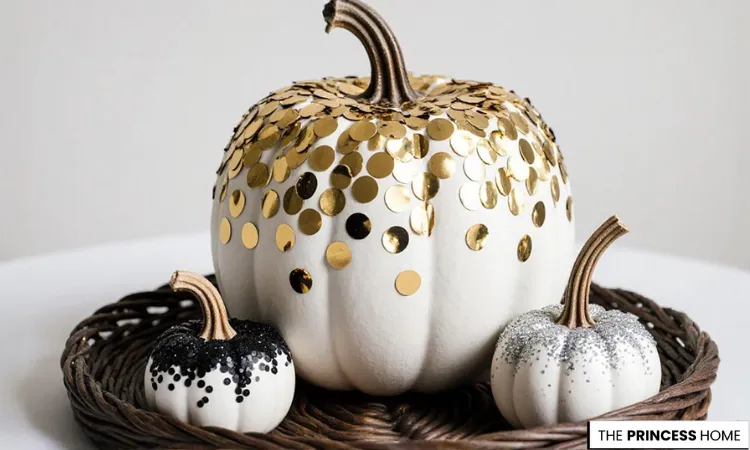
These no-carve pumpkins add glamour and sophistication to fall décor. A clean white base is accented with sparkling details for a chic alternative to carving. The centerpiece pumpkin features gold sequins, while smaller gourds shine with black and silver glitter.
To DIY, paint a real or faux pumpkin white. Apply craft glue, then press on sequins or sprinkle glitter for a radiant effect. This eco-friendly, mess-free method creates a durable, dazzling centerpiece perfect for fall and holiday décor.
Faux Leather Stitched Pumpkins
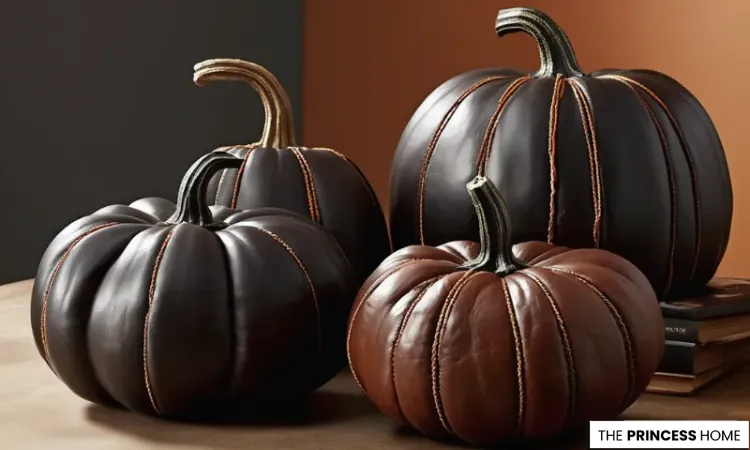
This display features faux pumpkins wrapped in black and brown faux leather with contrast stitching. The smooth texture and detailed seams create a rustic yet refined fall décor accent. These pumpkins add a masculine, high-end touch to modern autumn styling.
To DIY, start with foam or plastic pumpkins. Cut faux leather panels to fit, then secure with hot glue or craft adhesive. Add hand or machine stitching along the seams with contrasting thread, like tan or gold, for a polished, designer finish.
Elegant Chinoiserie Pumpkins
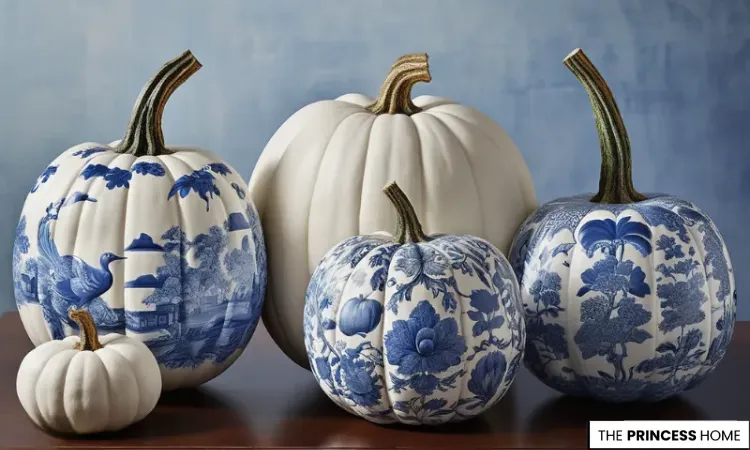
This elegant display features no-carve pumpkins with classic blue-and-white chinoiserie patterns. Delicate floral and scroll motifs inspired by Toile and Delftware add a sophisticated touch to fall or Thanksgiving décor.
To DIY, paint real or faux pumpkins white. Then, either decoupage printed rice paper or patterned napkins with Mod Podge, or hand-paint the blue details for a personalized, artistic finish. This technique creates refined, long-lasting seasonal decorations perfect for autumn displays.
Bold Teal & Orange Beaded Pumpkins
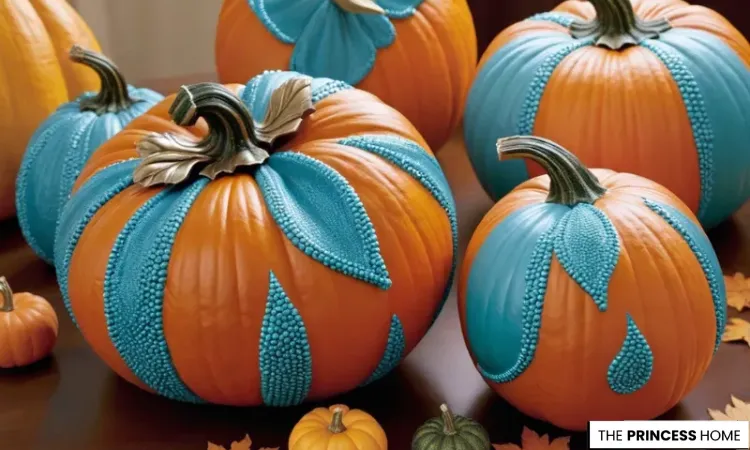
These no-carve pumpkins are painted bright orange and decorated with teal beads for a bold, modern fall look. Patterns include leaf shapes, teardrops, and stripes along the pumpkin ridges. Metallic faux stems and leaves add a sophisticated finishing touch.
To DIY, paint a real or faux pumpkin orange. Use hot glue or strong adhesive to attach teal micro-beads or small gems. This easy, mess-free method creates a striking, long-lasting centerpiece perfect for Halloween or autumn décor.
Silk Ribbon Pumpkins
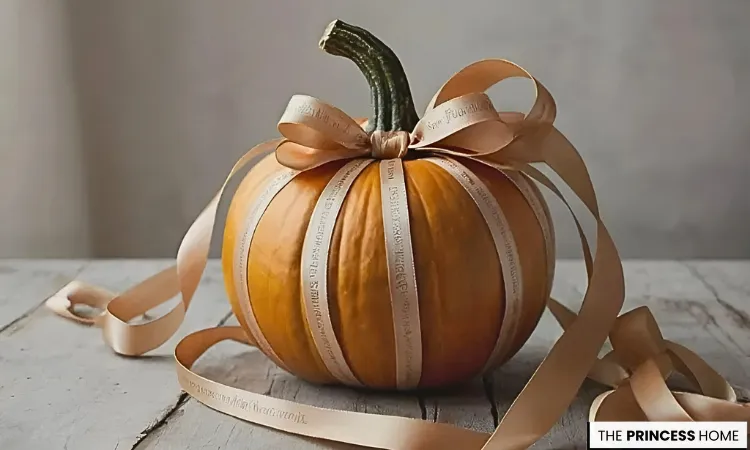
This charming no-carve pumpkin gets its elegant look by wrapping a wide satin ribbon—monogrammed or patterned—vertically around the pumpkin and securing it with a neat bow at the stem. The result is a beautifully gift-like design that adds instant sophistication to your fall or Thanksgiving decor.
This easy DIY pumpkin idea is perfect for creating a quick, classy centerpiece or accent piece for your autumn tablescape. It’s a simple, humane, and budget-friendly way to turn an ordinary pumpkin into a stylish seasonal decoration.
Gold Dipped Pumpkins
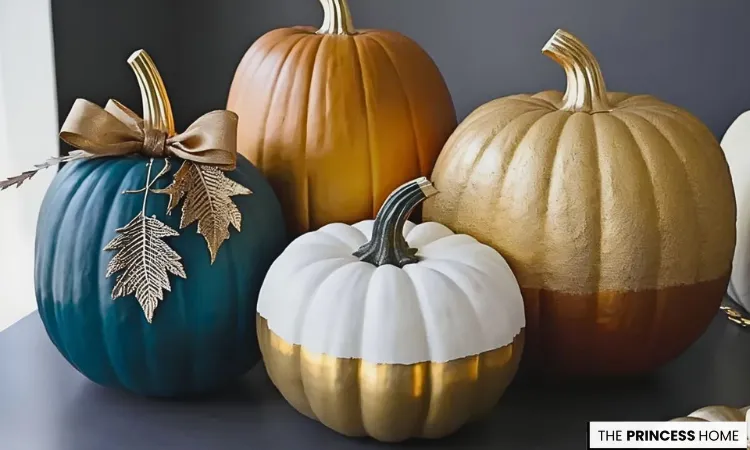
This stylish collection features painted pumpkins in bold shades like teal and metallic gold, offering a chic, modern update to classic fall décor. The dipped or color-blocked designs—with metallic gold on the bottom and a solid contrasting color on top—create a sleek, eye-catching look. Using spray paint makes this easy DIY project quick and mess-free, perfect for adding glamorous autumn flair to mantels, tables, or entryways.
Decoupage Newspaper Pumpkins
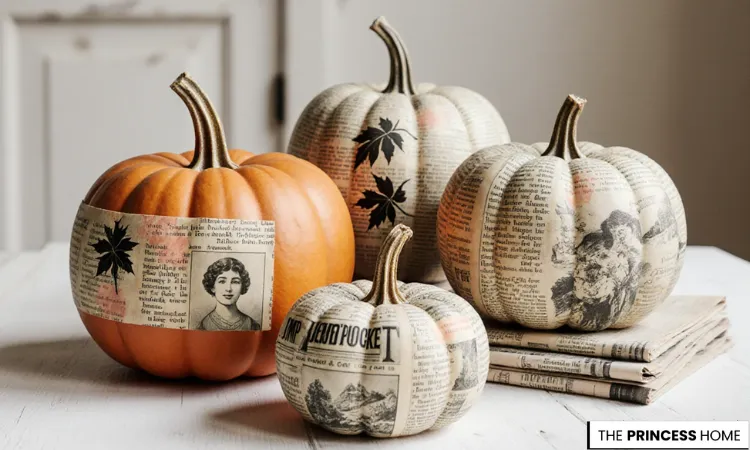
These no-carve pumpkins bring vintage, literary charm to fall décor with decoupage designs. Wrapped in newspaper and book print, they offer a creative, humane twist on traditional pumpkin decorating. Three pumpkins are fully covered with text and illustrations, while one classic orange pumpkin features a paper band with a stamped black maple leaf.
To DIY, brush Mod Podge onto a real or faux pumpkin, apply paper strips, and smooth them down. Seal with another coat and add optional black paint or leaf accents. This eco-friendly method creates sophisticated, long-lasting seasonal décor.
Dazzling Sequin Glam Pumpkins
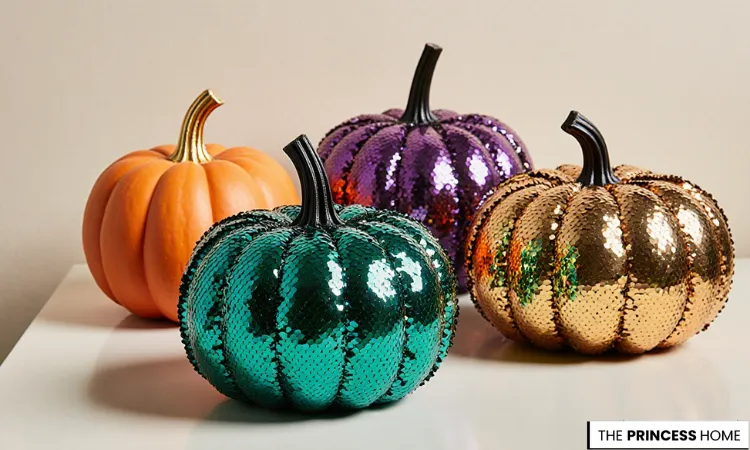
These no-carve pumpkins add luxury and sparkle to modern Halloween décor. Covered in reversible sequins, they’re a glamorous alternative to carving. The display includes three faux pumpkins in teal, purple, and gold, paired with a classic orange pumpkin with a gold-painted stem.
To DIY, use faux pumpkins and apply hot glue or strong adhesive. Layer sequin fabric or individual sequins until fully covered, then finish with a painted or black stem. This simple, mess-free method creates a durable, eye-catching decoration perfect for fall.
Modern Muted Pumpkin
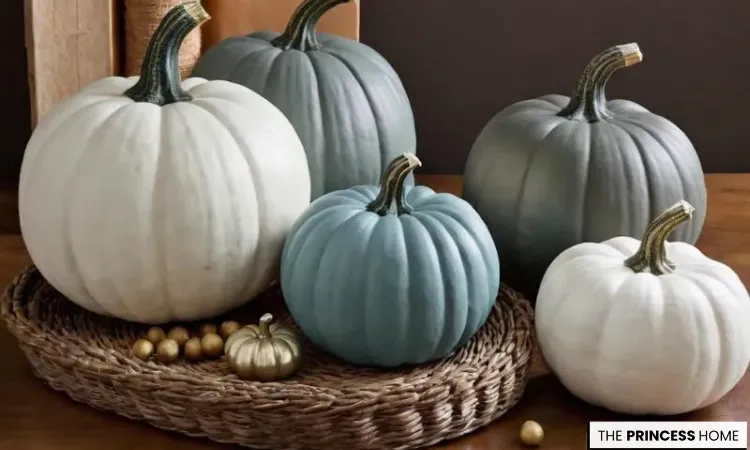
To achieve this elegant, modern look, paint a collection of pumpkins in neutral and pastel tones such as white, gray, and cool blue. After cleaning and painting, arrange them in a basket with small gold accents, keeping the natural stems for contrast. This arrangement creates calm, sophisticated fall décor and adds a refined touch to any home.
Cheerful Plaid Fabric Pumpkins
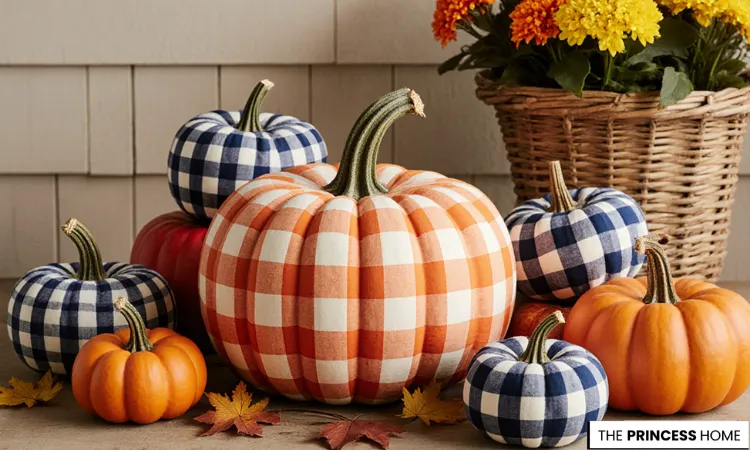
These no-carve pumpkins add warmth and farmhouse charm to fall décor. Large pumpkins feature orange-and-white buffalo check, while smaller ones are wrapped in navy gingham or classic plaid. Soft textures and rustic tones create a welcoming autumn display.
To DIY, wrap foam or Styrofoam pumpkins with flannel or cotton fabric. Secure with hot glue along the grooves and leave stems exposed for authenticity. This simple, eco-friendly method creates durable, charming, and humane decorations that stay beautiful all season.
Natural Pumpkin Floral Centerpieces
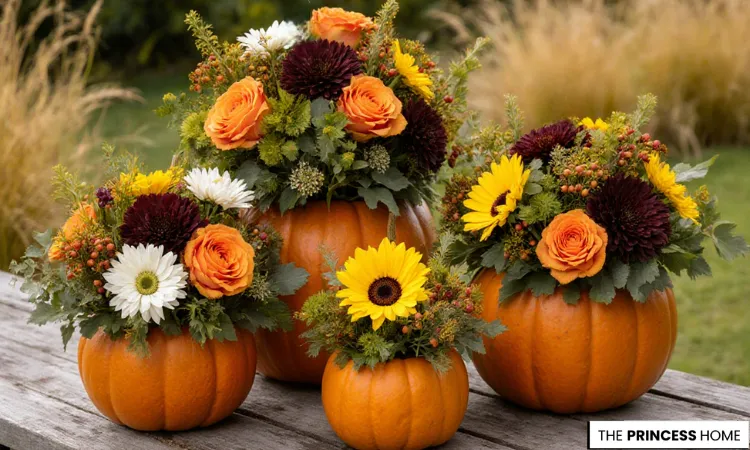
These pumpkin floral arrangements make stunning rustic fall centerpieces. Real pumpkins are carved only at the top and filled with vibrant blooms—orange roses, yellow sunflowers, white daisies, and burgundy dahlias—plus greenery and berries for a harvest-inspired look.
To DIY, cut an opening in the pumpkin top and place a small vase or jar with water inside. Arrange fresh flowers to keep them hydrated and away from the pumpkin flesh. This eco-friendly method creates long-lasting, beautiful autumn centerpieces.
Psychedelic Tie Dye Pumpkins
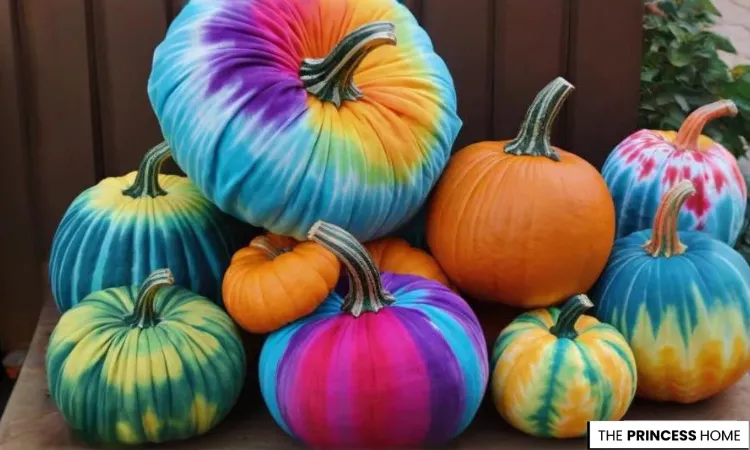
These no-carve pumpkins add a playful, hippie-inspired twist to fall décor. Tie-dye fabric in teal, pink, purple, and yellow creates a groovy contrast with natural orange gourds. The result is a cheerful, eye-catching display perfect for Halloween or autumn decorating.
To DIY, wrap a real or faux pumpkin with tie-dyed fabric. Tuck excess material and secure around the stem with an elastic band or glue. This eco-friendly, mess-free method creates bold, long-lasting seasonal accents full of color and joy.
Festive Sequin Sparkle Pumpkin
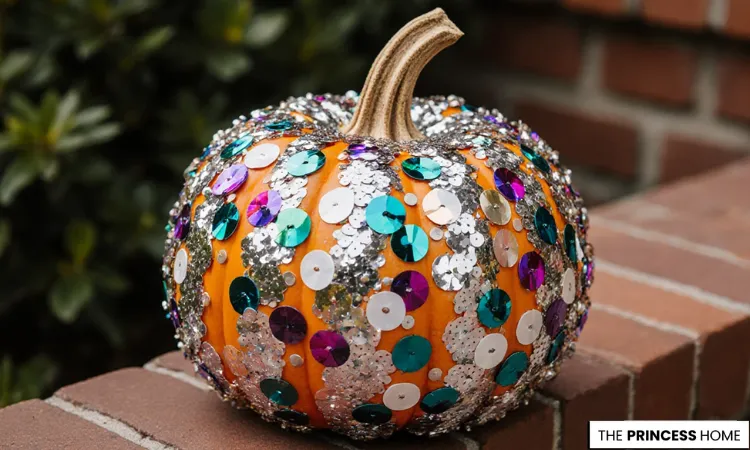
This no-carve pumpkin makes a sparkling statement for fall or Halloween décor. Covered in silver glitter and large metallic sequins in teal, purple, silver, and white, it’s a fun, glamorous alternative to carving. The result is a bold, eye-catching centerpiece.
To DIY, brush craft or decoupage glue onto a real or faux pumpkin. Sprinkle silver glitter and place colorful sequins on the surface. Let dry completely. This eco-friendly, mess-free method creates a durable, dazzling decoration perfect for autumn displays.
Bohemian Feather-Adorned Pumpkins
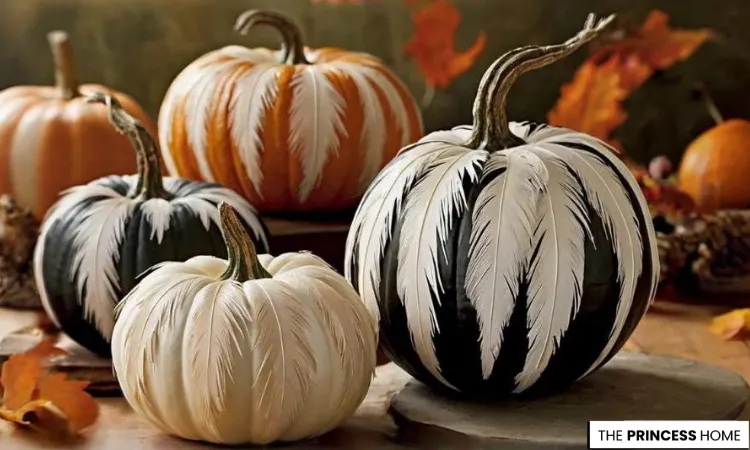
This stunning display showcases no-carve pumpkins beautifully decorated with natural feathers for a Bohemian-chic fall aesthetic. The soft, layered textures and earthy tones give these pumpkins a modern, artistic vibe perfect for stylish autumn décor.
To recreate this DIY boho pumpkin craft, apply hot glue to the pumpkin surface and attach small feathers—in shades of white, black, and orange—in vertical rows or repeating patterns. You can use painted or natural pumpkins depending on your preferred look.
Luxurious Metallic Pumpkins
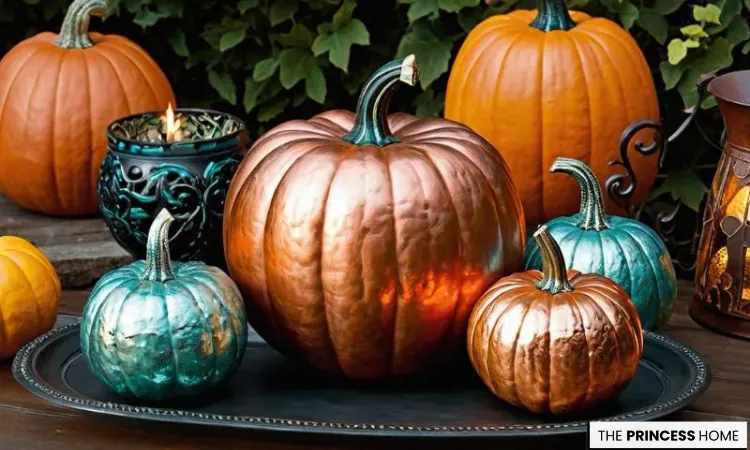
To infuse your space with modern luxury, paint a variety of pumpkins in shimmering metallic hues such as bright gold, soft rose gold, and crisp white. Clean and dry the pumpkins thoroughly, then apply high-quality metallic paint to achieve a radiant glow. This simple process transforms the pumpkins into elegant focal points that beautifully catch the light.
White & Gold Geometric Pumpkins
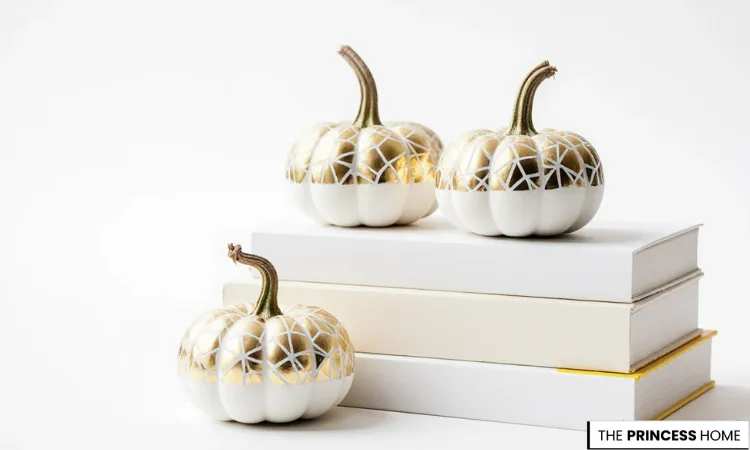
These no-carve pumpkins add elegance to fall décor with a stylish dipped design. Each mini pumpkin is creamy white on the bottom and metallic gold on top, featuring subtle geometric or honeycomb patterns for a modern look.
To DIY, paint real or faux pumpkins white. Once dry, tape off the center and spray the top half and stems gold. Add vinyl decals or hand-paint a geometric design for extra detail. This eco-friendly, mess-free method creates long-lasting, sophisticated autumn decorations.
Chic Rose Gold Striped Pumpkins
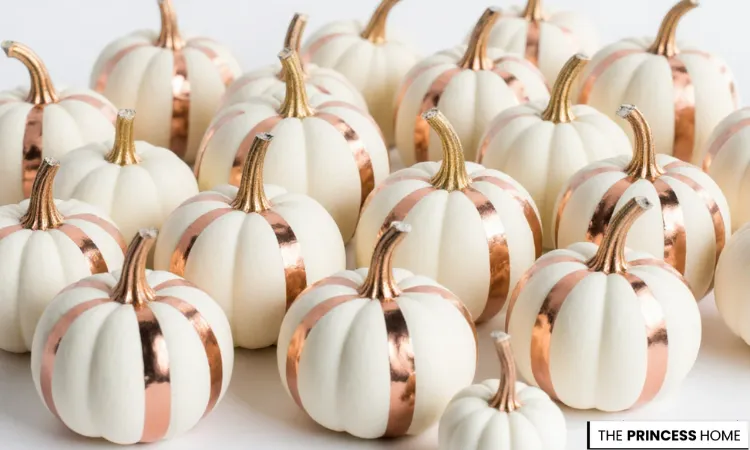
These no-carve pumpkins add a modern, glamorous touch to fall décor. Creamy white pumpkins feature shimmering rose gold stripes along their natural grooves, finished with gold-painted stems for a chic look. They bring understated luxury to any autumn display.
To DIY, paint a real or faux pumpkin white. Once dry, add rose gold stripes with metallic tape or carefully hand-paint them. Finish with a gold-painted stem. This eco-friendly, mess-free method creates durable, eye-catching seasonal accents perfect for tablescapes, mantels, or shelves.
No-Carve Succulent Pumpkin Planter
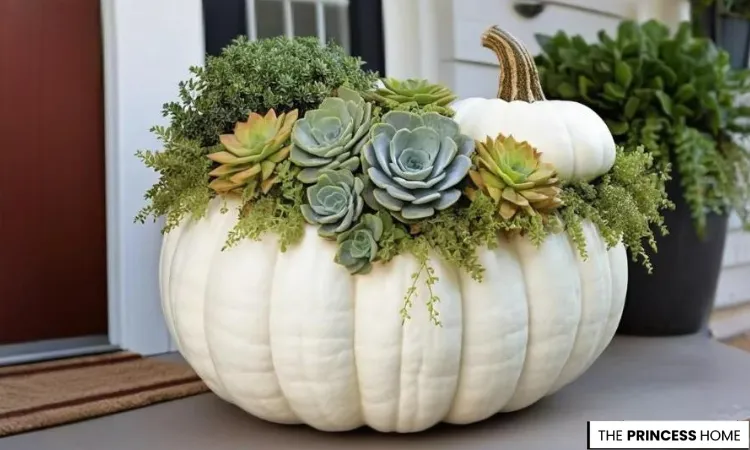
This elegant display showcases a large white “Ghost” pumpkin transformed into a no-carve succulent planter, ideal for stylish fall porch or indoor décor. The fresh greenery and natural tones create a modern, organic look that feels both seasonal and timeless.
To make this easy DIY pumpkin centerpiece, there’s no need to cut the pumpkin. Simply layer a bit of moss on top and secure a mix of succulent cuttings and trailing vines using floral pins or hot glue. The arrangement stays fresh and beautiful for weeks with minimal care.
Stylish Painted Pumpkin Display
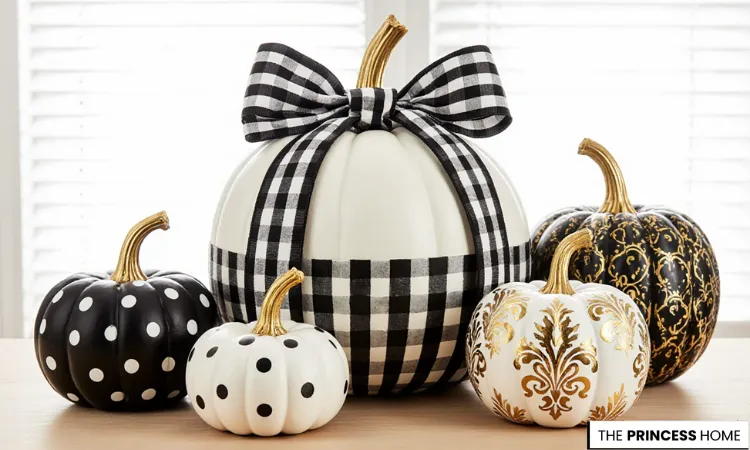
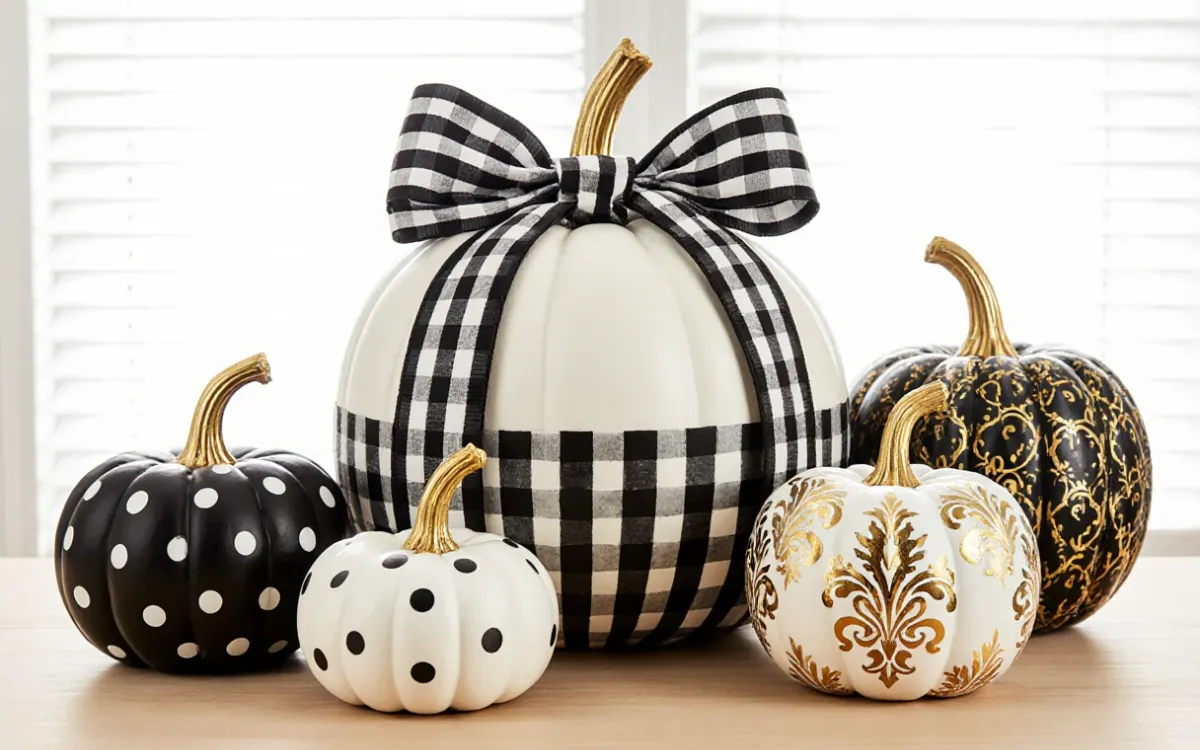
This chic pumpkin display brings a modern, glamorous twist to fall décor. A large white pumpkin with a black-and-white buffalo check bow is surrounded by smaller pumpkins featuring polka dots and gold scrollwork. Metallic accents and varied textures create a stylish, upscale autumn display.
To DIY, paint real or faux pumpkins white, black, and gold. Add patterns with stencils or freehand designs, then finish stems in gold. This eco-friendly, mess-free method creates a reusable, dazzling centerpiece perfect for fall or Halloween.
Gold & White Painted Pumpkins
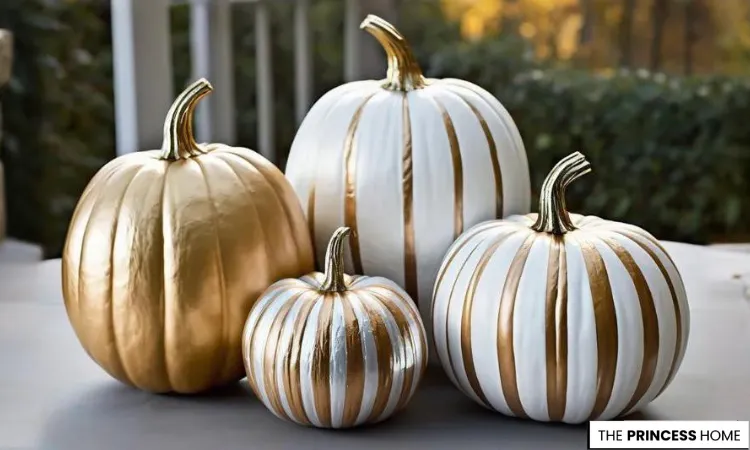
This striking display features glamorous no-carve pumpkins painted in a sleek metallic gold and crisp white palette, perfect for modern fall or Thanksgiving décor. Each pumpkin shines with a mix of solid and striped designs, creating a chic, high-end look.
To recreate this elegant DIY project, clean and prime your pumpkins, then apply a base coat of white or gold spray paint. Once dry, use painter’s tape to create vertical stripes on the white pumpkins and add a layer of metallic gold paint. For a solid gold pumpkin, leave the stem gold or paint it white for contrast. This simple, eco-friendly craft adds instant sophistication and sparkle to your autumn centerpiece.
Lace Embellishments
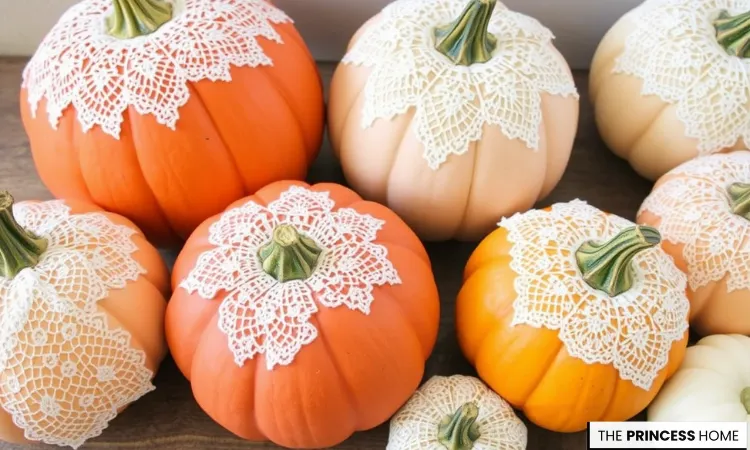
This charming no-carve pumpkin display adds a chic touch to fall and Thanksgiving décor. Each pumpkin is decorated with a delicate white lace doily, elegantly glued around the stem for a soft, farmhouse look. The mix of orange, peach, and cream pumpkins creates a warm, sophisticated centerpiece.
To make this easy DIY craft, use real or faux pumpkins. Glue the center of a lace doily to the stem and smooth the edges over the top. This simple, budget-friendly, and humane method offers a quick way to create elegant autumn décor.
Textured Stencil Pumpkins
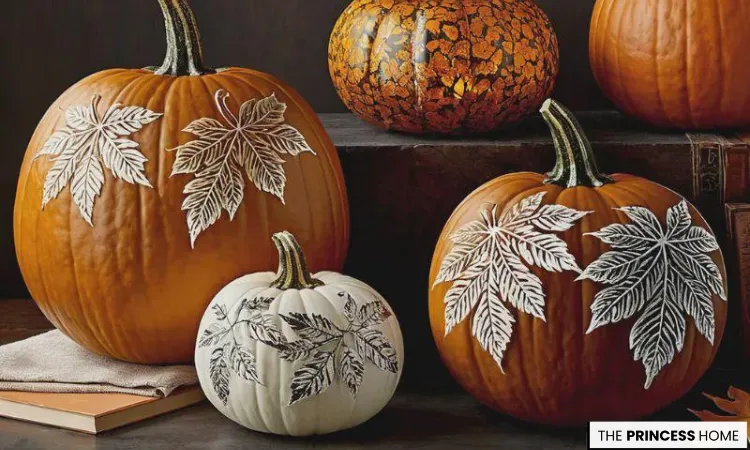
To achieve this textured, artistic décor, use the raised stenciling technique to give your design a tangible feel. Spread Modeling Paste or lightweight joint compound over a stencil, then lift the stencil carefully while the paste is still wet to reveal a 3D leaf motif. This method creates rustic yet elegant fall décor that emphasizes texture and contrast (such as white on dark orange), adding artistic depth to any arrangement.
Marbled Pumpkins
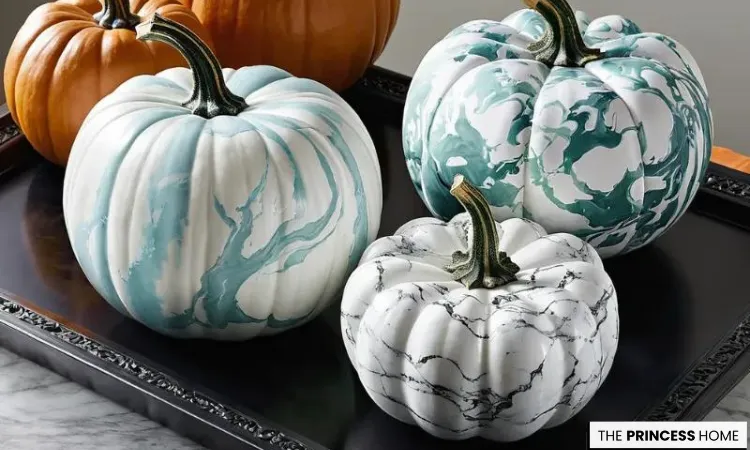
Create a marbled look by dipping white pumpkins into water swirled with paints like teal, black, and white. Slowly lift to transfer the unique veined pattern. This easy hydro-dipping technique produces modern, artistic fall décor with a sophisticated, contemporary touch.
Beaded & Metallic Pumpkins
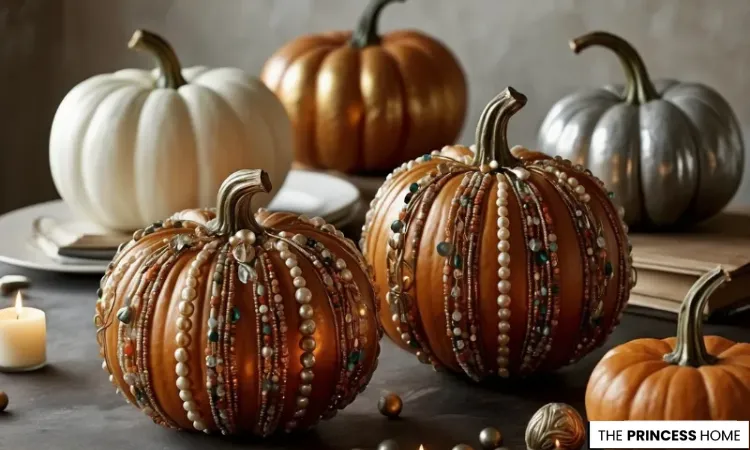
This sophisticated pumpkin display features no-carve pumpkins adorned with strands of pearls and beads. Two front pumpkins are decorated with vertical rows of faux pearls and seed beads along their natural ridges, creating a luxurious, textured look. Metallic gold, silver, and matte white pumpkins complete the glamorous fall or Thanksgiving centerpiece.
To DIY, use a hot glue gun to attach beads and pearls to real or faux pumpkins. This eco-friendly, mess-free method produces a high-end, eye-catching seasonal decoration perfect for tablescapes or autumn décor.
Mirror Mosaic Pumpkins
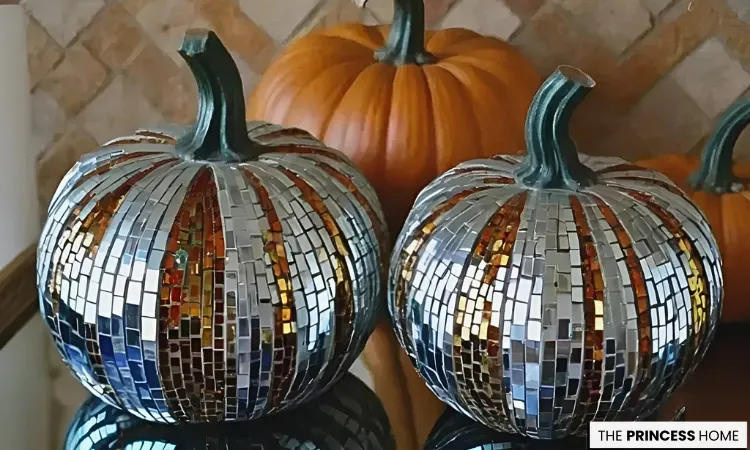
To achieve this bold look, cover artificial pumpkins with small silver and gold mirror tiles. The mosaic creates a shimmering, reflective effect. Secure each mirror piece by hand with strong adhesive, leaving small gaps for a cracked mirror style. These glittering pumpkins add dramatic light reflection and are perfect for modern, luxurious winter décor. Use them as eye-catching centerpieces for any elegant display.
Conclusion
Decorating pumpkins without carving is a wonderful way to express your creativity while keeping things simple and safe. Whether you’re decorating your porch, entryway, or dining table, these no carve pumpkin decorating ideas will fill your home with festive warmth and personal charm all season long.
Here are some frequently asked questions related to the article :
1. What are the best materials for no carve pumpkin decorating?
Paint, fabric, ribbons, stickers, and faux leaves are popular choices that make decorating easy and stylish.
2. Can I decorate both real and fake pumpkins?
Yes! Real pumpkins bring an authentic fall feel, while artificial ones last longer and can be reused every year.
3. How long do no carve pumpkins last?
Non-carved pumpkins can last several weeks, especially if kept in a cool, dry place away from direct sunlight.
4. What are some easy no carve ideas for kids?
Use markers, googly eyes, and felt cutouts—safe, fun, and mess-free options for little hands.
5. Can I use these ideas for indoor decor?
Absolutely. No carve pumpkins look beautiful on mantels, tables, shelves, or as part of your fall centerpiece.
6. What paint works best for pumpkins?
Acrylic paint or chalk paint provides great coverage and vibrant colors without damaging the pumpkin’s surface.
7. How can I make my decorated pumpkins last longer?
Wipe the pumpkin before decorating, keep it dry, and use a sealant spray to protect painted surfaces.
The princess home on Pinterest


