
Bunny Centerpieces Inspiring Ideas for Charming Table Decor
Bunnies have long been a symbol of joy, renewal, and charm, making them a perfect centerpiece theme for various occasions. Whether you’re planning a spring gathering, an Easter celebration, or simply looking to add a whimsical touch to your table decor, bunny centerpieces can create an inviting and playful atmosphere.
Below are inspiring ideas to craft delightful bunny-themed table decorations that will leave your guests hopping with admiration.
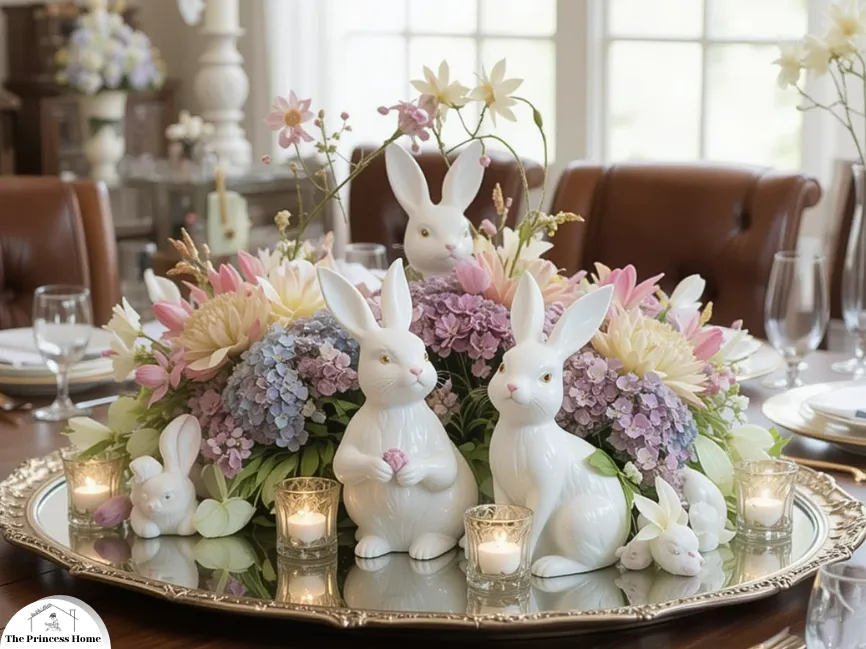
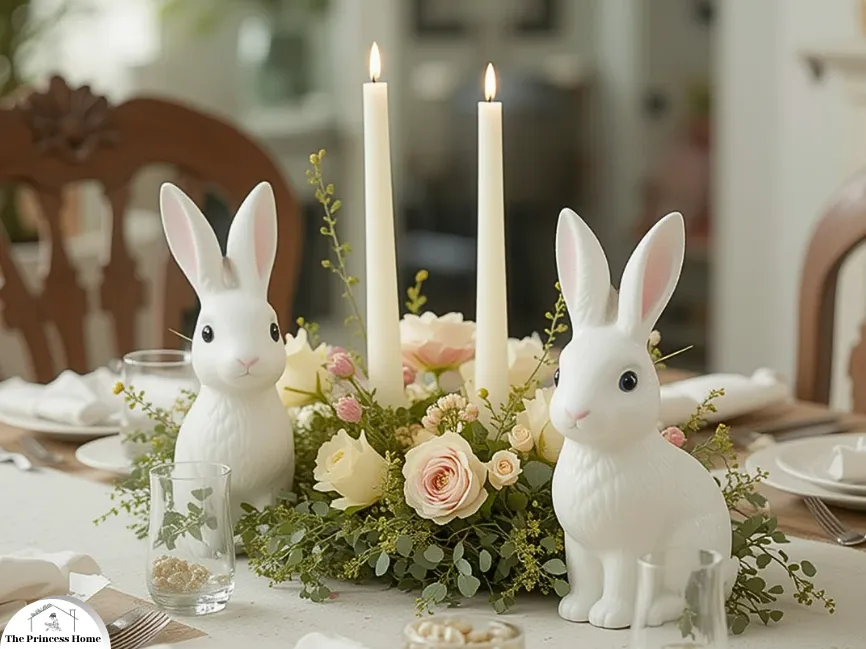
1. Elegant Porcelain Bunny Arrangements
For a sophisticated yet playful look, incorporate porcelain bunny figurines into your centerpiece. Arrange them on a mirrored tray with fresh flowers such as tulips, daffodils, or hydrangeas. Add some votive candles for a soft, glowing ambiance. This setup works beautifully for formal dinners and upscale gatherings. Opt for white or pastel-colored figurines to maintain a cohesive and elegant color palette.
DIY: Elegant Porcelain Bunny Arrangements
Materials Needed:
- White Bunny Figurines: Ceramic or resin bunnies (different sizes for variation).
- Flowers: Faux or fresh hydrangeas, dahlias, and tulips in pastel shades (pink, lavender, white). Optional: Greenery such as eucalyptus or ivy for a natural touch.
- Tray/Base: A mirrored or metallic tray to act as the base of the centerpiece.
- Candles: Small votive candles or LED tea lights in glass holders.
- Floral Foam (if using fresh flowers): To secure and arrange the flowers.
- Decorative Accessories: Additional small bunny figurines, eggs, or other seasonal accents.
Instructions:
Place the mirrored tray in the center of your table. If you’re using fresh flowers, secure floral foam to the tray with double-sided tape. Position the largest bunny figurine as the centerpiece. Surround it with smaller bunny figurines, varying the sizes for depth and interest. Arrange faux or fresh flowers around the bunnies. If using fresh flowers, insert stems into the floral foam. Place taller flowers toward the center and shorter ones near the edges.
Tuck greenery around the flowers to fill gaps and add texture. Add votive candles or LED tea lights in glass holders around the bunnies and flowers. Ensure they’re evenly spaced for a balanced look. Add small accents like mini bunny figurines, faux eggs, or pastel ribbons for extra charm.
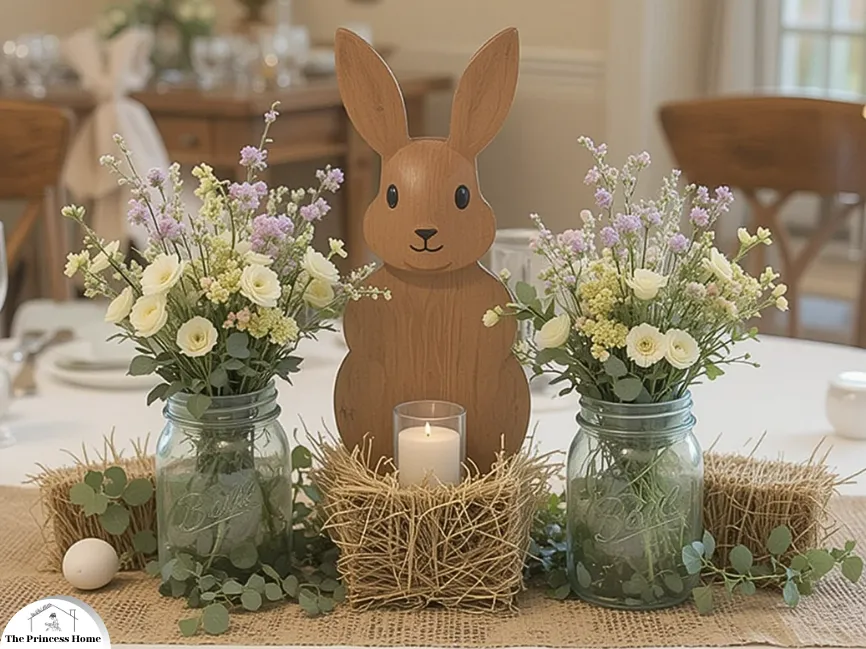
2. Rustic Wooden Bunny Displays
Achieve a cozy, farmhouse vibe by using wooden bunny cutouts or carved figurines. Pair them with mason jars filled with wildflowers, burlap table runners, and small hay bales. Incorporate greenery such as eucalyptus or ivy for a touch of natural charm. This style is perfect for rustic-themed events or casual get-togethers. Personalize the wooden bunnies with hand-painted names or messages to make your guests feel extra special. Here’s how you can recreate it:
DIY: Rustic Wooden Bunny Displays
Materials Needed:
- Wooden Bunny Cutout: A pre-made wooden bunny cutout (available at craft stores) or create your own from plywood. Paint and a black marker to add details like the eyes, nose, and mouth.
- Mason Jars: Two quart-sized Mason jars for floral arrangements.
- Flowers: Faux or fresh small blooms such as baby’s breath, white ranunculus, and pastel wildflowers. Eucalyptus sprigs for greenery.
- Hay or Straw: Small bundles of hay to create a rustic base.
- Votive Candle and Holder: A small votive candle in a clear glass holder.
- Burlap Runner: A rustic table runner to place beneath the centerpiece.
- Decorative Accents: Small white decorative eggs or any other spring-themed details.
Instructions:
Paint or stain the wooden bunny to your liking. Use a black marker or paint to draw facial features if they are not already on the cutout. Lay the burlap runner across the table. Place small bundles of hay/straw at the center of the runner. Fill the Mason jars with your chosen flowers and eucalyptus sprigs. Position the jars on either side of the bunny cutout, directly on the hay.
Place the votive candle in its holder and nestle it in the hay, in front of the bunny cutout. Add small decorative eggs or other spring-themed accents around the centerpiece to complete the look.
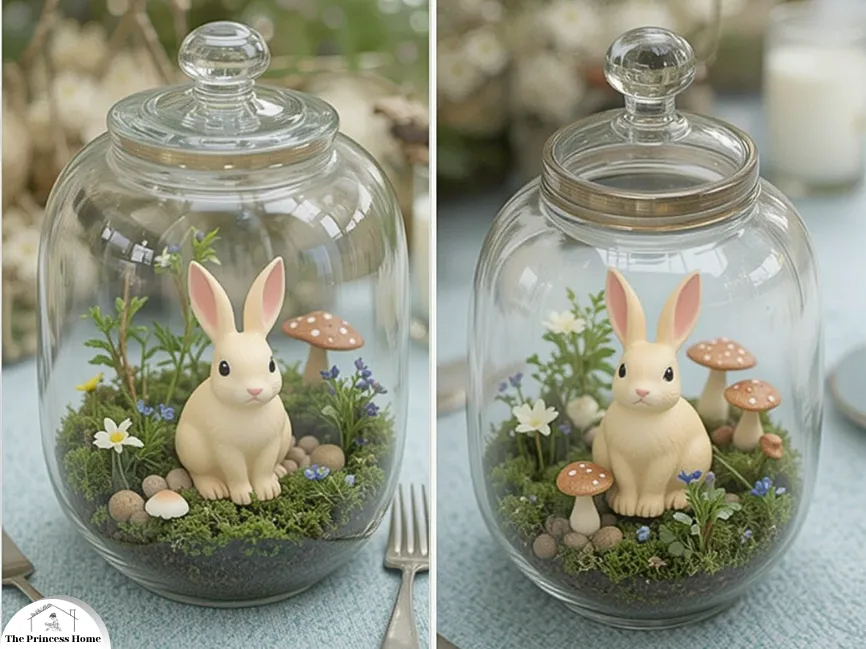
3. Bunny Terrarium Centerpieces
Create a miniature world by placing bunny figurines inside glass terrariums. Add moss, miniature mushrooms, and small flowers for a woodland-inspired setting. These centerpieces are not only charming but also allow for endless customization. Use battery-operated fairy lights inside the terrarium to enhance the magical effect.
DIY: Bunny Terrarium Centerpieces
Materials Needed:
- Glass terrariums (open or closed, various sizes)
- Bunny figurines (miniature, preferably ceramic or resin)
- Preserved moss (green or reindeer moss)
- Miniature mushrooms (available at craft stores)
- Small faux or dried flowers (e.g., baby’s breath or tiny blossoms)
- Battery-operated fairy lights
- Small pebbles or sand (optional for layering)
- Tweezers or small tongs (for precision placement)
Steps:
If desired, layer small pebbles or sand at the bottom of the terrarium for drainage and aesthetic appeal. Spread preserved moss evenly on top to create a lush, green “ground” for your miniature scene. Place the bunny figurines in the terrarium, ensuring they are visible and positioned at the focal point. Use tweezers to adjust their placement if the terrarium opening is small.
Tuck miniature mushrooms and small flowers around the figurines to mimic a woodland environment. Use different heights and colors to create visual interest. Carefully weave battery-operated fairy lights around the interior of the terrarium, ensuring the light string remains hidden within the moss or along the edges. Place the battery pack discreetly at the back or under the terrarium if possible.
Adjust the arrangement as needed to balance the design. Add extra moss or flowers to cover any visible mechanics, like the base of the figurines or light wires. To personalize the centerpiece, consider adding a small, handwritten name tag or a seasonal message attached to the terrarium with twine or ribbon. These can double as unique party favors for guests!
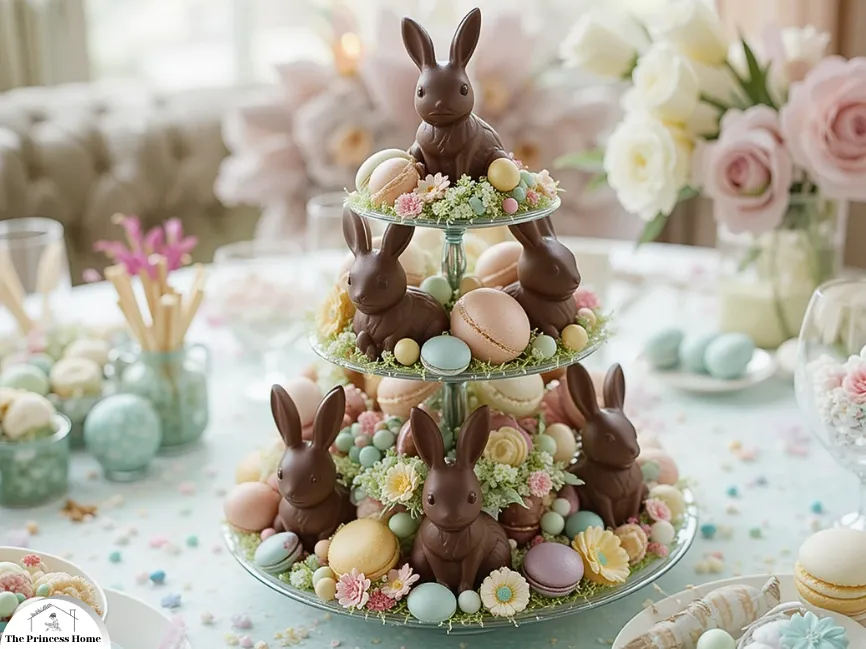
4. Edible Bunny Displays
Why not make your centerpiece delicious? Arrange chocolate bunnies on a tiered stand surrounded by an assortment of colorful candies, macarons, or cupcakes. This edible display doubles as both decor and dessert, making it a hit with guests of all ages. Use pastel-colored wrappers and edible glitter for a festive touch.
DIY: Edible Bunny Displays
Materials Needed:
- Chocolate bunny figurines (various sizes for visual interest)
- Tiered stand or cake stand
- Assorted candies (e.g., jellybeans, mini chocolate eggs, or pastel mints)
- Macarons or cupcakes (optional for added variety)
- Pastel-colored cupcake liners or wrappers
- Edible glitter or metallic food spray
- Small decorative accents (e.g., edible flowers or fondant shapes)
Steps:
Arrange the tiers of the stand for easy access and balanced visual appeal.mLine the tiers with pastel-colored cupcake liners or doilies for an added festive touch. Place chocolate bunnies as focal points on each tier, starting with the largest bunny on the bottom tier and smaller ones on higher tiers. Secure them in place using a dab of melted chocolate if needed.
Surround the bunnies with colorful candies, filling the spaces between them for a full, abundant look. Arrange macarons or cupcakes on the remaining space, ensuring a mix of colors and textures. Dust edible glitter or use metallic food spray to give the chocolate bunnies and cupcakes a shimmering, elegant finish. Add small edible flowers or fondant decorations to cupcakes for an extra touch of charm.
Adjust the arrangement to ensure all items are visible and evenly distributed. Sprinkle a few extra candies around the base of the stand for a cohesive look. For a themed event, match the candy and frosting colors to your party’s palette. Guests can enjoy the display throughout the gathering and help themselves to a sweet treat at their leisure!

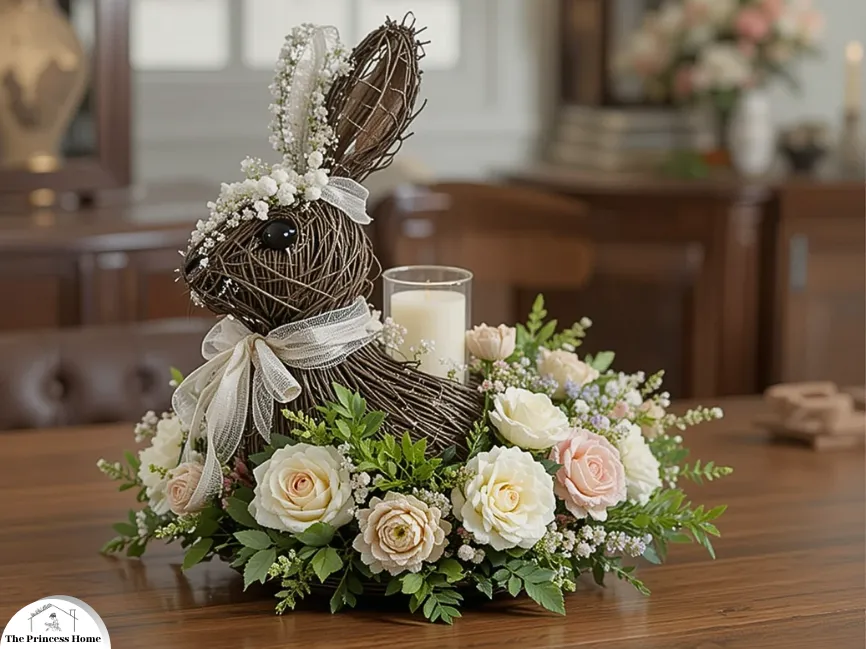
5. Floral Bunny Wreaths
Craft a bunny-shaped wreath using grapevine or foam bases. Cover the shape with fresh or faux flowers, greenery, and ribbons to create a stunning table centerpiece. Position the wreath flat on the table and place a vase or candle in the center for added height and visual interest. Coordinate the flower colors with your overall table decor for a harmonious look.
DIY: Floral Bunny Wreaths
Materials Needed:
- Grapevine or foam wreath base (bunny-shaped or a round base to shape into a bunny)
- Fresh or faux flowers (e.g., tulips, daisies, or peonies)
- Greenery (e.g., eucalyptus, ivy, or ferns)
- Ribbons (in pastel or coordinating colors)
- Hot glue gun and glue sticks (for securing the flowers and ribbons)
- A vase or candle (for the center)
Steps:
If using a foam wreath, shape it into a bunny form, creating large ears and a round body. For a grapevine wreath, you can use it as is or twist it into a bunny shape. Secure the base with floral wire if needed to hold the bunny shape. Start by adding greenery around the wreath. Use a hot glue gun or floral wire to attach ivy, eucalyptus, or ferns. Ensure the greenery covers the entire base evenly, forming a natural backdrop for the flowers.
Begin adding flowers, starting with larger blooms near the bottom or edges of the wreath. Fill in the gaps with smaller flowers, ensuring a balanced and full arrangement. Use hot glue to secure each flower, making sure the blooms are positioned in a way that complements the bunny’s shape.
If using a candle, consider a simple pillar candle or an LED version for safety. Adjust the flowers and greenery around the center to ensure everything remains visible and balanced. For added elegance, sprinkle faux pearl beads or glitter along the wreath for a whimsical touch. This will catch the light and add an extra layer of sophistication to the centerpiece!
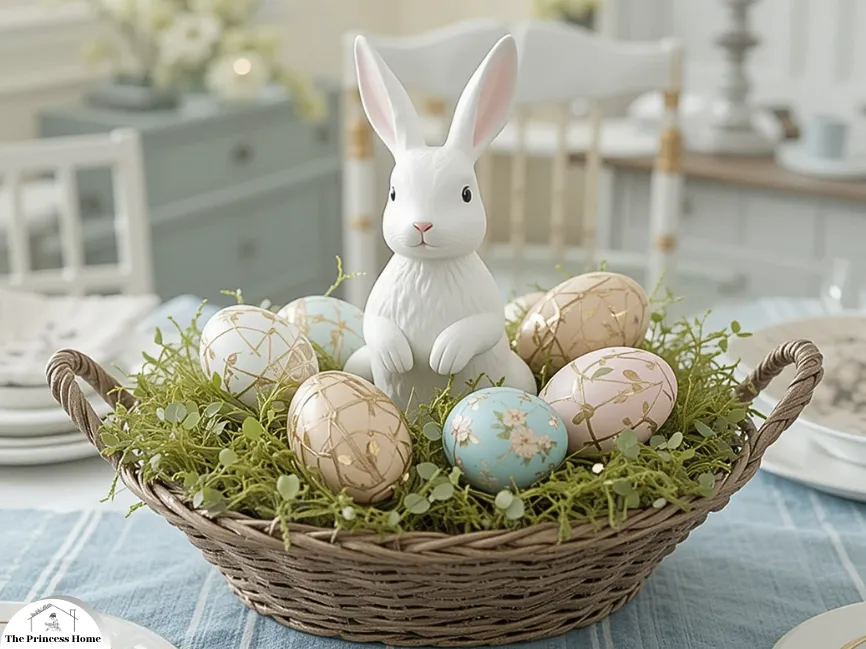
6. Bunny &Egg Combo Centerpieces
Combine bunny figurines with painted or decorated eggs for a quintessential Easter centerpiece. Place the items in a decorative basket lined with moss or shredded paper. This classic combination is timeless and versatile. Use metallic or pastel-painted eggs to suit your event’s aesthetic.
DIY: Bunny & Egg Combo Centerpieces
Materials Needed:
- Bunny figurines (ceramic or resin)
- Painted or decorated eggs (metallic, pastel, or hand-painted designs)
- Decorative basket (round or oval shape)
- Moss or shredded paper (for lining the basket)
- Ribbons or lace (optional for extra decoration)
- Small floral accents (optional for a fresh touch)
Steps:
Choose a decorative basket that complements your table decor. Line the basket with moss or shredded paper for a natural, rustic look. Ensure the lining is even to provide a soft base for the eggs and figurines. Position the bunny figurines in the center or along the edges of the basket, depending on their size. For a dynamic look, arrange them in different poses or facing different directions.
Place the painted or decorated eggs around the bunny figurines, filling in the empty spaces. Use metallic or pastel-colored eggs to match your event’s aesthetic. Arrange them randomly or in a circular pattern for a more structured look. Add small floral accents, like faux tulips or daisies, around the eggs and bunnies for a fresh, springtime feel.
Optionally, tie ribbons or lace around the basket’s handle or edges for a charming detail. Adjust the placement of the bunny figurines and eggs to create a balanced, visually appealing arrangement. Ensure the items are securely placed, especially if the basket will be moved during the event. For added sparkle, consider sprinkling some glitter or faux dew drops on the eggs to give them a magical, springtime glow!
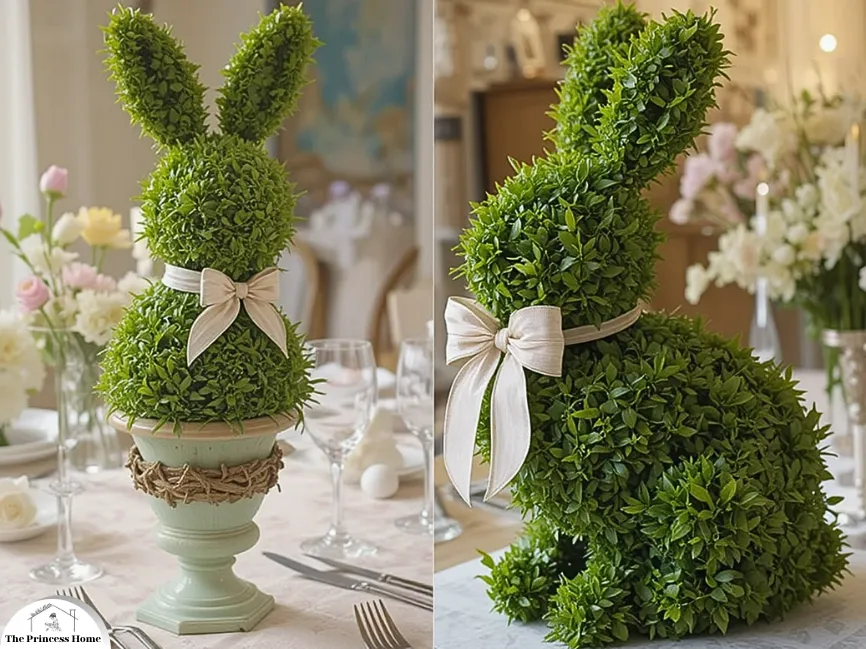
7. Whimsical Bunny Topiaries
Create topiaries shaped like bunnies using boxwood or artificial greenery. These lush and vibrant centerpieces add a touch of elegance while staying true to the bunny theme. Place them in decorative pots or urns to elevate their appearance. Accent the topiaries with small bows or flowers for added charm.
DIY: Whimsical Bunny Topiaries
Materials Needed:
- Boxwood or artificial greenery (topiary forms or foam balls)
- Bunny-shaped topiary frames (optional, or you can create your own with wire)
- Decorative pots or urns
- Floral wire or hot glue gun
- Small bows (ribbon or fabric)
- Fresh or faux flowers (e.g., small roses, daisies, or lavender)
- Moss or floral foam (to stabilize the topiary)
Steps:
If using a bunny-shaped topiary frame, position it in a decorative pot or urn. Creating your own frame, shape floral wire into a bunny silhouette (body, ears, and head) and attach it securely to a stake or foam base. If using foam balls, wrap them in artificial greenery, securing with floral wire or hot glue to form the bunny shape.
For boxwood or artificial greenery, start attaching it from the bottom of the frame upwards, ensuring it covers the entire structure evenly. Make sure to secure any loose ends of greenery to avoid gaps. Once the greenery is in place, place the topiary into a decorative pot or urn. Use moss or floral foam to stabilize the base and prevent the topiary from tipping over.
Tie small bows with ribbon or fabric around the base of the topiary or along the bunny’s ears for a playful touch. Attach fresh or faux flowers (such as roses, daisies, or lavender) around the greenery to add color and charm. Fluff the greenery and flowers to ensure a full, vibrant look.

8. DIY Bunny with Natural Elements
Embrace a nature-inspired theme by creating centerpieces with real moss, twigs, and fresh flowers. Add bunny figurines or cutouts for a playful element. Place the arrangement in a wooden box or a woven basket for a rustic finish. Use scented candles nearby to enhance the earthy ambiance.
DIY: Bunny with Natural Elements Centerpieces
Materials Needed:
- Bunny figurines or cutouts (wooden or ceramic)
- Real moss (available at craft stores or garden centers)
- Twigs or small branches (for a natural touch)
- Fresh flowers (e.g., daisies, tulips, or wildflowers)
- Wooden box or woven basket
- Scented candles (earthy scents like sandalwood or lavender)
- Floral foam (optional, for stability)
- Floral wire or hot glue gun (for securing elements)
Steps:
Choose a rustic container such as a wooden box or woven basket. If using a wooden box, line it with floral foam to help stabilize the moss and other elements. Fill the container with real moss to create a soft, green base, covering the entire bottom evenly. Place small twigs or branches around the edges of the moss to create structure and a natural look.
Position the twigs in various directions, bending or twisting them to create a dynamic, woodland feel. Add a bunny figurine or cutout to the center of the arrangement. For a more rustic look, use a wooden or ceramic bunny. For a more playful touch, consider a painted or embellished bunny.
Add fresh flowers like daisies, tulips, or wildflowers around the bunny and within the moss. Gently place them into the moss or secure them with floral wire to keep them in place. For a natural look, leave some flowers slightly loose or cascading.
To add a whimsical touch, sprinkle some faux eggs or small stones around the moss to create a complete woodland scene. This setup pairs beautifully with natural linen tablecloths or rustic dinnerware for a charming, nature-inspired atmosphere.
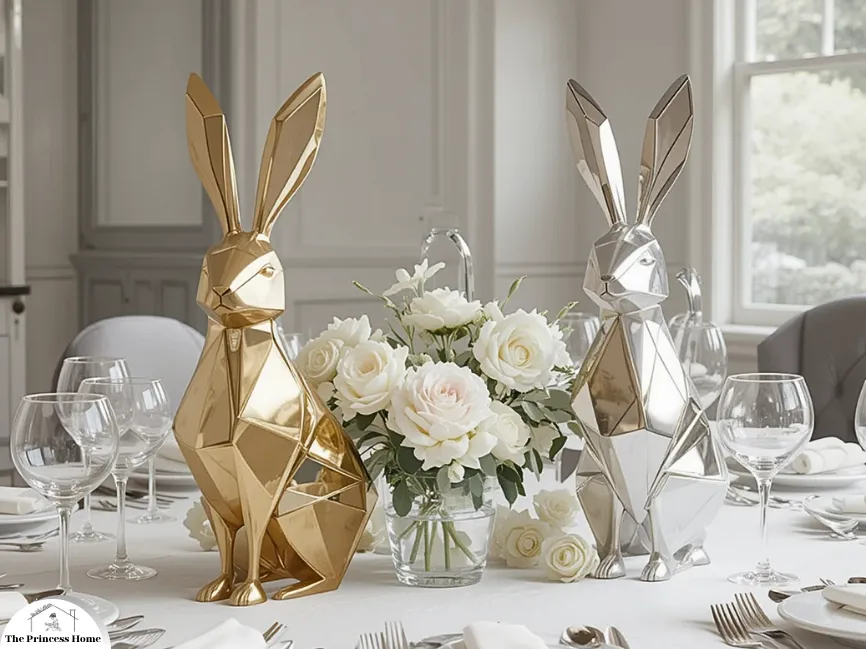
9. Modern Minimalist Bunny Decor
For a sleek and contemporary look, choose geometric bunny sculptures in metallic finishes such as gold or silver. Pair them with monochromatic floral arrangements and minimalist table settings. This style is ideal for modern homes and upscale events. Keep the color palette neutral to enhance the minimalist aesthetic.
DIY: Modern Minimalist Bunny Decor
Materials Needed:
- Geometric bunny sculptures (metallic finishes like gold, silver, or chrome)
- Monochromatic floral arrangements (e.g., white roses, lilies, or orchids)
- Minimalist table settings (white plates, black or gray napkins, simple glassware)
- Clean, sleek vases (glass or metallic)
- Candles (tall, simple, and neutral-colored)
- Decorative accents (optional: small pebbles, metallic trays)
Steps:
Select geometric bunny sculptures with clean lines and a metallic finish (gold, silver, or chrome). Position the sculptures as focal points of the centerpiece, either centered or flanking the floral arrangements. Select flowers in a single color palette, such as white, ivory, or soft gray. Arrange the flowers in sleek, modern vases—glass or metallic vases work best to complement the minimalist aesthetic. Keep the arrangement simple, using fewer flowers and focusing on their shape and texture for added sophistication.
Use minimalist dinnerware in neutral tones—think white plates, black or gray napkins, and simple glassware. Keep the tablecloth or placemats crisp and unembellished, allowing the bunny sculptures and floral arrangements to stand out. Place the geometric bunny sculptures on the center of the table or slightly off-center to create a balanced yet modern look.
Add tall, simple candles (preferably white or neutral tones) to the table for soft, elegant lighting. For added refinement, place a metallic tray or a few small pebbles around the bunny sculptures for visual interest, without overcrowding the centerpiece. Adjust the placement of the bunny sculptures and flowers to create a balanced, airy look. Ensure the overall design feels open, with plenty of negative space to maintain the minimalist aesthetic.
To maintain the modern feel, avoid clutter or excessive decorations. Keep the color palette neutral and the decor simple, allowing the sleek bunny sculptures and elegant flowers to shine as the focal points of the arrangement.
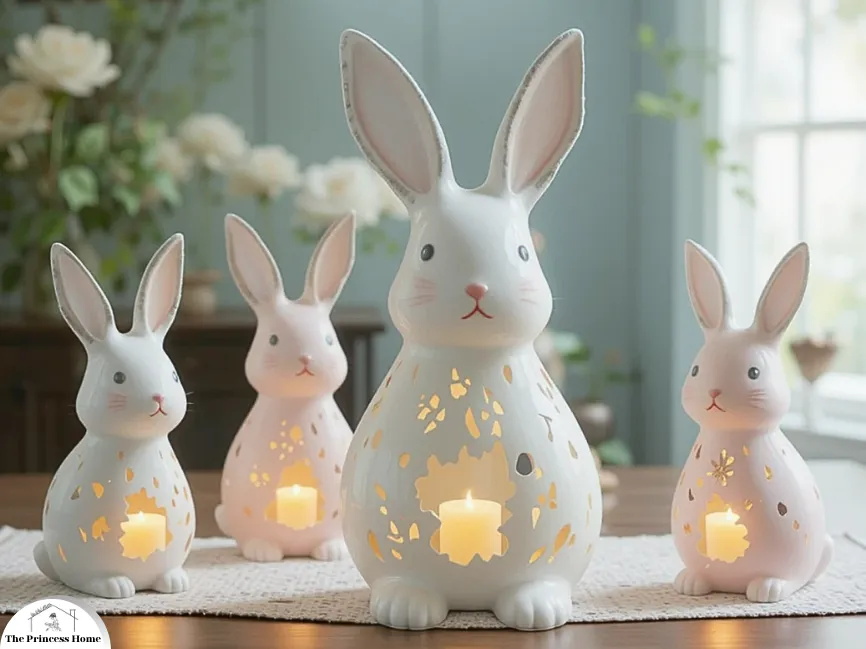
10. Bunny Lantern Centerpieces
Illuminate your table with bunny-shaped lanterns. Use ceramic or metal lanterns with cut-out designs that allow light to shine through. Add LED candles inside for a warm, flickering glow. These centerpieces combine functionality with whimsical charm, making them perfect for evening gatherings. Choose lanterns in neutral or pastel colors to match a spring or Easter
DIY: Bunny Lantern Centerpieces
Materials Needed:
- Bunny-shaped lanterns (ceramic or metal with cut-out designs)
- LED candles (battery-operated for safety)
- Decorative moss or faux grass
- Small flowers (optional, like daisies or lavender)
- Neutral or pastel-colored ribbons (optional)
- Decorative tray (optional, to display the lanterns)
Steps:
Choose bunny-shaped lanterns with cut-out designs, either ceramic or metal, that will allow the light to shine through. Opt for lanterns in neutral or pastel colors to complement a spring or Easter theme. Place battery-operated LED candles inside the lanterns. Choose warm white or soft amber LED candles to create a gentle, flickering glow. If desired, place the lanterns on a decorative tray or table runner to gather the centerpieces.
Add a layer of decorative moss or faux grass to the tray, which complements the natural aesthetic and provides a soft base for the lanterns. Scatter small flowers like daisies, lavender, or faux spring blossoms around the base of the lanterns or inside the tray for an added touch of whimsy.
Alternatively, you can place flowers at the bottom of the lantern to enhance the lantern’s appearance. Tie pastel-colored ribbons around the base of the lanterns or the tray for a coordinated look. If you prefer a more minimalist style, simply leave the lanterns as-is, letting the soft glow be the main focal point. Position the bunny lanterns at varying heights or in a straight line for a balanced display.
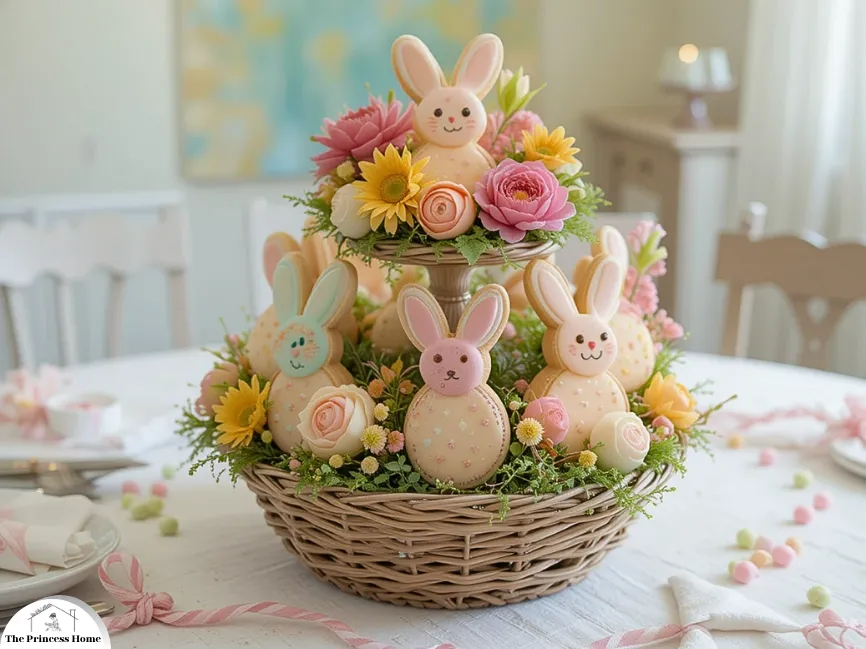
11.Edible Bunny Centerpieces
Edible bunny centerpieces are both adorable and delicious! Create a bunny-shaped fruit platter with strawberries, melon, and grapes for a healthy, colorful touch. Or, arrange bunny-shaped cookies or cupcakes in tiers for a whimsical dessert display. Add charm with shredded coconut “fur” or candy eyes—sure to delight your guests!
DIY a Bunny-Themed Floral Centerpiece :
Materials Needed:
- Basket or Tray: A wicker basket or decorative tray for the base.
- Bunny Cookies or Figurines: Use bunny-shaped cookies, or pre-made figurines.
- Fresh Flowers: Choose soft pastel blooms like roses, daisies, and ranunculus.
- Greenery: Small foliage like ferns or moss for filler.
- Floral Foam or Styrofoam: To hold flowers and decorations in place.
- Tiered Stand (Optional): For added height and elegance.
Steps
Line the basket or tray with floral foam or moss for support and a natural look. Place moss, small ferns, or greenery over the foam to create a lush background. Arrange fresh flowers in a circular pattern, ensuring they are evenly spaced. Use a mix of small and medium-sized blooms for variety. Place bunny cookies or figurines among the flowers.
If you’re using edible bunnies, ensure they are securely positioned on picks or small stands to avoid contact with greenery If using a tiered stand, position it in the center and repeat the floral arrangement on the upper level for added visual appeal. Add a Sprinkle some pastel candies around for extra charm.
If you want a long-lasting centerpiece, substitute fresh flowers with high-quality silk blooms. Add name tags or small signs for each bunny if you’re using it for a dinner party.
Enjoy crafting your elegant bunny-themed centerpiece! Let me know if you’d like other variations or suggestions.r!
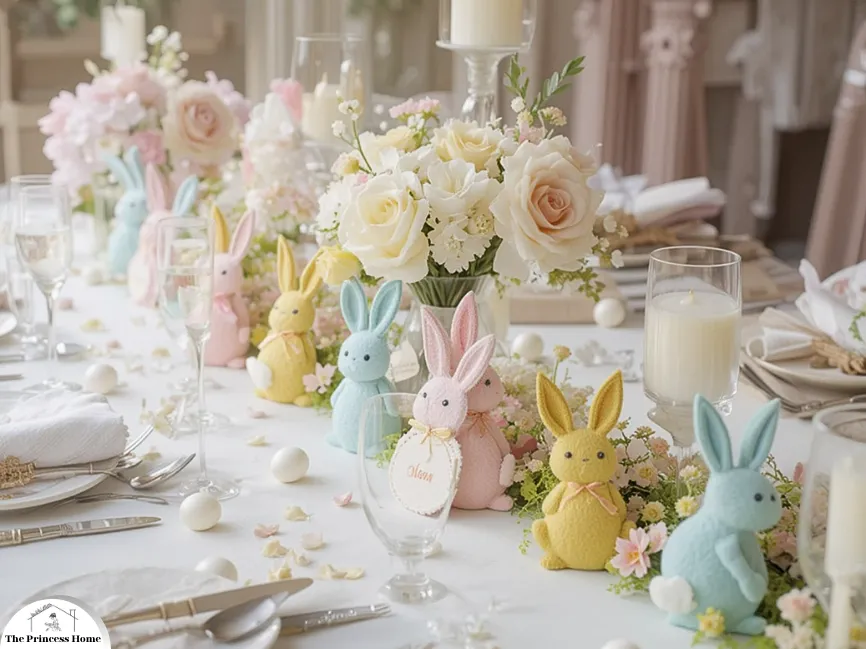
12. Felt Bunny Garland Centerpieces
String together felt bunny shapes to create a garland that runs down the center of your table. Incorporate pastel-colored felt and secure the garland with small clips or knots. Place additional small decorations, like eggs or flowers, around the garland for a cohesive look. Add personalized tags or names to each bunny for a unique touch.
DIY: Felt Bunny Garland Centerpieces
Materials Needed:
- Felt sheets in pastel colors (light pink, blue, yellow, etc.)
- Scissors
- Fabric glue or a sewing kit
- Miniature decorative eggs, flowers, or small embellishments (optional)
- Personalized tags or name tags (optional)
Steps:
Use a bunny-shaped template or freehand the shapes onto the felt sheets. Cut out the bunnies, making sure each is roughly the same size for a cohesive look. You can alternate colors for variety (e.g., light pink bunnies followed by blue )
Use fabric glue or a needle and thread to attach the felt bunnies to the string. If you prefer a simpler option, secure the bunnies with small clips to the string. Space them evenly or in a pattern that suits your style. For a unique touch, You can use paper tags or tiny fabric pieces and attach them to the bunnies with glue or by sewing.

13. Bunny Nest Centerpieces
Create nests from twigs, straw, or raffia and place bunny figurines inside. Surround the nest with small decorative eggs or flowers for a cozy and adorable display. Use natural materials to enhance the organic feel of this arrangement.
DIY: Bunny Nest Centerpieces
Materials Needed:
- Twigs, straw, or raffia (for nest-building)
- Bunny figurines (ceramic, wooden, or any style you prefer)
- Small decorative eggs (plastic, wooden, or real)
- Fresh or faux flowers (e.g., daisies, tulips, or lavender)
- Decorative moss or shredded paper (for extra texture)
- Small wooden or wicker trays (optional, for placement)
Steps:
Start by gathering twigs, straw, or raffia. Form a circular or oval shape by layering the material in a loose, nest-like pattern. You can weave the twigs together or simply arrange them to form the base and sides of the nest. If you’re using raffia, twist or braid it for a more structured look, then arrange it into a nest shape. Position a bunny figurine inside the nest.
If you’re using small bunnies, you may want to place one or two. For larger bunnies, one per nest is ideal. Ensure that the bunny is securely placed in the nest so it doesn’t tip over. You can glue the figurine in place if necessary. Surround the bunny with small decorative eggs. You can place them around the base of the nest or tuck them inside, near the bunny, to give the arrangement a fuller appearance.
Use pastel-colored eggs, metallic finishes, or painted wooden eggs, depending on the aesthetic you’re aiming for. Add small fresh or faux flowers around the nest for a soft, spring-like touch. Use flowers such as daisies, lavender, or tulips to enhance the overall theme. You can also incorporate small sprigs of greenery, like ivy or eucalyptus, for added texture and color.
For additional texture, sprinkle shredded paper or decorative moss around the nest and eggs. This will help tie everything together and give the arrangement an organic, nature-inspired feel. If you want to elevate the display, place the nest on a small wooden or wicker tray. This will not only make it easier to transport but also add a rustic touch to the centerpiece.

14. Bunny-shaped Succulent Planters
Fill bunny-shaped ceramic planters with small succulents or cacti for a centerpiece that combines whimsy and greenery. These are perfect for spring gatherings and double as take-home gifts for guests. Choose low-maintenance succulents for easy care.
DIY: Bunny-Shaped Succulent Planters
Materials Needed:
- Bunny-shaped ceramic planters (available in various sizes and colors)
- Small succulents or cacti (e.g., echeveria, jade plant, or aloe vera)
- Potting soil
- Small stones or pebbles (for drainage)
- Decorative moss or small rocks (optional, for finishing touch)
- Watering can (for care)
Steps:
Start by ensuring the bunny-shaped ceramic planters have proper drainage. If they don’t, add a layer of small stones or pebbles to the bottom of the planter to help with water flow and prevent root rot. Fill the planter with potting soil, leaving about an inch of space from the top. Select small, low-maintenance succulents or cacti that will fit nicely in the bunny planters. Good options include echeveria, jade plant, or small aloe vera.
Gently remove the succulent from its nursery pot and shake off excess soil. If the roots are tangled, trim them carefully to encourage healthy growth. Place the succulent in the center of the bunny planter, ensuring it is sitting upright. Fill around the base of the plant with more potting soil, packing it gently to secure the plant.
Make sure the succulent is stable and the top of the soil is about half an inch below the planter’s rim to avoid overflow when watering. To give the arrangement a polished look, cover the top layer of soil with decorative moss, small rocks, or pebbles. This adds texture and helps retain moisture in the soil. Optionally, add small decorative touches like tiny faux flowers or mini figurines around the base of the succulent for added whimsy.
Gently water the succulent, being careful not to overwater. Succulents prefer dry soil, so only water when the top of the soil feels dry to the touch. Place the planters in a sunny spot with indirect light, and keep them out of direct sunlight to avoid scorching the leaves.

15. Vintage Bunny Figurine Displays
Incorporate vintage bunny figurines into your decor for a nostalgic touch. Pair them with lace doilies, antique vases, and classic floral arrangements for an elegant, old-world charm. Scout local thrift stores or flea markets for unique finds.
DIY: Vintage Bunny Figurine Displays
Materials Needed:
- Vintage bunny figurines (look for porcelain, ceramic, or glass)
- Lace doilies or antique linens
- Antique or vintage vases (glass, silver, or ceramic)
- Fresh or faux classic floral arrangements (roses, peonies, lilacs, etc.)
- Decorative elements like pearls, ribbon, or vintage buttons (optional)
- Small wooden tray or vintage box (optional, for display base)
Steps:
Find the Perfect Bunny Figurines:
Start by sourcing vintage bunny figurines. Thrift stores, flea markets, and antique shops are great places to find unique and charming pieces. Look for figurines in pastel colors or classic porcelain for an elegant, timeless touch.
Lay a lace doily or antique linen as the base for your display. This delicate fabric adds texture and enhances the vintage, nostalgic vibe. You can arrange the doily on a tray, side table, or directly on the dining table for a soft, vintage touch. Pair the bunnies with a classic floral arrangement. Choose flowers like roses, peonies, or lilacs in soft, vintage hues such as blush pink, lavender, and cream.
Arrange the flowers in an antique vase or glass container. You can use a single large bouquet or small, elegant bunches scattered around the bunnies. Incorporate additional vintage-inspired elements, such as pearls, ribbons, or buttons. Consider draping a soft ribbon around the base of the bunnies or placing a strand of pearls around the floral arrangement for added elegance.
Small vintage trinkets or antique items, such as old keys or tiny figurines, can add a personal touch to the display. Position the bunny figurines in a way that draws the eye. If you’re using multiple bunnies, group them in a way that creates balance—perhaps one larger bunny in the center, with smaller bunnies around it. Consider adding a small wooden tray or vintage box beneath the display to elevate the items and create a more cohesive look.
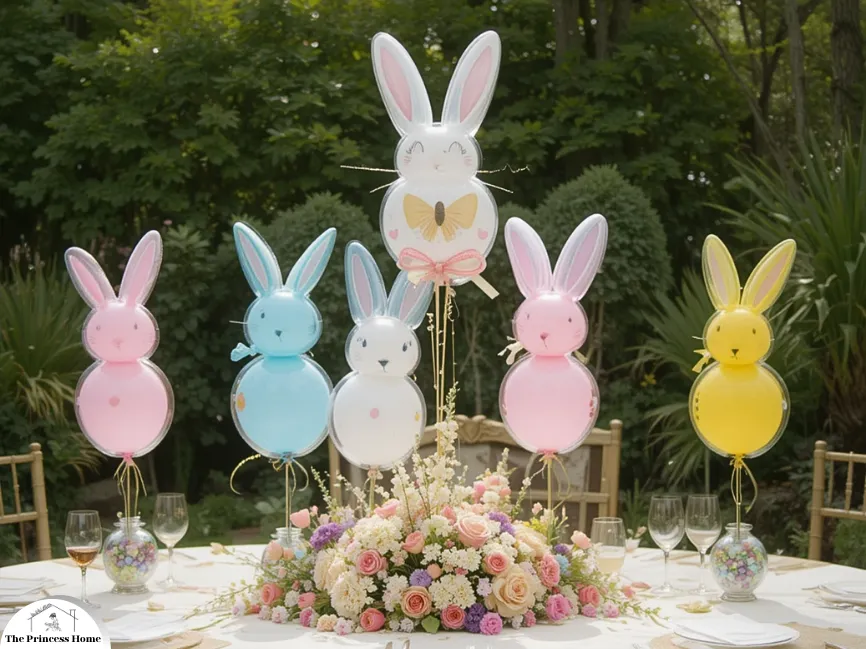
16. Bunny Balloons Centerpieces
Use bunny-shaped balloons as the focal point of your centerpiece. Tie them to weighted bases and surround them with flowers or small decorative items to keep the display grounded. Opt for pastel-colored balloons to match a springtime theme.
DIY: Bunny Balloons Centerpieces
Materials Needed:
- Bunny-shaped balloons (latex or foil)
- Balloon weights (or create your own with sand or stones)
- Fresh or faux flowers (e.g., tulips, daisies, or roses)
- Decorative items (e.g., small eggs, ribbons, or figurines)
- Balloon pump (if needed)
- Floral foam (optional, for secure flower placement)
- Clear vases or containers (optional, for additional decor base)
Steps:
Begin by inflating the bunny-shaped balloons using a balloon pump or by hand if you prefer. Opt for pastel-colored balloons, like soft pink, lavender, or baby blue, to maintain a springtime aesthetic. Ensure that the balloons are fully inflated but not overfilled to avoid popping. If using foil balloons, you may need to attach the provided self-sealing tab to close the balloon.
Attach each balloon to a weighted base to ensure it stays grounded. Balloon weights are available in many shapes and sizes, or you can create your own using small stones, sand, or fabric to make a small pouch. Secure the balloon strings to the weight, ensuring it remains stable throughout the event.
Surround the base of the balloon with a floral arrangement. Use fresh or faux flowers like tulips, daffodils, or daisies for a vibrant spring feel. If you’re using a vase or container, fill it with floral foam to keep the flowers in place. Arrange the flowers around the base of the balloon, leaving enough space to highlight the balloon as the focal point of the centerpiece.
To add extra charm, scatter small decorative items around the base of the flowers. You can use pastel-colored eggs, tiny bunny figurines, or ribbons tied in bows for an extra whimsical touch. Ensure that the decorative items complement the overall color scheme, using soft colors like pastels to keep the look cohesive.
Arrange the balloon(s) in the center of the table and surround it with the floral and decorative accents. For a more dynamic look, you can use multiple bunny-shaped balloons of different sizes or place them in clusters. If desired, drape the balloon strings over the edge of the table for a cascading effect, or tie them in soft bows to add a delicate finish.
17. Bunny Candle Holder Centerpieces
Find bunny-shaped candle holders and use them as a base for your centerpiece. Surround the holders with greenery and flowers for a charming and illuminated display. Use scented candles to add a pleasant aroma to your table setting.
DIY: Bunny Candle Holder Centerpieces
Materials Needed:
- Bunny-shaped candle holders (ceramic, metal, or glass)
- Candles (preferably scented, in colors that match your theme)
- Fresh or faux greenery (eucalyptus, ivy, ferns, etc.)
- Seasonal flowers (e.g., tulips, daisies, or lilies)
- Decorative items (optional: ribbon, Easter eggs, small figurines)
- Decorative tray or plate (optional, for a unified display base)
Steps:
Find bunny-shaped candle holders that match your aesthetic—look for cute, whimsical designs or elegant, minimalist ones depending on the tone of your event. Ceramic, metal, or glass candle holders all work well, and they add charm with their playful or refined look. Place a candle in each bunny-shaped holder. Scented candles in soft, floral, can enhance the ambiance of your table, adding a pleasant aroma to the room. Choose candle colors that coordinate with your spring or Easter theme—light pastels, soft whites, or even metallic shades like gold or silver.
Surround the bunny candle holders with fresh or faux greenery. Eucalyptus, ivy, or ferns make a great base, creating a lush, natural feel. Arrange the greenery in a loose, organic way, allowing it to cascade around the candle holders for a relaxed, effortless look. Place small seasonal flowers around the bunny candle holders. Tulips, daisies, or lilies are ideal for spring-themed centerpieces, but feel free to use any flowers that complement your decor. Consider grouping the flowers in clusters or scattering them evenly for balance.
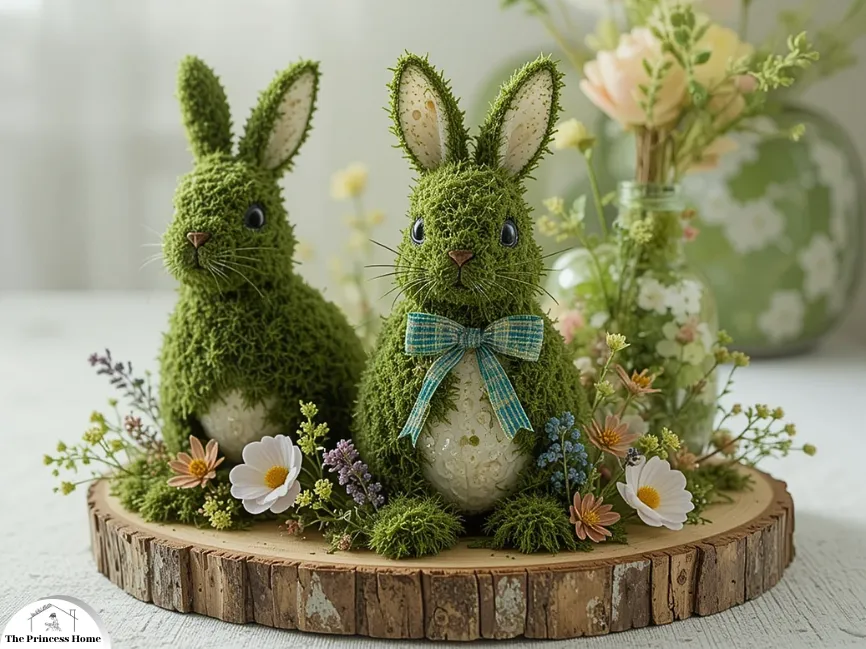
18. Moss-covered Bunny Centerpieces
Cover bunny figurines with preserved moss for a natural, woodland look. Place them on a wooden tray or log slice and decorate with small flowers and foliage. Use spray adhesive to secure the moss in place.
DIY: Moss-Covered Bunny Centerpieces
Materials Needed:
- Bunny figurines (foam, wood, or ceramic work best)
- Preserved moss (available at craft stores)
- Spray adhesive or craft glue
- Wooden tray or log slices
- Small flowers (fresh or faux)
- Foliage (e.g., eucalyptus, ferns, ivy)
- Optional: twine, small decorative items like eggs or mushrooms
Steps:
Select bunny figurines with a smooth surface for easier application of moss. Foam or wood figurines are ideal because they provide a good base for the adhesive. Work in small sections, spraying adhesive or applying craft glue to the surface of the bunny figurine. Avoid covering the entire bunny at once to prevent the glue from drying before you attach the moss.
Press pieces of preserved moss onto the adhesive-covered areas, ensuring full coverage. Use your hands to press firmly and shape the moss around the contours of the bunny. Trim any excess moss with scissors for a neat, polished look. Place the moss-covered bunny on a wooden tray or a log slice for a natural, rustic foundation. The wooden base enhances the woodland aesthetic and provides a sturdy platform for your centerpiece.
Surround the bunny with small flowers and foliage for added charm. Position blooms like daisies, miniature roses, or baby’s breath around the base. Add greenery such as eucalyptus, ivy, or ferns for texture and depth. For a whimsical touch, incorporate decorative items like pastel-colored eggs, miniature mushrooms, or twine bows around the bunny. These details add personality and a seasonal flair to your centerpiece.
Arrange the centerpiece in the middle of your table, ensuring that it’s visible from all angles. If desired, create a group of moss-covered bunnies in varying sizes for a layered, dynamic display. This moss-covered bunny centerpiece combines natural charm with a playful twist, making it perfect for spring gatherings or Easter celebrations!
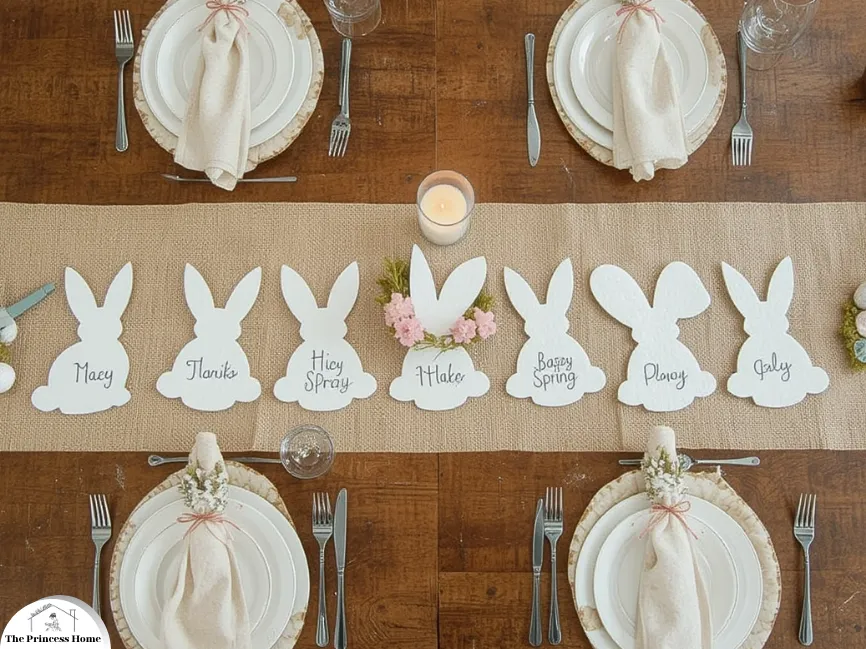
19. Bunny Table Runner Displays
Create a table runner with bunny silhouettes cut from fabric or paper. Arrange it along the center of the table and add decorative elements like candles or flowers to enhance the design. Coordinate the runner material with your overall table theme.
DIY: Bunny Table Runner Displays
Materials Needed:
- Fabric (burlap, linen, or felt) or thick craft paper
- Bunny silhouette templates (downloadable or hand-drawn)
- Scissors or a craft knife
- Fabric glue or a hot glue gun (if layering bunnies on a base material)
- Optional: pastel or metallic paint, stencils, or fabric markers
- Decorative elements: candles, flowers, or small eggs
Steps:
Select a material that complements your table’s theme. For rustic settings, burlap or linen works best. For a modern or playful vibe, choose felt or thick craft paper in neutral or pastel tones. Print or draw bunny templates in the desired size. Cut out the templates and trace them onto your chosen material. Alternatively, you can cut the silhouettes directly from fabric or paper.
If using a fabric base, attach the bunny cutouts along the length of the runner with fabric glue or a hot glue gun. Space them evenly for a clean look. Create a runner entirely from interconnected bunny silhouettes by cutting a continuous strip or overlapping shapes and securing them together.
Paint or stencil the bunny silhouettes with patterns, names, or seasonal phrases like “Hoppy Spring” for a personal touch. Add bows, pom-pom tails, or glitter for extra charm. Lay the bunny table runner along the center of your table. Enhance the display by placing candles, flowers, or small decorations like eggs or moss-filled jars on top or alongside the runner. Match the runner’s colors and patterns with your napkins, plates, or centerpieces for a cohesive look.
This bunny table runner is an easy and versatile way to add festive charm to your spring or Easter table!
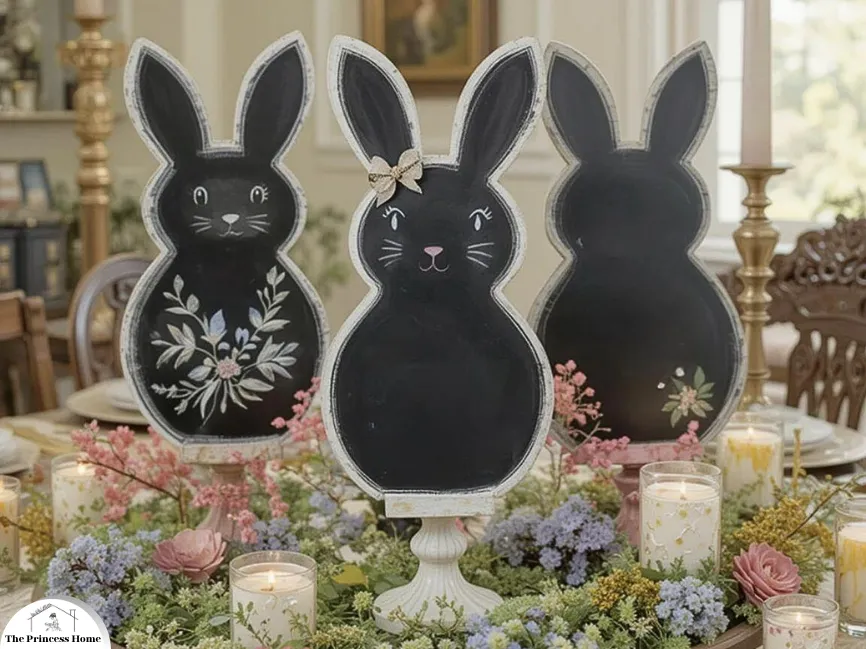
20. Bunny Chalkboard Centerpieces
Use bunny-shaped chalkboards to write messages or draw seasonal designs. Place them on small stands in the center of your table and decorate around them with flowers or candles. Change the messages throughout the season for added versatility.
DIY: Bunny Chalkboard Centerpieces
Materials Needed:
- Bunny-shaped chalkboards (store-bought or DIY with wood or foam board and chalkboard paint)
- Small easels or stands
- Chalk or chalk markers (white or pastel colors)
- Decorative elements: flowers, candles, moss, or small eggs
- Optional: ribbons or bows to adorn the chalkboards
Steps:
Purchase ready-made bunny-shaped chalkboards. Cut bunny shapes out of wood or foam board. Apply two coats of chalkboard paint, allowing ample drying time between coats. Place the chalkboard bunnies on small easels or attach wooden dowels or sturdy bases to keep them upright. Use chalk or chalk markers to write festive messages like “Hoppy Easter,” “Spring Has Sprung,” or guests’ names if using them as place cards. Arrange the bunny chalkboards in the center of your table.
Add flowers, candles, moss, or decorative eggs around the base to enhance the display. Use a tray or mirrored surface to anchor the arrangement for a polished look. Match the chalkboard centerpiece with your table’s color palette and overall theme. Pastel candles, fresh flowers, or a burlap runner complement the chalkboard’s rustic charm. Throughout the season, update the messages or designs on the chalkboards to keep the decor fresh and engaging.
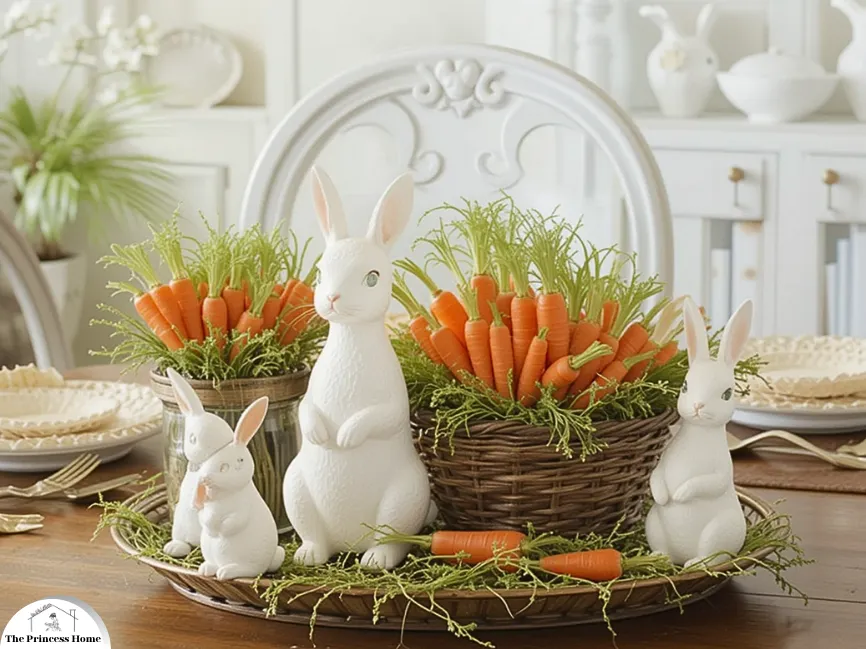
21. Bunny &Carrot Combo Centerpieces
Pair bunny figurines with bundles of faux or real carrots. Arrange them in baskets or on trays for a charming, farm-to-table aesthetic. Use vibrant orange and green hues to create a striking contrast.
DIY: Bunny & Carrot Combo Centerpieces
Materials Needed:
- Bunny figurines (ceramic, wooden, or plush)
- Faux or real carrots (real carrots with stems for an authentic look, or faux carrots made of felt, fabric, or plastic)
- Baskets, trays, or wooden crates
- Decorative moss, shredded paper, or straw for layering
Steps:
Select a basket, wooden tray, or crate to serve as the foundation for your centerpiece. Line it with decorative moss, shredded paper, or straw to create a natural setting. Place bunny figurines strategically within the base. Position them to appear playful, such as sitting, standing, or “hopping” among the carrots. Arrange faux or real carrots around the bunnies. Layer the carrots at different angles for a natural, farm-to-table vibe.
Ensure the vibrant orange and green hues are prominently displayed for visual contrast. Tuck sprigs of greenery around the carrots and bunnies to add texture and fill any gaps. Greenery like eucalyptus or ivy complements the natural theme beautifully. Add accents like mini flowers, small eggs, or ribbon bows around the base to elevate the aesthetic. Use elements that match your table’s color palette.
Place the finished centerpiece in the middle of the table. Surround it with votive candles or additional greenery for a cohesive and inviting display.
Tips for Success:
Opt for faux carrots and bunnies if you want a reusable centerpiece.Ensure the orange carrots and green stems stand out against neutral-colored bases like baskets or crates. Use items of varying heights, such as larger carrots at the back and smaller ones upfront, to add depth to your arrangement. This charming combination of bunnies and carrots adds a whimsical yet rustic touch to your spring or Easter table, delighting guests of all ages!
Conclusion
Bunny centerpieces offer a world of creativity and charm for your event decor. Whether you prefer the elegance of porcelain bunnies, the playfulness of balloons, or the natural beauty of moss-covered topiaries, there’s a bunny centerpiece idea to suit every occasion. These centerpieces not only add visual appeal to your tables but also infuse a sense of whimsy and wonder into your celebrations. So, hop to it and create your own bunny-centric masterpieces to impress your guests and make your event truly unforgettable.
Here are some frequently asked questions related to bunny centerpieces, along with their answers:
Q1: Where can I find bunny figurines or decorations for my centerpieces?
A1: You can find bunny figurines and decorations for your centerpieces at various places. Consider visiting craft stores, home decor shops, or even online marketplaces like Etsy. You can also explore seasonal sections of stores around Easter when bunny-themed decor is readily available.
Q2: Are there any specific flowers that work best with bunny centerpieces?
A2: While the choice of flowers largely depends on your personal preferences and the theme of your event, some flowers that work well with centerpieces include tulips, daisies, daffodils, and pastel-colored roses. These flowers evoke a sense of spring and complement the bunny theme nicely.
Q3: Can I make my own moss-covered bunny topiaries, and how do I do it?
A3: Yes, you can create your own moss-covered bunny topiaries. Start by shaping a wire frame into a bunny shape, securing it with floral wire. Then, attach sheets of moss to the wire frame using hot glue. Ensure you cover the entire frame with moss. You can add embellishments like faux flowers or ribbons for extra flair.
Q4: What’s the best way to clean ceramic bunny centerpieces?
A4: To clean ceramic bunny , use a soft, damp cloth or sponge. Avoid abrasive cleaners or scouring pads, as they can scratch the ceramic surface. For stubborn stains, you can use a mixture of mild dish soap and warm water. Rinse and dry thoroughly after cleaning.
Q5: Can bunny balloon centerpieces be customized to match my event’s colors?
A5: Yes, bunny balloon centerpieces can be customized to match your event’s colors. Balloon suppliers often offer a variety of balloon colors, so you can choose balloons that fit your theme. Additionally, you can use colorful ribbons or accessories to enhance the customization.
Q6: How far in advance can I create edible bunny centerpieces?
A6: Edible bunny centerpieces like fruit platters or baked goods can be prepared a day or two before your event. However, for optimal freshness and taste, it’s best to assemble them as close to the event start time as possible. This ensures that the fruits stay fresh and baked goods remain moist.
Q7: Can I combine different bunny centerpiece ideas on the same table?
A7: Absolutely! Combining different bunny centerpiece ideas on the same table can create a visually appealing and dynamic tablescape. For example, you can have a mix of floral arrangements, moss-covered topiaries, and edible bunny centerpieces, each at different intervals on the table for a diverse and captivating look.


